Your pumpkin can be more than a simple jack-o’-lantern this Halloween. 🎃
With the right design, even an ordinary pumpkin can become the star of your porch or party table.
These cool pumpkin carving ideas are packed with creative ways to make your Halloween decor feel more personal, playful, and memorable.
From spooky faces and glowing patterns to whimsical cats, bats, ghosts, and artistic designs, you’ll find inspiration for different decorating styles and skill levels. Whether you’re carving with kids or creating a polished porch display, these ideas make it easier to choose a design that fits your space. In my experience, simple shapes often create the biggest visual impact once the pumpkin is illuminated at night. Save your favorites, gather your carving tools, and get ready to create something guests will notice.
1. Classic Grinning Pumpkin
- Creates an instantly recognizable Halloween focal point.
- Exaggerated eyes and uneven teeth add playful personality.
- Works beautifully on porches, steps, and entry tables.
- Warm lighting makes the carved details glow after dark.
- A few smaller pumpkins can make the display feel fuller.
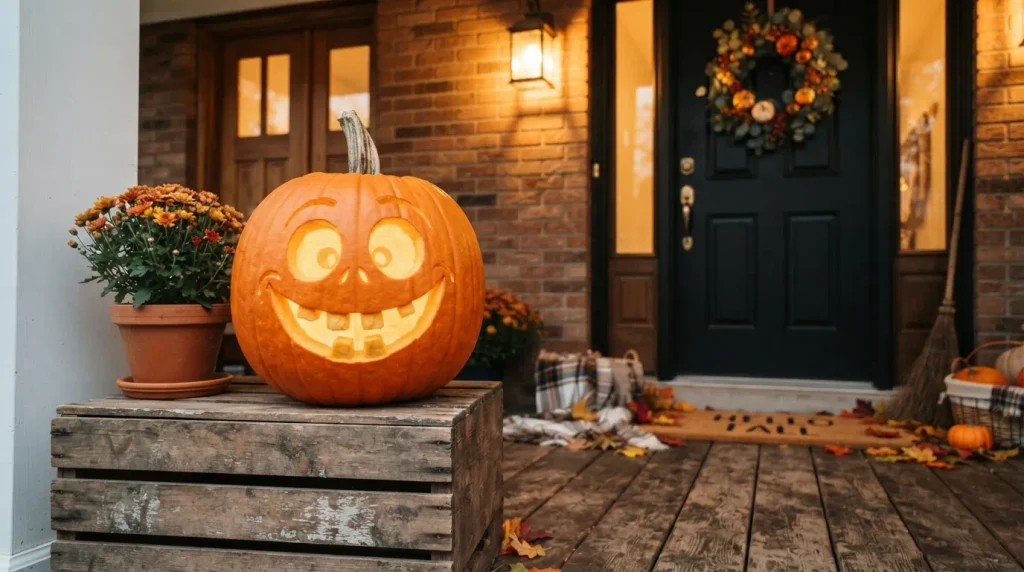
Make your porch instantly more playful with a grinning pumpkin face that feels classic without looking ordinary. This carving works especially well when you use a wide, slightly flattened pumpkin and give the eyes an exaggerated shape. In my experience, uneven teeth and expressive eyebrows make a simple design feel much more handcrafted. Place the pumpkin near your front door, beside a welcome mat, or on a wooden crate for extra height. Warm porch lighting will catch the carved edges after sunset, creating a cheerful Halloween focal point that photographs beautifully for Pinterest and feels inviting to guests.
A classic grin becomes much more striking when the carving has clean shapes, varied tooth sizes, and plenty of open space around the face. Choose a sturdy pumpkin with a smooth surface, then sketch the features lightly before cutting to keep both sides balanced. Battery-operated LED lights are a practical choice because they provide a steady glow without the heat of a candle. For a layered display, pair the carved pumpkin with smaller uncarved pumpkins, dried leaves, and a simple black lantern. The result feels festive, approachable, and polished without requiring advanced carving skills or complicated decorations.
Also Read : 24 Fall Chalkboard Ideas for a Charming Seasonal Display
2. Whimsical Cat Silhouette
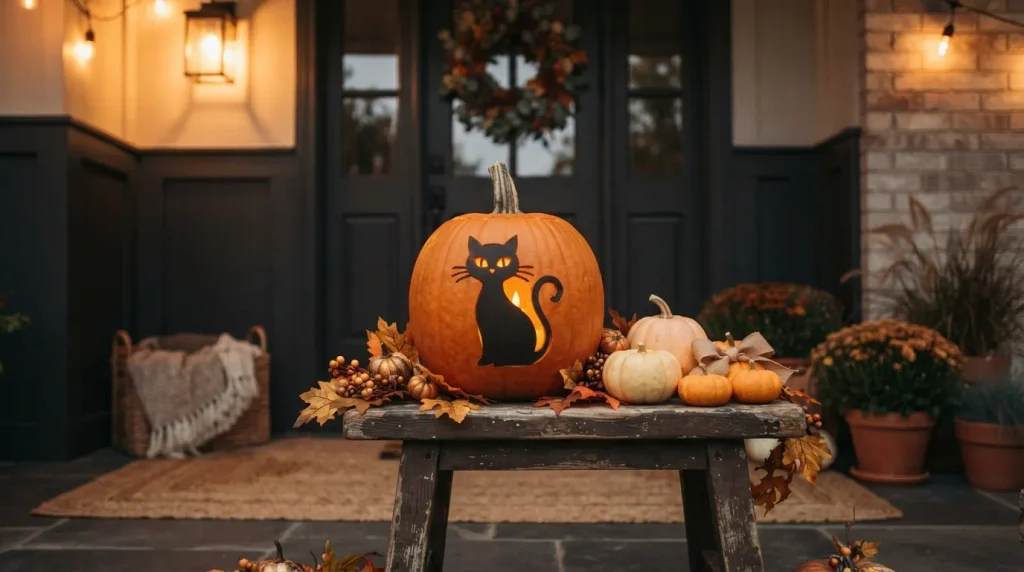
- Adds a playful Halloween character without complicated carving.
- Simple outlines are easier for beginners to cut neatly.
- Glowing eyes create extra impact after sunset.
- Looks charming with pumpkins in different sizes.
- A wooden stool adds useful height to the arrangement.
Turn a basic pumpkin into a tiny work of Halloween art with a whimsical cat silhouette stretched across its front. A black cat shape, pointed ears, curved tail, and bright cutout eyes create a graphic look that stands out beautifully at night. Choose a medium or large pumpkin with a broad face so the silhouette has enough room for clear lines. I’ve noticed that simpler outlines are easier to carve neatly and remain recognizable from a distance. Set the finished piece on a porch step, wooden stool, or entry table where its playful shape becomes the main visual accent.
This feline-inspired design works because it combines a recognizable Halloween symbol with a clean, modern silhouette. Instead of carving many tiny details, focus on the ears, back, tail, and glowing eyes, leaving generous pumpkin surface around each shape. A warm LED light inside will emphasize the silhouette and create a soft amber glow. For a Pinterest-friendly display, place the pumpkin beside two smaller pumpkins in cream and orange, then add a few scattered faux leaves. The simple arrangement keeps the cat as the star while adding enough texture and color to make the setting feel thoughtfully styled.
Also Read : 25 Thanksgiving Chalkboard Ideas for a Charming Fall Display
3. Moonlit Star Pattern
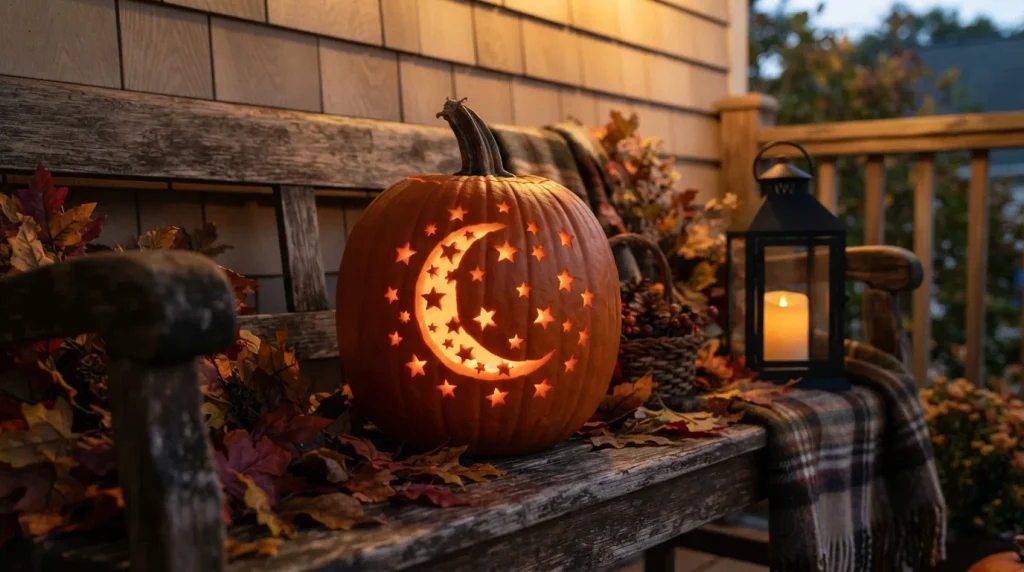
- Gives your pumpkin a dreamy, artistic Halloween look.
- Mixed-size stars create interesting points of light.
- A crescent moon provides an easy central focal point.
- Small LED lights emphasize the carved pattern beautifully.
- Dark wood and warm accents make the design feel sophisticated.
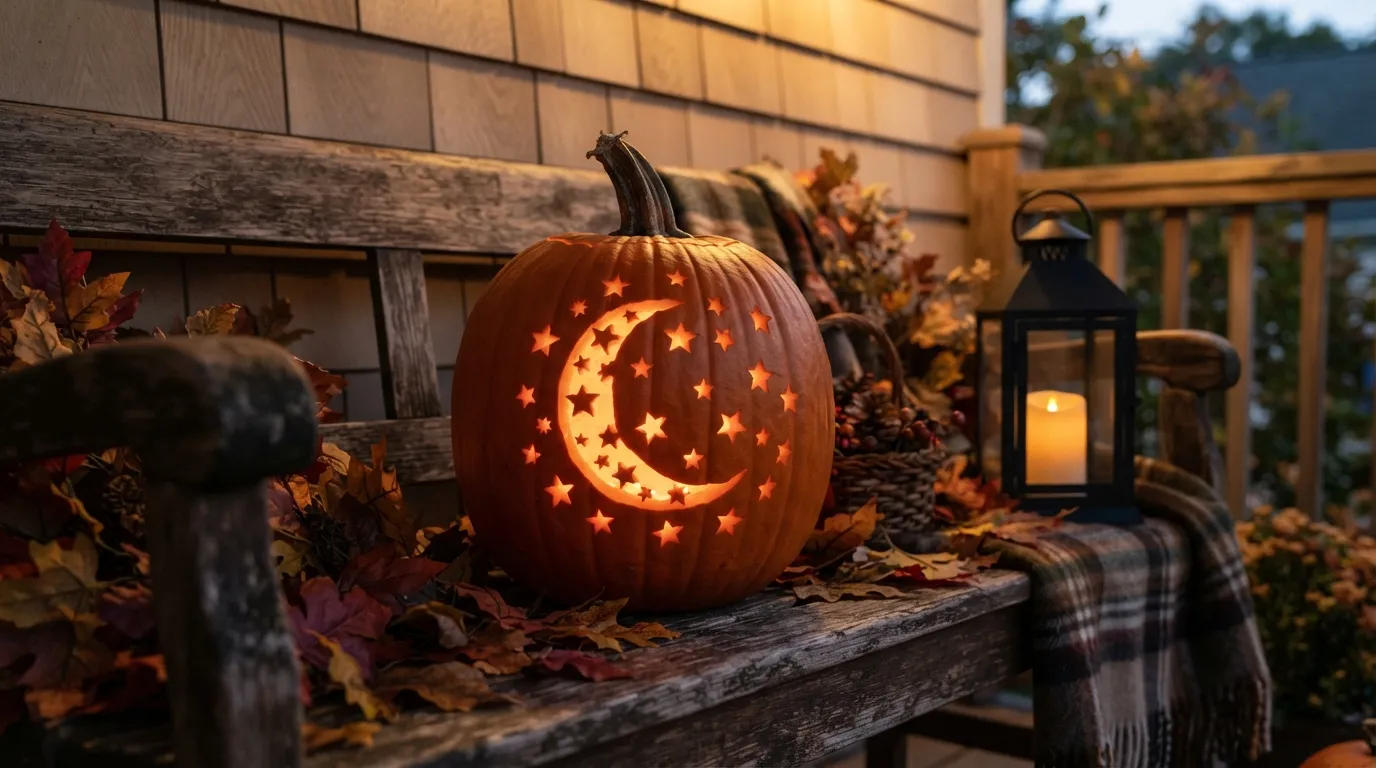
Create a dramatic centerpiece by carving a crescent moon surrounded by tiny stars across a deep orange pumpkin. The design looks especially beautiful when the openings are varied in size, allowing different amounts of light to shine through. Choose a pumpkin with a firm surface and use a small carving tool for the star shapes. In my experience, spacing matters more than perfection here; an intentionally scattered pattern looks natural and artistic. Display the finished pumpkin on a dark wooden table, porch bench, or entryway console with soft lighting, creating a dreamy Halloween accent that feels elegant rather than spooky.
Moon-and-star carvings also give you an easy way to create a more sophisticated Halloween display without relying on scary faces or complicated characters. Keep the moon slightly larger than the stars so the composition has a clear focal point. A warm LED candle placed inside the pumpkin will make each opening glow gently against the darker evening surroundings. Pair it with black lanterns, dried branches, or muted autumn leaves for contrast. The finished arrangement works particularly well on a porch, mantel, or dining table where the soft pattern can be appreciated up close and from across the room.
4. Spooky Haunted House
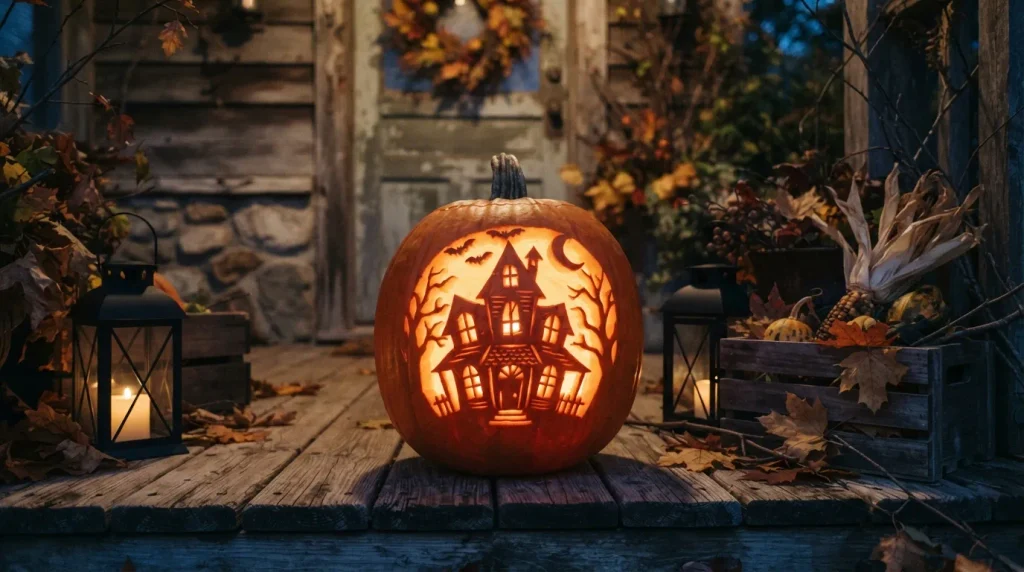
- Creates a miniature haunted scene on a single pumpkin.
- Crooked windows and rooflines add charming imperfections.
- Works well as a porch or mantel centerpiece.
- Layering it with smaller pumpkins makes the scene richer.
A miniature haunted house turns an ordinary pumpkin into a tiny Halloween scene that immediately catches the eye. Carve a crooked roof, narrow windows, a small doorway, and a few bare trees around the house to create depth without overcrowding the surface. This design works best on a larger pumpkin with enough room for several connected details. I’ve seen this approach work especially well on porches because the glowing windows become more noticeable as evening arrives. Place the pumpkin on a wooden crate or small stool to raise the carving into view and make the display feel intentionally styled.
For a more polished result, keep the haunted house silhouette simple and let the lighting provide most of the drama. A battery-powered LED light inside the pumpkin will illuminate the windows and doorway while keeping the setup convenient for several hours. Surround the carved piece with miniature pumpkins, dried leaves, or a black lantern to create a layered autumn arrangement. You can also vary the window shapes slightly so the house feels handmade rather than perfectly symmetrical. This idea is particularly useful when you want Halloween decor that feels spooky and playful while still fitting naturally into a cozy home exterior.
5. Wicked Witch Face
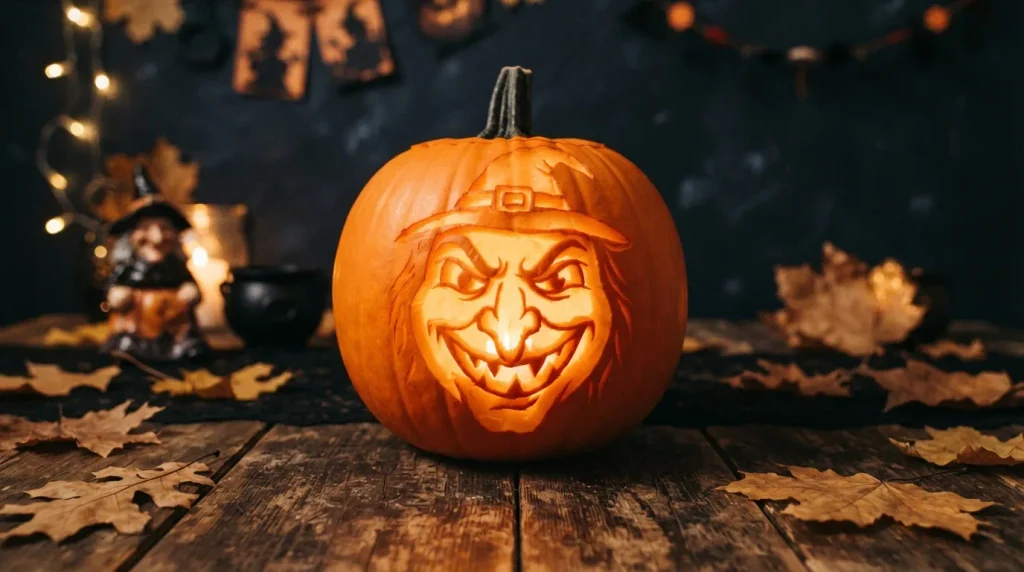
- Brings playful witchy personality to the Halloween display.
- Angular features make the carving look expressive.
- A small hat detail adds extra visual interest.
- Black accessories create strong contrast against orange pumpkin tones.
Give your Halloween display a little attitude with a mischievous witch face featuring an exaggerated nose, arched brows, and a crooked smile. The strongest versions use bold shapes rather than tiny details, making the expression easy to recognize from several feet away. Choose a firm pumpkin with a relatively smooth front and sketch the facial features before cutting. In my experience, slightly uneven eyebrows can actually improve the final result because they make the character look more playful and handmade. Place the finished carving near your entryway, porch seating, or Halloween snack table for an instant conversation piece.
The witch theme becomes even more effective when you repeat a few dark accents around the pumpkin without overwhelming it. Try placing a miniature black hat on top, or arrange the pumpkin beside a black lantern and a few dried branches. A warm LED light inside will emphasize the eyes, nose, and smile while creating a welcoming glow after sunset. Keep the surrounding decorations simple so the expressive face remains the focal point. This is one of those cool pumpkin carving ideas that feels festive for children but still has enough personality to appeal to adults decorating a stylish Halloween gathering.
6. Floral Skull Design
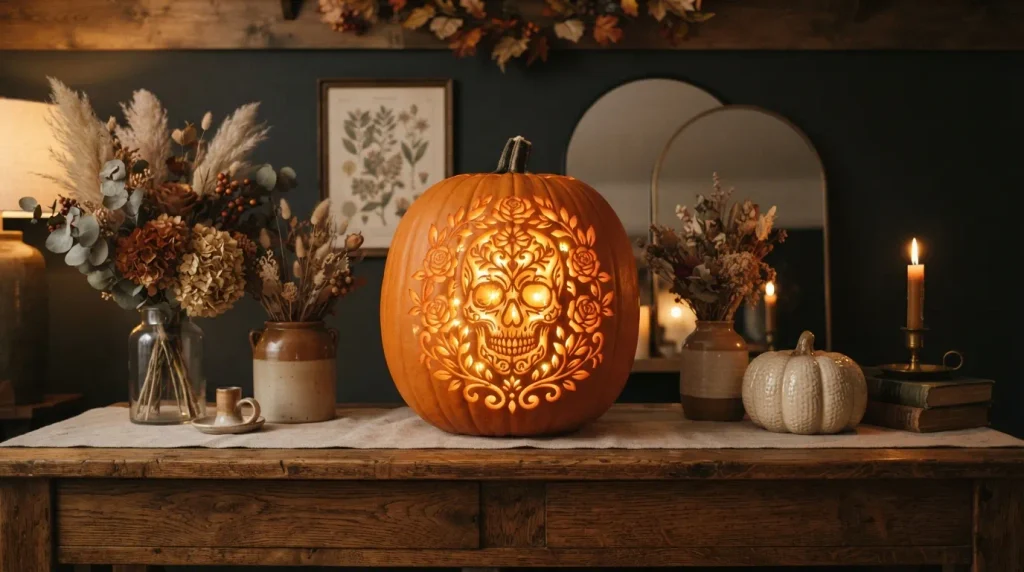
- Blends spooky skull details with softer floral shapes.
- Floral accents make the design feel artistic and decorative.
- Symmetry helps the finished carving look balanced.
- Works beautifully with neutral or rustic Halloween styling.
Combine spooky and beautiful details by carving a skull surrounded with flowers, leaves, and small decorative shapes. The contrast makes this design feel more artistic than a traditional frightening face. Start with the skull as the main focal point, then add larger flowers around the cheeks or forehead before filling small spaces with leaves. Keep the shapes moderately sized so they remain visible when the pumpkin is illuminated. I’ve noticed that symmetrical floral placement can make a detailed carving look much more finished, especially when viewed from the front. A large, smooth pumpkin provides the best canvas for this style.
A floral skull also gives you plenty of freedom to match the carving with different Halloween decorating styles. Use warm LED lighting inside to highlight the flowers and skull openings, then place the pumpkin on a rustic console, porch table, or dining centerpiece. Dried flowers, neutral ceramics, dark foliage, and natural wood can reinforce the artistic mood without competing with the carving. If you want more contrast, choose an orange pumpkin with darker surroundings. The finished display feels dramatic yet refined, making it especially appealing for Pinterest photos where intricate details, texture, and strong visual contrast attract attention.
7. Spiderweb Glow
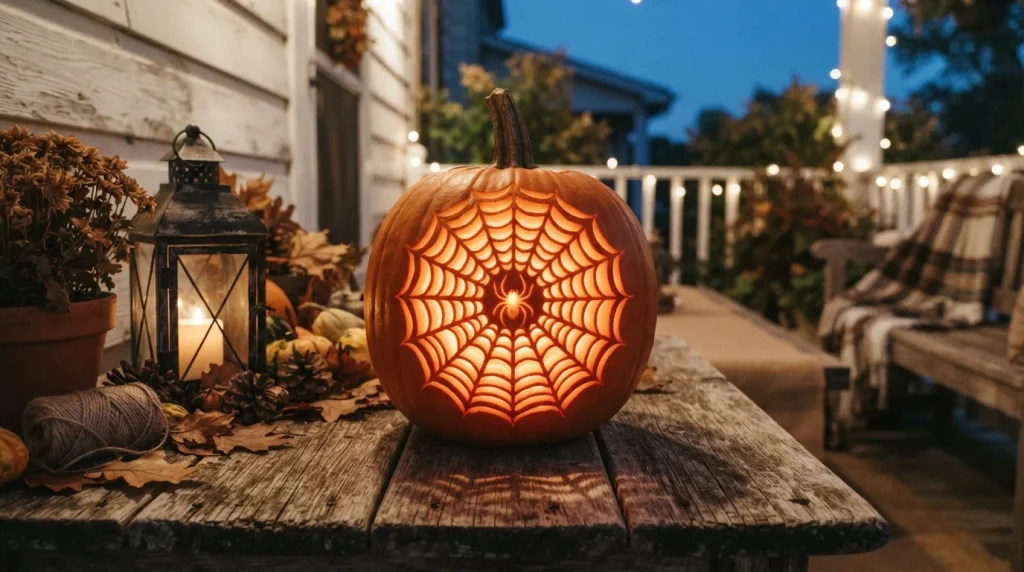
- Creates a detailed focal point without carving a face.
- Thin web lines add texture and visual dimension.
- A tiny spider makes the design instantly recognizable.
- Warm lighting makes the pattern especially striking after dark.
A spiderweb pattern can make a pumpkin look surprisingly intricate while using a design that is easier to recognize than many detailed characters. Start with several curved lines radiating from the center, then connect them with smaller arcs to form the web. Keep the lines evenly spaced so the pattern remains clean when illuminated. A small spider carved or attached near the center adds an unmistakable Halloween touch. In my experience, this design looks best on a larger pumpkin because the extra surface allows the web to spread naturally without making the individual openings feel crowded.
The glow is what really brings this carving to life once the sun goes down. Place a warm LED light inside the pumpkin so the web appears softly illuminated against the darker surroundings. A black lantern, a few dried branches, and scattered autumn leaves can reinforce the spooky theme without taking attention away from the pattern. For a layered porch arrangement, position the carved pumpkin slightly higher than smaller pumpkins around it. This creates useful height variation and gives the display a more finished appearance while keeping the spiderweb carving as the main visual feature.
8. Monster Teeth
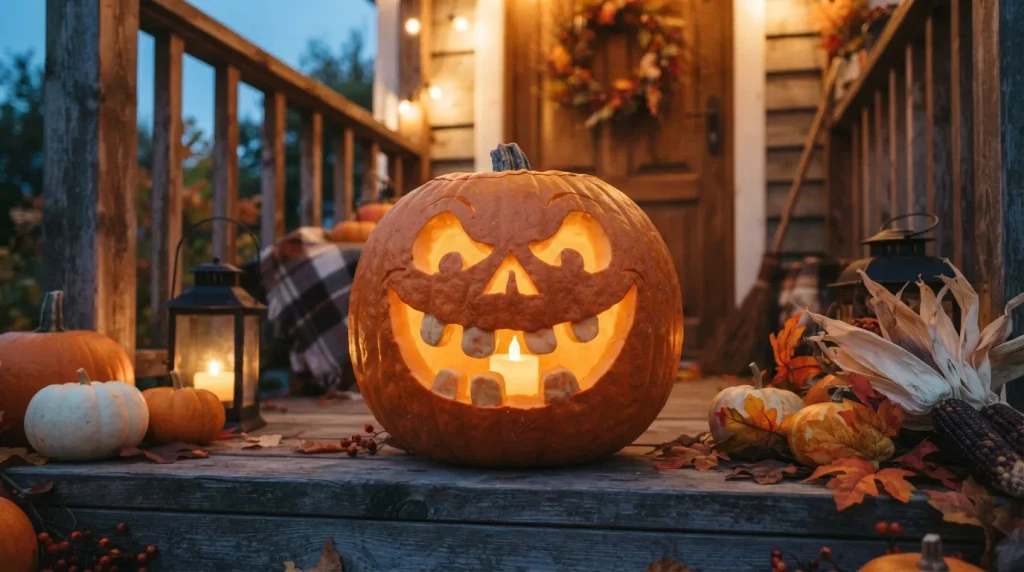
- Makes a bold statement with an oversized toothy grin.
- Uneven teeth give the monster more playful character.
- Works especially well for family-friendly Halloween displays.
- Smaller pumpkins can balance the oversized central design.
Make your pumpkin look like it is ready to chomp with an oversized mouth filled with dramatic, jagged teeth. This playful design works particularly well when the teeth vary in height and width instead of following a perfectly uniform pattern. Use a large pumpkin with enough space for a wide mouth, then position the eyes slightly above it to create a funny monster expression. The exaggerated features make the carving easy to see from a distance, which is useful for front porches. A warm internal glow will make the eyes and teeth stand out beautifully at night.
For a more polished arrangement, treat the monster pumpkin as the centerpiece and build the rest of the display around its size. Place two or three smaller pumpkins nearby, keeping their colors within a simple orange, cream, and muted green palette. A rustic wooden step or crate can provide additional height while black lanterns add contrast. If children are helping with the project, keep the design broad and avoid overly intricate cuts. The result is cheerful rather than frightening, making this carving a practical choice for family homes, Halloween parties, or a playful outdoor decorating setup.
9. Geometric Cutouts
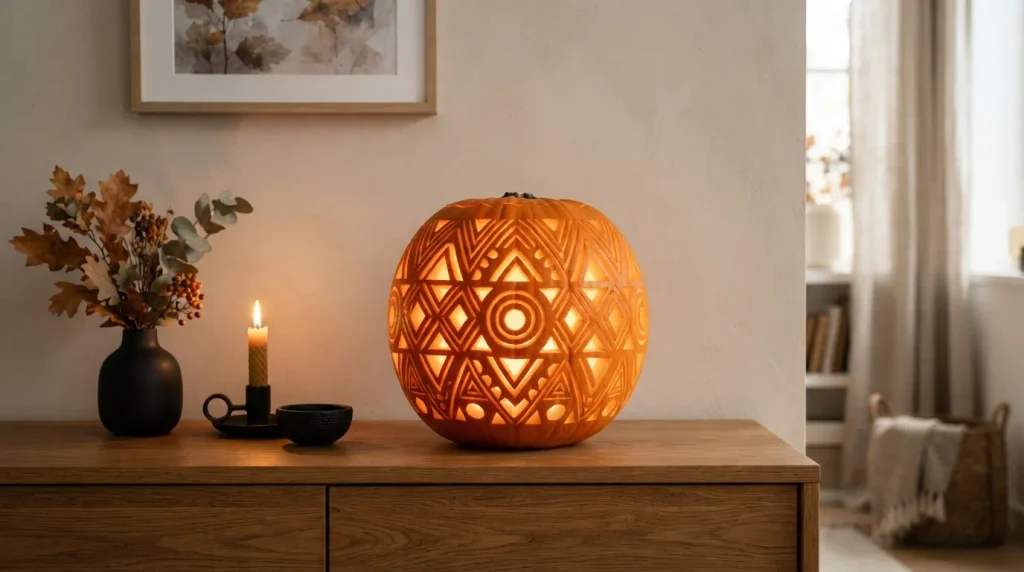
- Gives traditional Halloween decor a modern update.
- Repeating shapes create a clean, organized pattern.
- Simple geometry is approachable for beginner carvers.
- Looks stylish with minimalist surrounding decorations.
Give your Halloween display a contemporary twist with geometric cutouts arranged in a repeating pattern across the pumpkin. Triangles, diamonds, circles, and narrow lines can create a striking design without relying on traditional faces or characters. The key is consistency: lightly mark your pattern first and leave enough pumpkin between each opening to maintain strength. In my experience, geometric designs look particularly impressive when the shapes are repeated at slightly different sizes. Choose a smooth pumpkin with a rounded surface, then place it somewhere visible where the clean pattern can become a modern decorative accent.
Lighting plays an important role because geometric openings create crisp patches of illumination once the pumpkin is glowing. A warm LED light inside will highlight the contrast between the orange surface and surrounding darkness. Keep nearby decorations simple with black ceramics, neutral foliage, wooden trays, or a minimalist lantern so the pattern does not compete with visual clutter. This approach is especially useful if traditional Halloween decorations feel too busy for your home. Among cool pumpkin carving ideas, geometric cutouts offer a fresh option that photographs beautifully while blending easily with modern, farmhouse, or Scandinavian-inspired interiors.
10. Creepy Eyeball Pumpkin
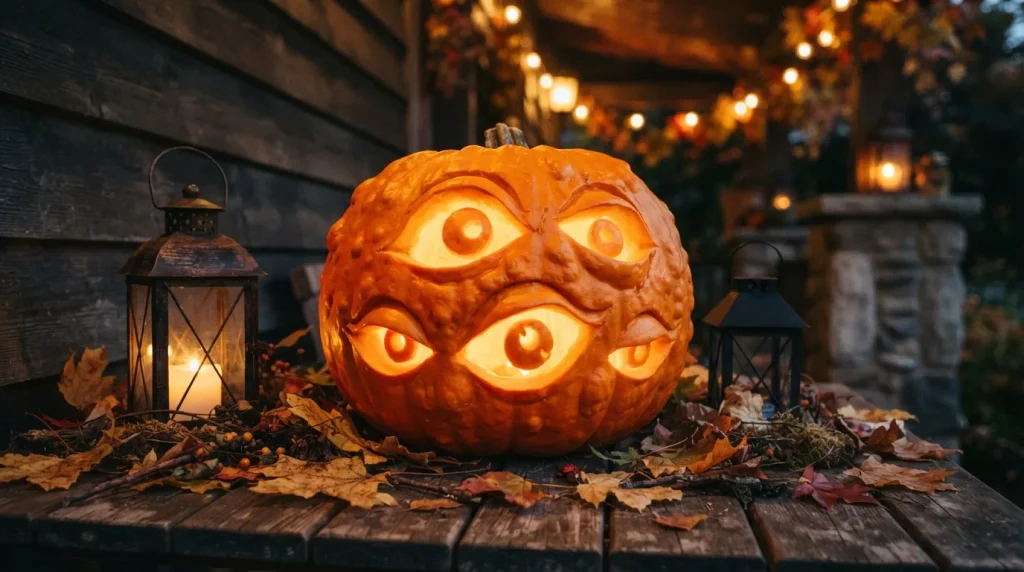
- Creates an instantly attention-grabbing Halloween focal point.
- Oversized eyes make the pumpkin look animated and expressive.
- Different pupil directions add a quirky, humorous effect.
- Works well as a standalone decoration or centerpiece.
Make your pumpkin look like it is watching every guest with a collection of oversized, expressive eyes. Instead of carving a traditional face, use several circular eye shapes with different pupil directions to create a quirky, slightly creepy effect. Varying the sizes can make the design feel more playful and less predictable. Choose a wide pumpkin with plenty of front-facing surface so the eyes have room to breathe. I’ve noticed that this type of carving gets plenty of attention because people naturally pause to look at the expressions. Place it near an entryway where guests can easily notice the details.
The glowing effect becomes even more interesting after sunset because each carved opening catches the light differently. Use a warm LED light inside the pumpkin and keep the surrounding decorations darker for stronger contrast. Black lanterns, dried branches, and scattered leaves can frame the carving without distracting from its unusual face. If you want a family-friendly version, make the eyes round and cartoon-like rather than sharply angled. For a creepier appearance, narrow the eyelids and use uneven pupils. Either way, the finished pumpkin adds personality to a porch, mantel, party table, or Halloween-themed entry display.
11. Vampire Smile
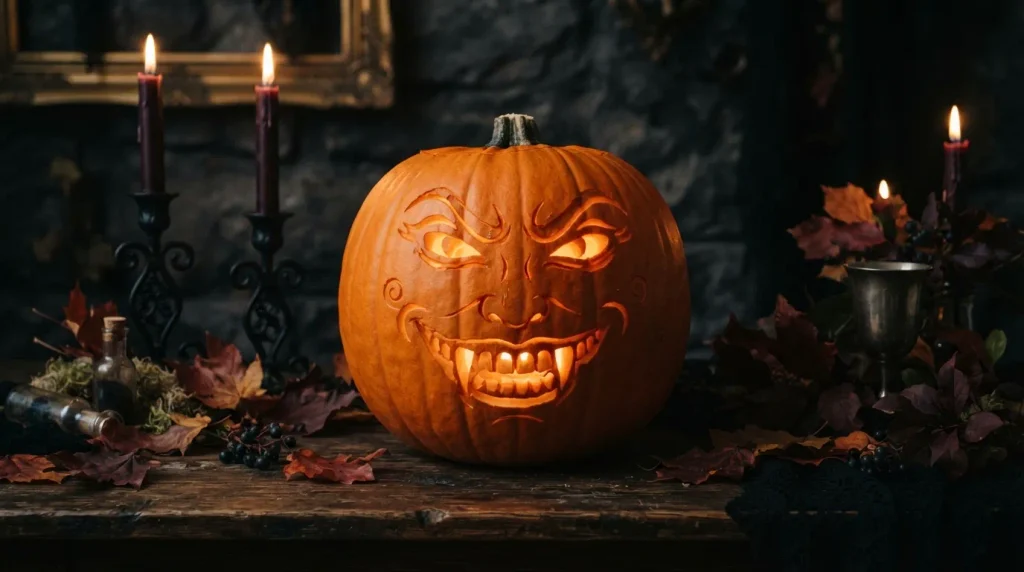
- Sharp fangs instantly establish the vampire theme.
- A crooked smile adds personality without complex carving.
- Dark accents make the orange pumpkin stand out.
- Works beautifully with gothic or dramatic Halloween decor.
Give your pumpkin a mischievous vampire personality with a wide crooked smile, sharp fangs, and narrow expressive eyes. The mouth should be the main feature, with two prominent teeth extending slightly lower than the others for an unmistakable vampire effect. A medium or large pumpkin with a smooth front makes the design easier to sketch and carve. Keep the surrounding facial details simple so the fangs remain the focal point. This is a fun choice when you want something more character-driven than a basic jack-o’-lantern but still manageable with ordinary carving tools.
To make the finished display feel richer, pair the orange pumpkin with deep burgundy, black, and dark wood accents. A small black lantern or gothic candleholder can add atmosphere without making the arrangement feel overly theatrical. Place the pumpkin on a porch table, mantel, or Halloween party buffet where the warm internal glow can highlight the sharp teeth. For a playful family display, use rounded eyes and exaggerated fangs. For a more dramatic look, narrow the eyes and create a deeper smile. The flexible design makes it easy to adjust the mood while keeping the vampire theme instantly recognizable.
12. Boo Lettering
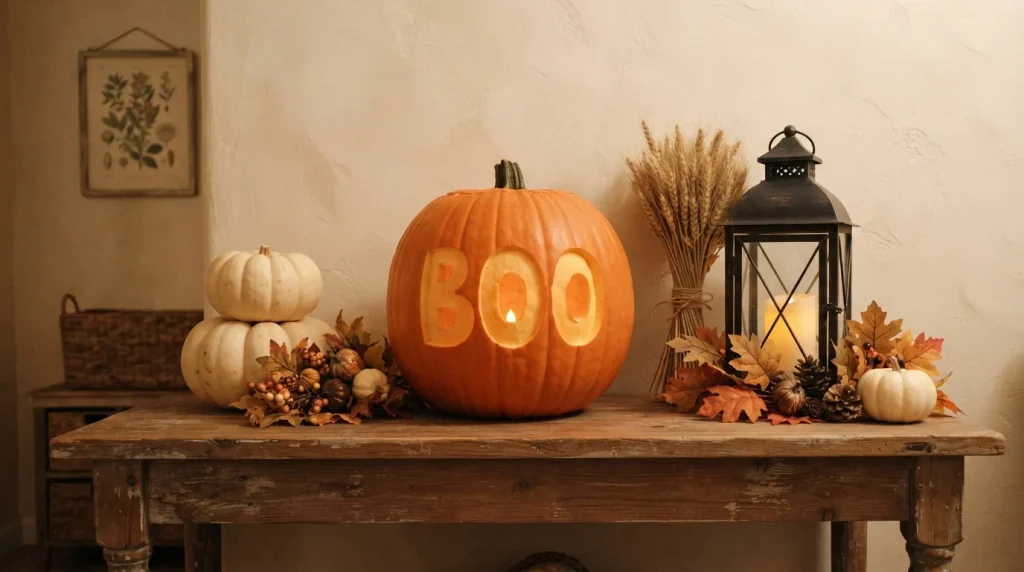
- Adds a clear Halloween message with minimal carving.
- Bold letters remain readable from a distance.
- Rounded lettering gives the design a friendly appearance.
- Looks polished when paired with neutral autumn decorations.
Keep your carving simple and instantly readable with bold “BOO” lettering across the front of the pumpkin. Choose thick, rounded letters rather than thin script so the word remains clear when the pumpkin is illuminated. Lightly sketch the lettering before cutting, paying attention to spacing and alignment across the curved surface. A large pumpkin works especially well because it gives each letter enough room to stand apart. This design is ideal for beginners who want something more creative than a traditional face. Place it on a porch, entry table, or shelf where the message can become an easy visual focal point.
The lettering can also become part of a larger seasonal arrangement without requiring many extra decorations. Surround the pumpkin with cream-colored mini pumpkins, dried wheat, autumn leaves, or a simple black lantern for a balanced Pinterest-friendly display. Warm LED lighting will make the carved letters glow softly once the room or porch becomes darker. If the pumpkin surface is strongly curved, keep the lettering slightly wider and simpler to avoid distortion. The finished look feels cheerful, clean, and welcoming, making it especially useful for family homes where Halloween decorations need to feel festive without becoming too frightening.
13. Pumpkin Face Stack
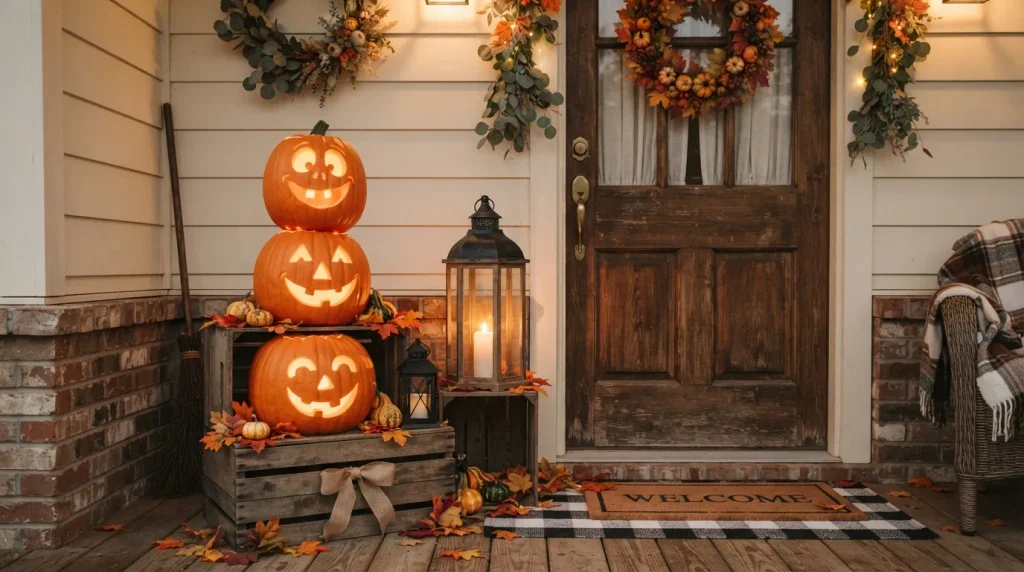
- Creates height without needing complicated individual carvings.
- Different expressions make the stack feel playful.
- Smaller pumpkins work naturally as upper layers.
- A sturdy base keeps the arrangement visually balanced.
Stack several pumpkins to create a tall Halloween display that instantly draws attention toward the entrance. Give each pumpkin a different expression, such as a surprised face, sleepy eyes, or a crooked grin, so the arrangement feels playful rather than repetitive. Use the largest pumpkin at the bottom and progressively smaller ones above it. In my experience, varying the facial expressions makes a stacked display much more interesting in photographs. Choose pumpkins with relatively flat tops and bottoms where possible, and position them securely so the finished arrangement remains stable throughout the season.
The vertical shape makes this idea especially useful when porch space is limited but you still want a noticeable Halloween statement. Place the stack beside a doorway, on a wide step, or against a wall where it will not interfere with foot traffic. Warm LED lights inside each pumpkin can create a layered glow that becomes more dramatic after sunset. Add a few scattered leaves and one or two black lanterns around the base, but avoid overcrowding the area. The result feels cheerful, dimensional, and easy to customize for different decorating styles or family personalities.
14. Owl Eyes
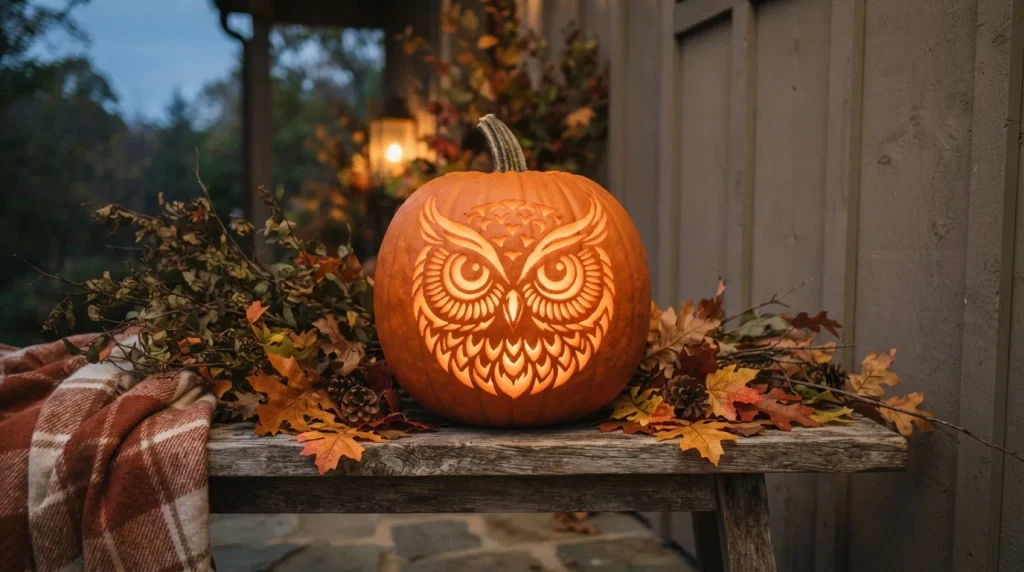
- Gives the pumpkin a charming woodland personality.
- Large circular eyes create strong nighttime impact.
- Simple feather details add texture without excessive cutting.
- Looks natural beside branches and autumn foliage.
Turn a pumpkin into a charming nighttime owl with large circular eyes, curved brows, a small beak, and a few feather-inspired markings. The oversized eyes should dominate the design because they create the strongest visual impact once the pumpkin is illuminated. Choose a round pumpkin with a smooth front and sketch the eyes evenly before adding smaller details. Keep the feather shapes simple and spaced apart so they remain visible rather than blending together. This design works especially well for families who want Halloween decorations with a cute woodland feeling instead of an intensely spooky appearance.
For a cohesive display, place the carved owl pumpkin beside dried branches, autumn leaves, and smaller pumpkins in muted natural tones. A warm LED light inside will make the eyes glow beautifully while emphasizing the carved feather details. You can position the pumpkin on a wooden bench, porch step, or rustic entry table depending on the available space. I’ve noticed that natural textures such as wood, dried foliage, and woven baskets make animal-inspired carvings feel more intentional. The finished arrangement adds character while maintaining a cozy seasonal atmosphere that works well throughout the Halloween season.
15. Ghostly Face
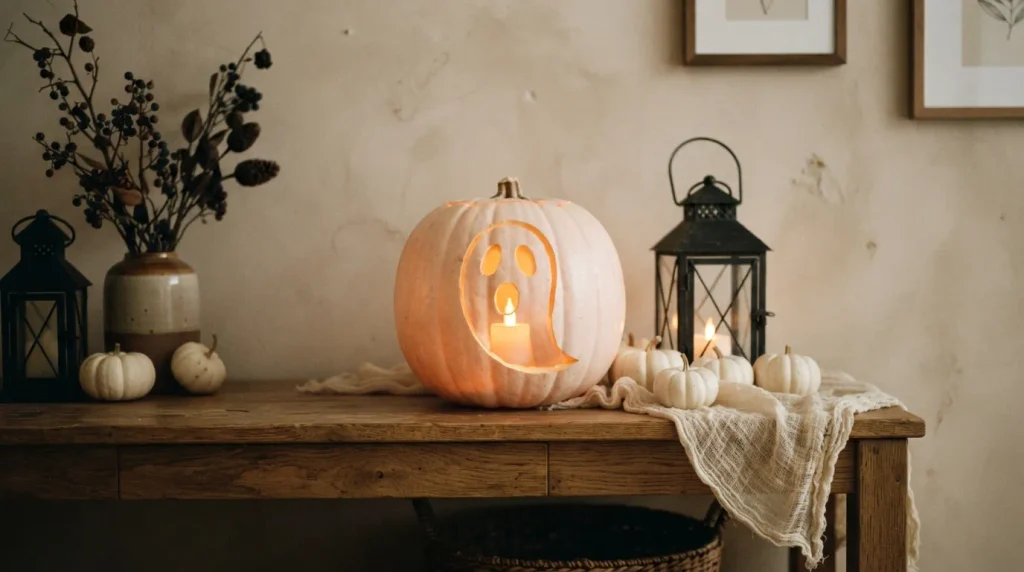
- Creates a friendly ghost theme with very simple shapes.
- Large hollow eyes make the expression easy to recognize.
- Pale pumpkins create beautiful contrast with darker decor.
- Gauzy fabric adds softness and movement to the display.
Create a friendly ghost-inspired pumpkin using oversized oval eyes and a surprised open mouth. The simplicity of this design makes it approachable for beginners while still delivering a strong Halloween look. A pale orange, white, or cream pumpkin can make the ghostly theme even more convincing, especially when surrounded by darker decorations. Keep the facial openings large and clean so they remain clearly visible when illuminated. This is one of the easiest ways to create cool pumpkin carving ideas without spending hours on intricate patterns, and the expressive face works beautifully in both indoor and outdoor displays.
For a softer ghostly arrangement, place the carved pumpkin beside white mini pumpkins, black lanterns, and a small amount of gauzy fabric. Warm LED lighting inside creates a gentle glow that contrasts beautifully with the pale pumpkin surface. A few dried branches can add height without making the display feel crowded. Set everything on a rustic wooden console, porch bench, or entry table depending on your space. The finished arrangement feels playful rather than frightening, making it a versatile choice for family-friendly Halloween decorating, seasonal parties, or a cozy autumn corner that needs one memorable focal point.
16. Angry Monster
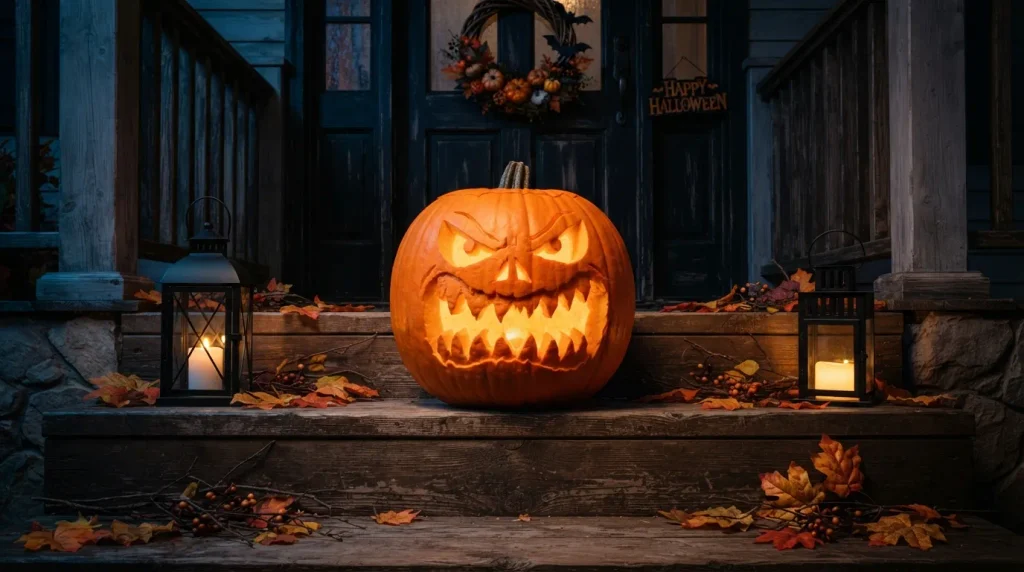
- Slanted eyes instantly create a dramatic expression.
- Jagged teeth make the monster look more intense.
- Bold facial shapes are easier to see from outside.
- Dark surroundings strengthen the glowing carved features.
Give your pumpkin a bold personality with slanted eyes, heavy brows, and a wide jagged mouth filled with uneven teeth. The secret to making an angry monster look convincing is exaggeration. Angle the eyes downward toward the center and make the eyebrows thick enough to remain visible after carving. Use a large pumpkin with a broad front so the facial features have plenty of space. Unlike delicate designs, these strong shapes are easy to recognize from a distance, making the finished piece particularly effective on outdoor steps, porches, or near a front entrance.
The dramatic expression works even better when the surrounding decoration stays relatively dark and simple. Place the pumpkin against a dark door or wall, then add one black lantern and a few scattered autumn leaves for contrast. A warm LED light inside will emphasize the eyes and jagged mouth while creating a strong nighttime glow. If you prefer a less frightening version, round the teeth and make the eyes larger. For a scarier result, narrow the eyes and deepen the mouth. This flexible design lets you adjust the character while keeping the overall carving bold and visually striking.
17. Skeleton Hands
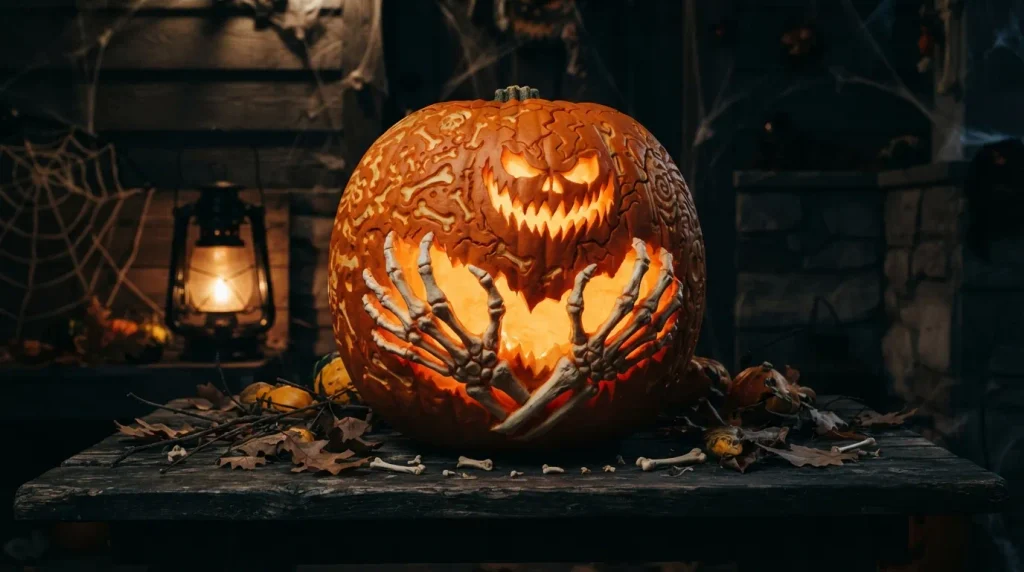
- Creates an unusual design without relying on a face.
- Skeletal fingers add movement and visual drama.
- Small cracks make the carving feel more detailed.
- Works especially well with darker Halloween accessories.
Create a striking Halloween scene by carving skeletal hands that appear to reach upward across the pumpkin surface. Start with two large hands and give the fingers slightly different lengths and angles so they feel natural rather than perfectly mirrored. Keep the palms broad and the finger shapes separated enough to preserve the details during carving. Small cracks or bone-like markings around the wrists can add extra character without making the design overly complicated. This approach is ideal when you want your pumpkin to look unusual and dramatic while moving away from traditional jack-o’-lantern faces.
Lighting can make the skeletal details feel even more dimensional after dark. Place a warm LED light inside the pumpkin and position it where the glow reaches the spaces between the fingers. A dark wooden table, black lantern, dried branches, and muted autumn leaves can strengthen the eerie setting. For outdoor displays, keep the pumpkin somewhere protected from heavy rain and direct moisture. I’ve noticed that leaving generous spaces between detailed cuts helps the design stay readable from a distance, especially when the pumpkin is photographed or viewed under low evening light.
18. Candy Corn Face
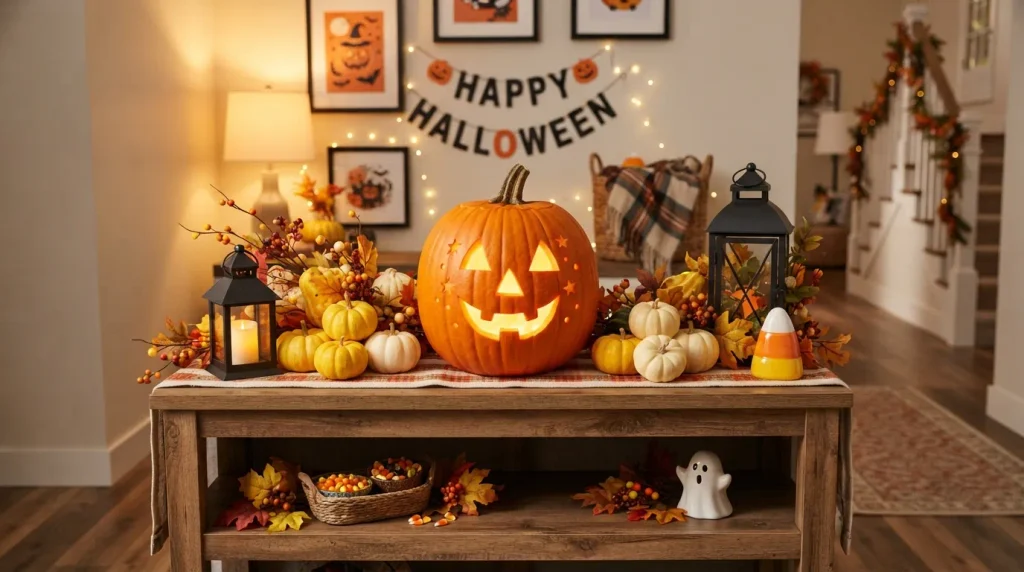
- Brings candy-inspired color into the Halloween display.
- Cheerful facial shapes make it family-friendly.
- Small cutouts add detail without overwhelming the design.
- Pairs naturally with colorful seasonal decorations.
Bring a playful candy-shop feeling to your Halloween display with a pumpkin inspired by the familiar colors and shape of candy corn. Use triangular eyes and a cheerful smile, then surround the carving with small decorative cutouts that echo the candy’s simple geometry. A bright orange pumpkin works naturally with this concept, while yellow and white accents can complete the palette. Keep the face bold and uncomplicated so the design remains readable. This is a fun alternative when you want Halloween decor that feels colorful and cheerful rather than dark, especially for homes where children will be enjoying the decorations.
Build the display around a simple orange, yellow, white, and black palette to keep everything visually connected. Place the carved pumpkin on an entry table or porch beside cream and yellow mini pumpkins, black lanterns, and a few autumn leaves. A warm LED light inside will make the facial openings glow softly while preserving the bright seasonal colors. Avoid adding too many patterns nearby, because the candy-inspired theme already provides plenty of visual interest. The finished arrangement feels festive and playful, making it suitable for family gatherings, Halloween parties, trick-or-treating areas, or cheerful seasonal photographs.
19. Raven Silhouette
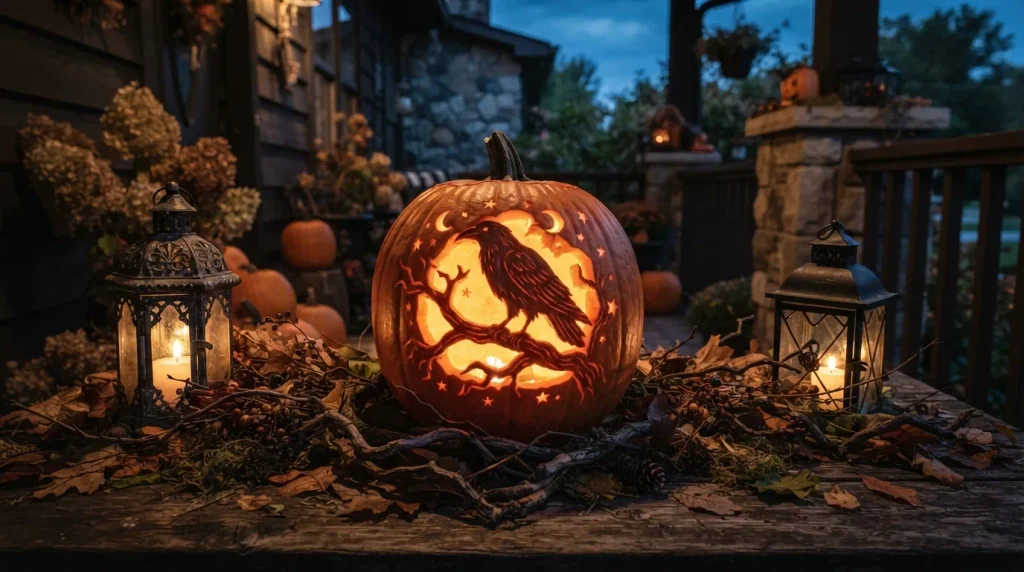
- Creates a sophisticated Halloween focal point.
- The raven silhouette feels dramatic without excessive carving.
- Small moon and star details add depth.
- Dark accessories enhance the gothic appearance.
Give your pumpkin a mysterious Halloween character with a raven silhouette perched on a crooked branch. Keep the bird shape bold, focusing on the beak, head, body, and folded wings rather than attempting overly tiny feather details. A few small stars or a crescent moon can fill the surrounding space without competing with the main silhouette. Choose a large pumpkin with a smooth front for the clearest result. This design works particularly well when you want a darker, more sophisticated alternative to traditional smiling jack-o’-lanterns while still keeping the carving visually approachable.
The raven becomes especially atmospheric when illuminated from within after sunset. Use a warm LED light and place the pumpkin against a darker background so the carved silhouette stands out clearly. Black lanterns, dried branches, and deep-toned autumn foliage can reinforce the gothic mood without creating visual clutter. For an elegant arrangement, position the pumpkin on a dark wooden table or porch bench and keep surrounding pumpkins mostly neutral. The combination of glowing cutouts, natural textures, and strong silhouette creates a dramatic focal point that photographs beautifully and gives your Halloween decorating a more refined personality.
20. Frankenstein Face
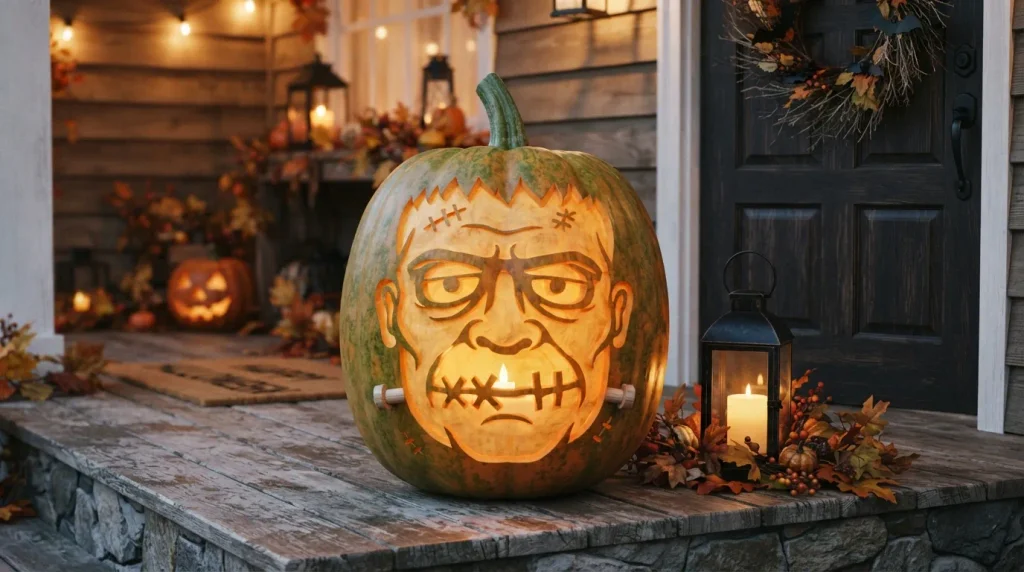
- Creates a recognizable monster with bold facial features.
- Stitch details add character without requiring intricate patterns.
- Heavy brows make the expression instantly recognizable.
- Green and black accents strengthen the classic monster theme.
Turn your pumpkin into a playful Frankenstein-inspired character with heavy eyebrows, square eyes, a stitched mouth, and a few simple forehead scars. Use bold lines and chunky shapes so every feature remains visible once the pumpkin is glowing. If you want the classic monster appearance, combine an orange or green-painted pumpkin with black accents around the face. Keep the scars short and widely spaced rather than creating numerous tiny cuts. The strong expression makes this design particularly useful for outdoor displays because guests can recognize the character easily from the walkway.
For a complete Frankenstein display, add dark accessories around the pumpkin while keeping the overall arrangement simple. A black lantern, rustic wooden crate, and scattered autumn leaves provide texture without competing with the face. A warm LED light inside creates an inviting glow through the eyes and stitched mouth. If you are decorating with children, this design can be adjusted to look funny instead of frightening by enlarging the eyes and softening the mouth. The result is a memorable Halloween character that brings personality to a porch, party table, entryway, or seasonal centerpiece.
21. Bat Swarm
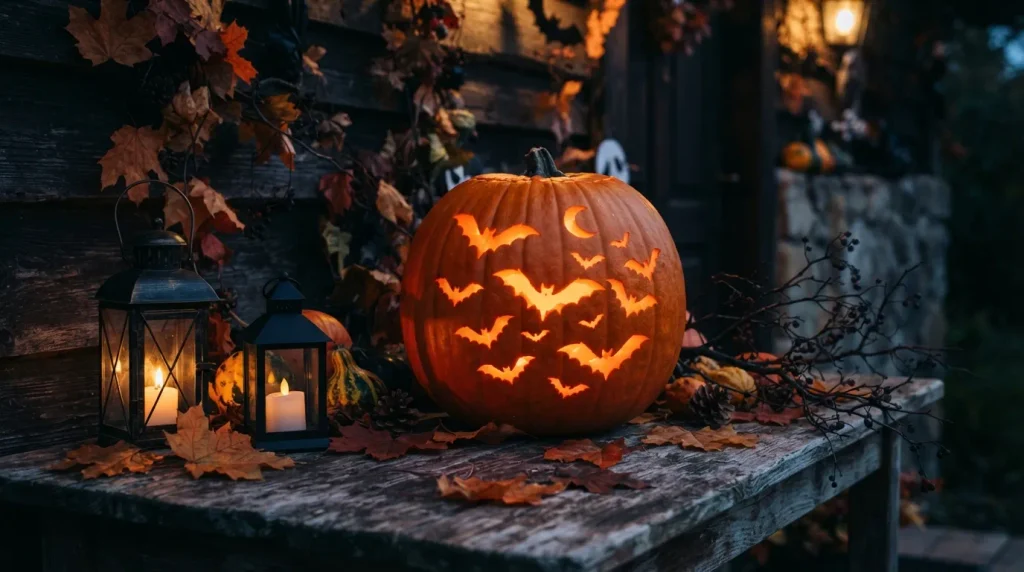
- Creates movement across the entire pumpkin surface.
- Different bat sizes make the pattern feel natural.
- A crescent moon gives the design a clear focal point.
- Works beautifully with black and orange Halloween styling.
Create the illusion of a tiny night sky by carving several bats flying across the front of your pumpkin. Use different bat sizes and angles so the pattern feels active instead of repetitive. Keep the largest bat near the center and arrange smaller silhouettes around it, leaving enough pumpkin surface between each shape. A crescent moon can provide a simple focal point and help connect the individual elements. This design is a great choice when you want something more decorative than a face while still using familiar Halloween imagery that looks instantly recognizable.
The bat pattern becomes especially striking when the pumpkin is illuminated from inside. Place a warm LED light behind the carved silhouettes and position the pumpkin against a darker surface for stronger contrast. Black lanterns, dried branches, and scattered autumn leaves can create a cohesive setting around the carving. For a larger porch display, use the bat pumpkin as the center and place smaller uncarved pumpkins around it at different heights. I’ve noticed that varied spacing makes this kind of design photograph better because the eye naturally moves across the entire pumpkin rather than focusing on one crowded area.
22. Creepy Pumpkin Mouth
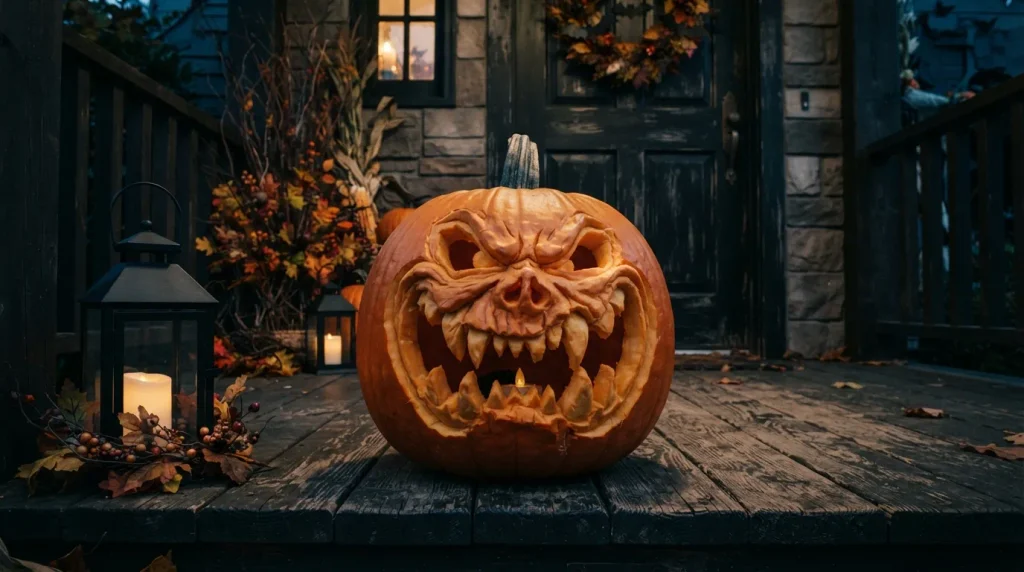
- Creates a dramatic final focal point with one bold feature.
- Uneven teeth make the expression look more unsettling.
- A wide mouth is easy to recognize from a distance.
- Dark surroundings make the glowing carving more dramatic.
Make the mouth the entire personality of your pumpkin with an exaggerated grin, uneven lips, and rows of irregular teeth. Instead of carving a complete face, focus all the attention on creating a wide opening that feels slightly creepy and unexpected. Vary the tooth sizes and angles to avoid a perfectly symmetrical appearance. Choose a large pumpkin with a broad front so the mouth can stretch across the surface naturally. This design works especially well when you want a dramatic decoration that photographs clearly and makes an immediate impression without requiring multiple complicated facial features.
The finished carving becomes even more effective when the mouth remains the brightest visual detail in the arrangement. Place a warm LED light inside and keep nearby decorations darker to create contrast around the glowing teeth. A black lantern, dried branches, and a few autumn leaves can frame the pumpkin while maintaining its spooky character. For a more playful result, use rounded teeth and a wide smile; for a creepier appearance, make the lips uneven and the teeth narrow. Among cool pumpkin carving ideas, this bold single-feature approach is practical, memorable, and easy to adapt to your preferred Halloween mood.
Conclusion
The right pumpkin carving can completely change the look and personality of your Halloween display. From playful monsters and expressive faces to elegant silhouettes and glowing patterns, these cool pumpkin carving ideas give you plenty of ways to create something memorable. You don’t need advanced carving skills—just a good design, a sturdy pumpkin, and a little creativity. I’ve seen how small details and thoughtful lighting can make a simple pumpkin feel like a true seasonal centerpiece. Save this post on Pinterest, try your favorite idea at home, and share it with someone looking for fresh Halloween inspiration.