Turn a blank chalkboard into a Christmas focal point that guests will notice and love. Christmas chalkboard art can make an entryway, kitchen, mantel, or family room feel instantly more festive without adding bulky decor.
From evergreen wreaths and snowy cabins to playful gingerbread scenes and elegant lettering, these 22 ideas offer something for every decorating style. Whether you love traditional red and green or prefer a softer neutral look, you’ll find practical designs that are easy to recreate at home. In my experience, the best chalkboard displays balance one strong focal point with a few simple details, making the finished piece feel intentional rather than crowded.
1. Evergreen Wreath
- A classic wreath makes the board instantly recognizable as Christmas decor.
- White highlights help the greenery and berries stand out against dark chalk.
- Keep the lettering large and centered for easy reading from a distance.
- Leaving some empty space makes the finished artwork feel cleaner and more refined.
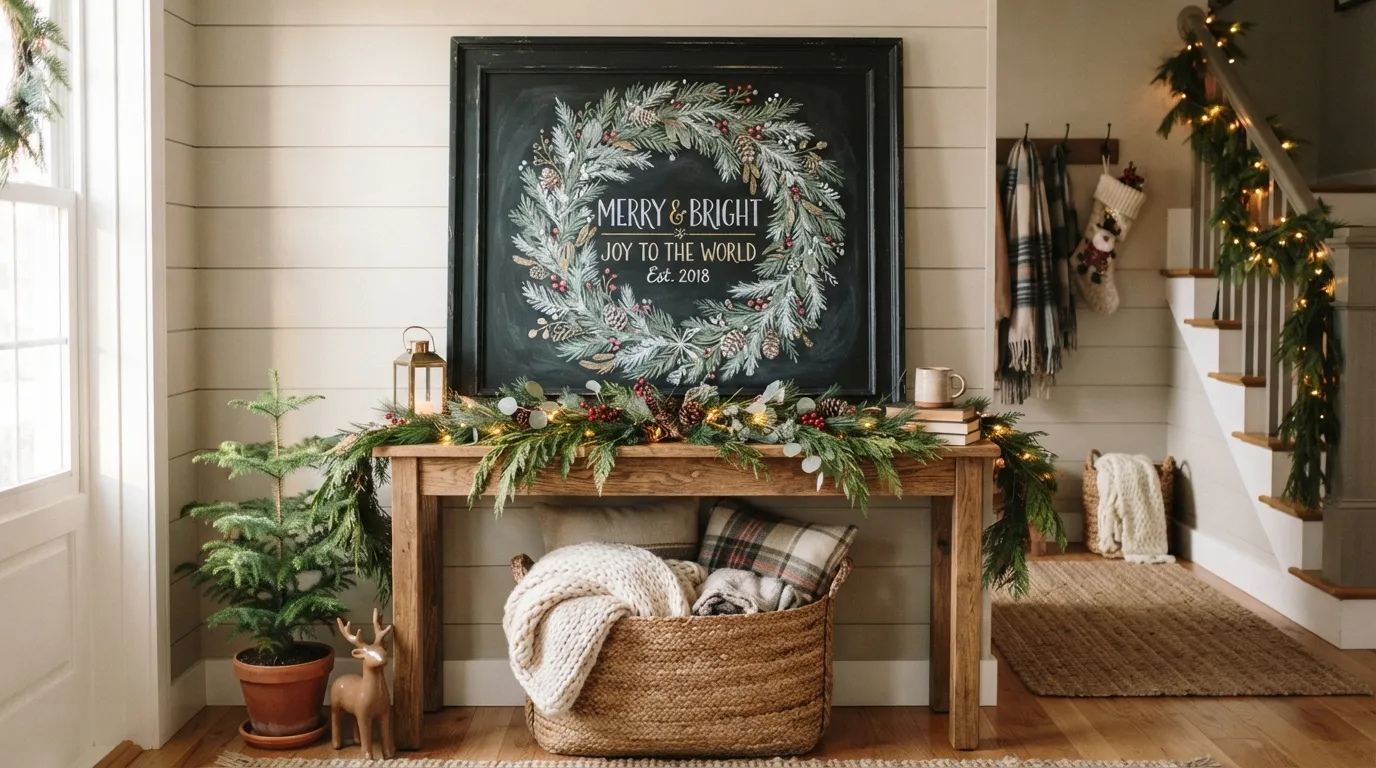
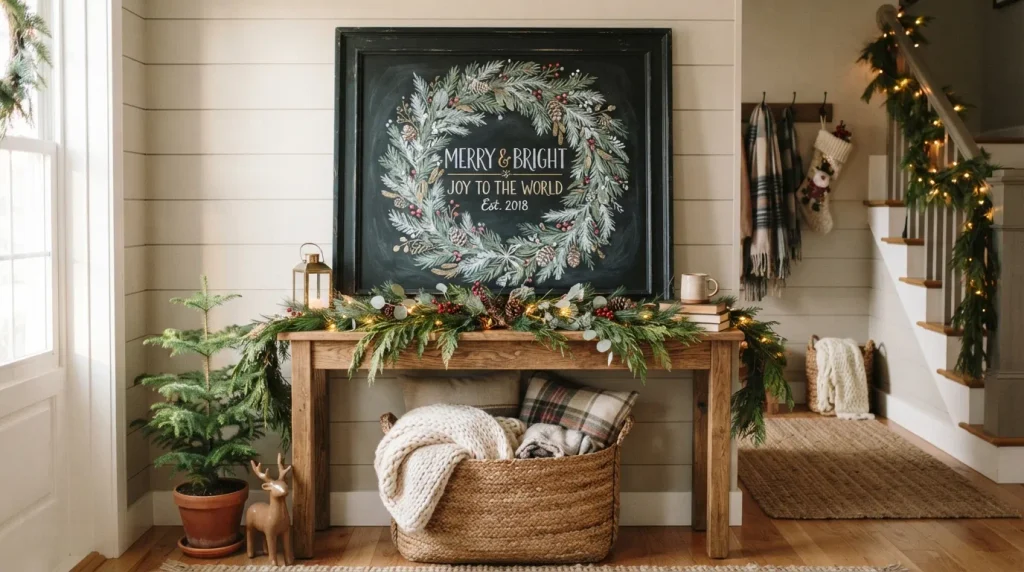
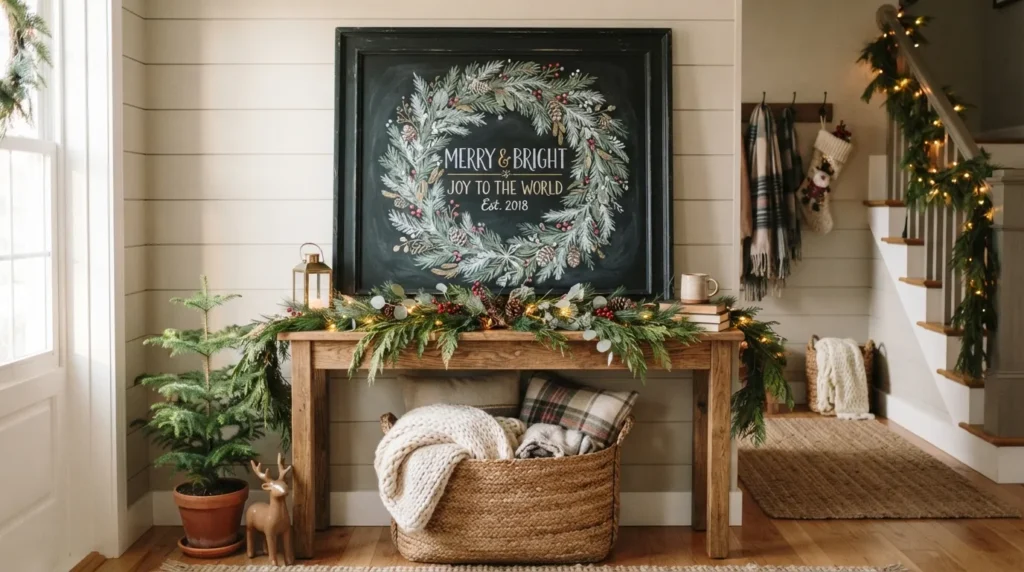
Turn a blank chalkboard into the star of your holiday decor with a simple evergreen wreath design. Draw a circular wreath through the center, using white chalk for snowy highlights and muted green, red, and gold accents for depth. Add a short Christmas greeting inside the wreath, keeping the lettering large enough to read from across the room. This approach works especially well in entryways, kitchens, and dining areas where wall decor needs to feel festive without becoming bulky. In my experience, leaving black space around the drawing makes the colors look brighter and the whole display feel more polished.
A wreath illustration instantly signals Christmas while keeping the overall display clean and balanced. Use chalk markers for crisp colored details, then add tiny berries, pinecones, or snow dots around the branches for texture. Position the board where natural light can catch the white lettering without creating glare. If your room already has busy holiday decorations, keep the wreath restrained and let the board provide one focused accent. For a softer look, pair it with a small wooden frame, woven basket, or nearby greenery. The finished arrangement feels handmade, welcoming, and easy to refresh throughout the holiday season.
Also Read : 23 Minimalist Christmas Decor Ideas for a Simple Home
2. Snowflake Lettering
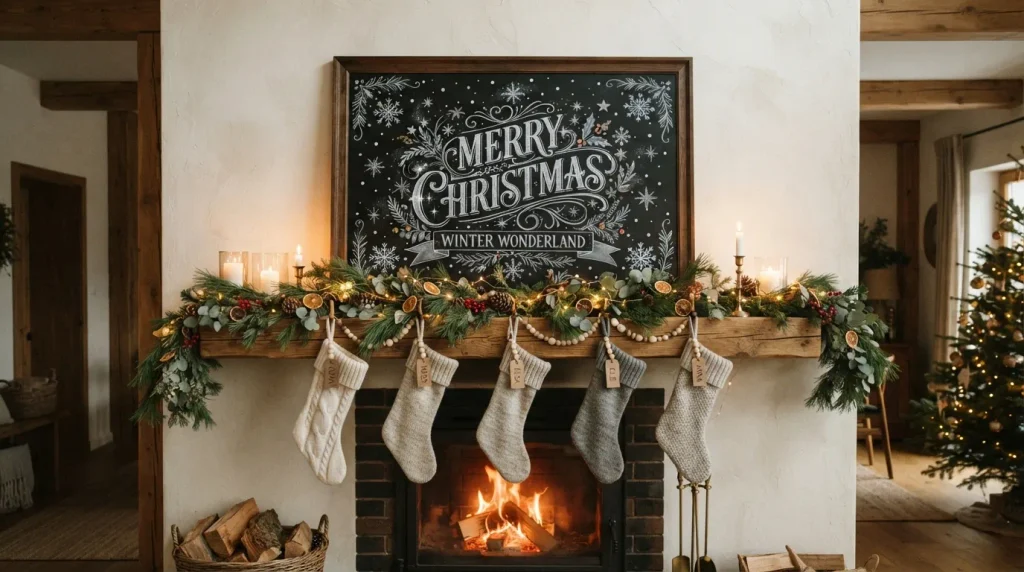
- Snowflakes create a wintery border without overwhelming the main message.
- A limited white, blue, and gray palette keeps the artwork sophisticated.
- Vary snowflake sizes to make the arrangement feel naturally hand-drawn.
- Smaller boards benefit from this simple design because it preserves readability.
Create a cozy seasonal message by surrounding bold lettering with hand-drawn snowflakes. Use white chalk as the main color, then introduce pale blue and silver-gray details to give the board a frosty appearance. Vary the snowflake sizes so the composition feels natural rather than patterned. A few scattered dots can mimic falling snow and fill empty areas without making the design crowded. I’ve noticed this style looks particularly effective on smaller boards because the limited palette keeps everything readable. Place it near a mantel, coffee station, or entry table, where the winter-inspired artwork can become an inviting focal point.
Snowflake lettering gives a holiday chalkboard an airy, wintery finish without requiring a complicated illustration. Start with one strong phrase, then build the decoration outward so the words remain the visual anchor. Use a white chalk pen for fine lines and a regular chalk stick for softer, textured marks. If you make a mistake, wipe that section with a slightly damp cloth and redraw it after the surface dries. Add a few metallic-looking silver accents if desired, but avoid overfilling the board. The result is festive enough for Christmas gatherings while still looking calm and stylish in an everyday home.
Also Read : 21 Natural Christmas Decor Ideas for a Cozy Rustic Home
3. Christmas Tree Sketch
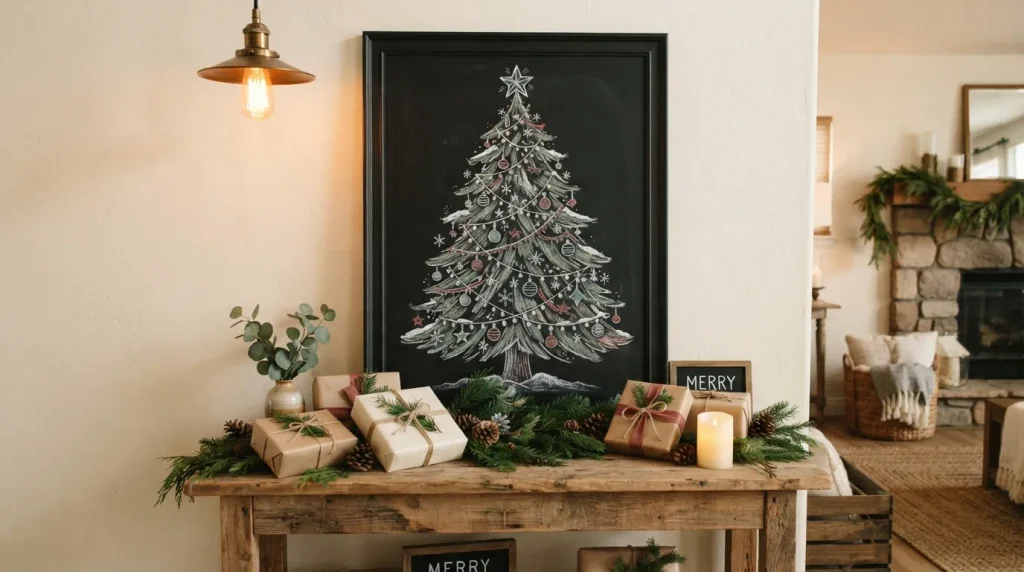
- A simple tree sketch gives the display an unmistakable holiday focal point.
- Minimal ornament details keep the design achievable for beginners.
- White and muted colors create a softer look than bright traditional shades.
- Add small wrapped gifts nearby to visually connect the artwork with the room.
A hand-drawn Christmas tree can turn even a narrow chalkboard into a cheerful seasonal feature. Sketch a simple triangular tree with layered branches, then decorate it with tiny ornaments, stars, and snow-like marks. White chalk works beautifully for the structure, while muted red and sage green add just enough color. Keep the tree centered and allow generous space around its edges so it does not look cramped. This idea works particularly well above a console table or beside a fireplace. The simple shape is forgiving, making it a practical choice when you want festive artwork without advanced drawing skills.
For extra dimension, combine solid chalk lines with lighter, smudged shading across selected branches. Add a small star at the top and a few wrapped presents underneath to make the illustration feel complete. If you prefer a farmhouse look, use warm white, soft green, and dusty red rather than saturated colors. I’ve seen this approach work especially well in homes where existing holiday decor already includes natural wood and greenery. The finished Christmas chalkboard art feels personal and handmade, while the uncomplicated composition remains easy to copy, adjust, or recreate next year with a fresh message.
Also Read : 23 Boho Christmas Decor Ideas for a Cozy Holiday Home
4. Candy Cane Border
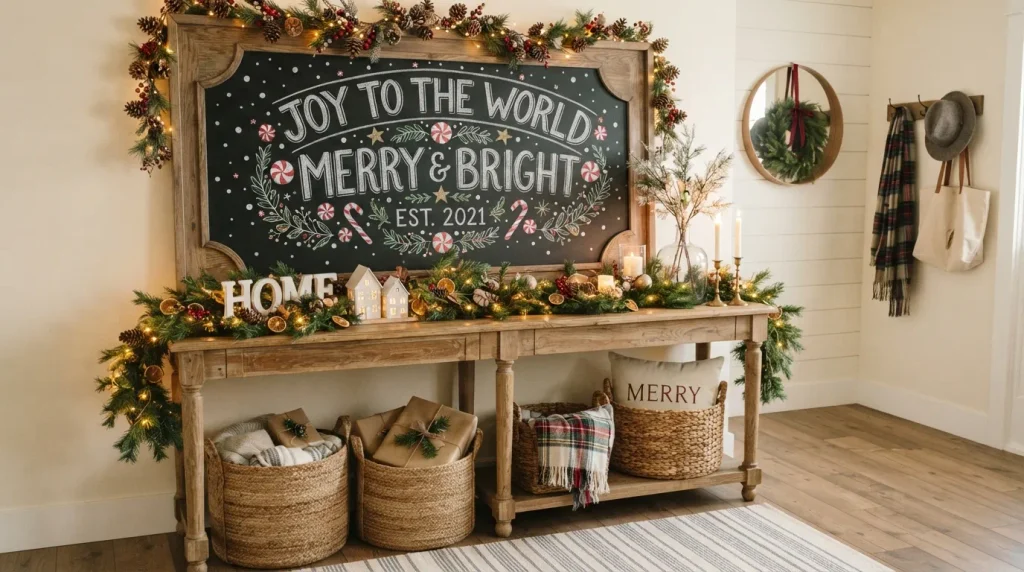
- Candy canes create a playful border that naturally frames the main message.
- Red-and-white details provide strong contrast against the dark chalkboard.
- Keep the corners slightly fuller while leaving the center open for lettering.
- Small peppermint shapes can fill awkward gaps without making the design busy.
Give a plain chalkboard a cheerful holiday makeover with a candy cane border. Draw pairs of red-and-white candy canes around the outer edges, slightly overlapping them at the corners for a playful framed effect. Keep the center mostly open so your Christmas greeting remains easy to read. Small peppermint circles and white snow dots can add extra detail without requiring complicated drawing skills. This design works beautifully in kitchens, family rooms, and entryways where a little festive color feels welcome. In my experience, repeating one simple motif around the edges makes homemade chalk art look surprisingly intentional.
A candy cane frame also gives you an easy way to coordinate the chalkboard with traditional Christmas decorations already in the room. Use bright red for a classic look, or choose dusty red and creamy white for a softer farmhouse palette. Chalk markers are useful for crisp stripes, while regular chalk can create a slightly more handmade finish. Place the board near red ornaments, striped ribbon, or a small bowl of peppermint treats to create visual repetition. The finished display feels joyful and welcoming without requiring a detailed central illustration, making it especially practical for beginners decorating on a budget.
Also Read : 24 Christmas Table Settings for a Beautiful Holiday Table
5. Festive Gift Stack
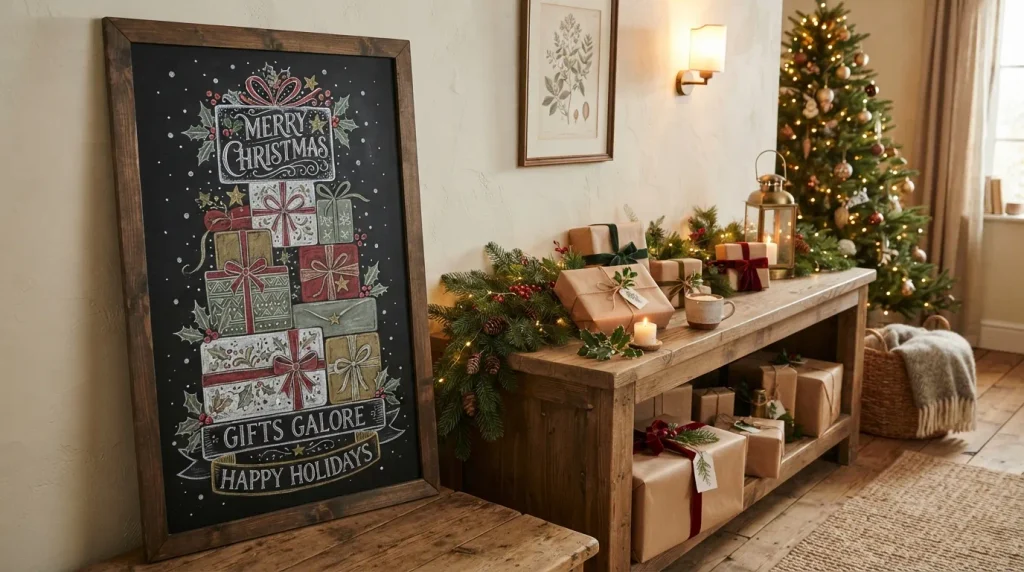
- Stacked presents create a strong vertical composition for taller chalkboards.
- Simple ribbons and bows add detail without making the illustration difficult.
- Use different wrapping patterns to make each gift visually distinct.
- Pair the artwork with real presents nearby for a coordinated holiday display.
Turn your chalkboard into a cheerful pile of illustrated Christmas presents by stacking gift boxes from largest to smallest. Use simple rectangles, oversized bows, and ribbon lines rather than complicated patterns. A combination of white, muted red, sage green, and soft gold creates a festive palette that feels warm without becoming overly bright. Place the tallest package toward the bottom and gradually narrow the stack upward to create a natural shape. This arrangement is especially useful for narrow vertical boards because it fills the space efficiently. A short greeting above the presents can complete the composition while keeping the illustration central.
The gift-stack concept works because it connects the chalkboard directly with one of the most recognizable parts of Christmas decorating. Add small stars, dots, or evergreen sprigs around the boxes to soften empty areas, but keep the presents as the main focus. If you have real wrapped gifts nearby, repeat one or two colors from the artwork on their ribbons for a pulled-together appearance. I’ve noticed that repeating small decorative details across the room makes inexpensive seasonal pieces feel much more coordinated. The result is playful, welcoming, and easy to recreate each holiday season with minor changes.
Also Read : 21 Christmas Table Centerpieces for a Beautiful Holiday Table
6. Merry Christmas Script
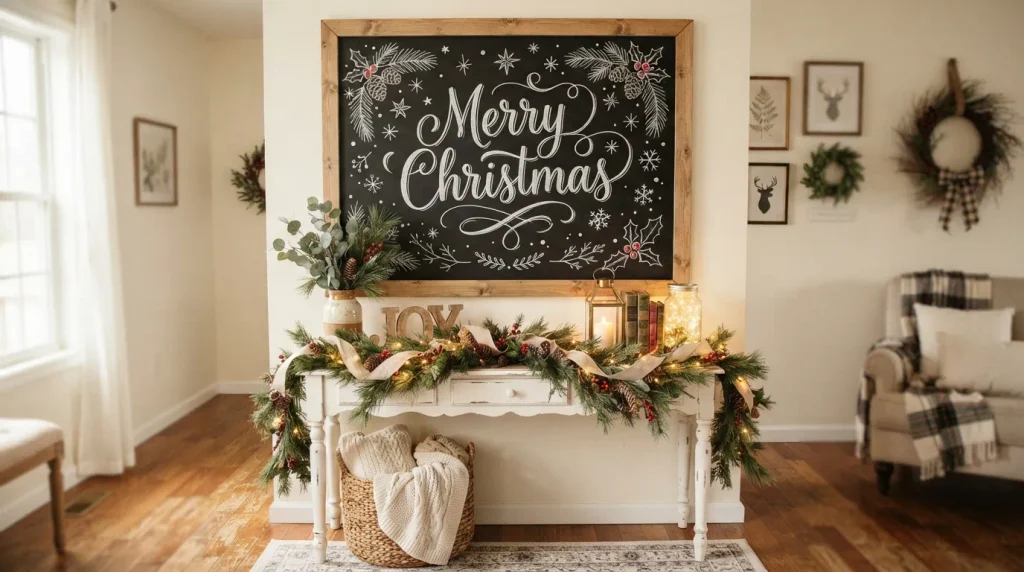
- Large script lettering makes the greeting the immediate focal point.
- White lettering keeps the message crisp and highly readable.
- Tiny greenery and stars add decoration without competing with the words.
- Leave generous spacing between letters for a cleaner handmade appearance.
Sometimes the simplest greeting creates the strongest Christmas display. Center a large “Merry Christmas” message on the board using flowing script, then surround it with a few delicate pine branches, berries, stars, and snow dots. The lettering should take up most of the visual space, while the surrounding details act as a subtle frame. This approach is ideal when you want your chalkboard to feel elegant rather than heavily illustrated. Choose thick chalk markers for the main words and a finer tip for decorative lines. The contrast between bold lettering and tiny accents creates an attractive Pinterest-friendly composition.
A strong script greeting can also make an ordinary corner feel intentionally decorated without adding more physical objects. Keep the wording centered and avoid filling every available inch of the board. For a traditional look, combine bright white lettering with touches of red and green; for a modern space, use white with muted greenery instead. Position the board above a console, mantel, or holiday coffee station where the message can be noticed easily. In my experience, generous empty space is what makes hand-lettered displays look sophisticated rather than cluttered, especially when the surrounding room already contains plenty of seasonal decorations.
Also Read : 23 Front Porch Christmas Decor Ideas for a Festive Welcome
7. Gingerbread Village
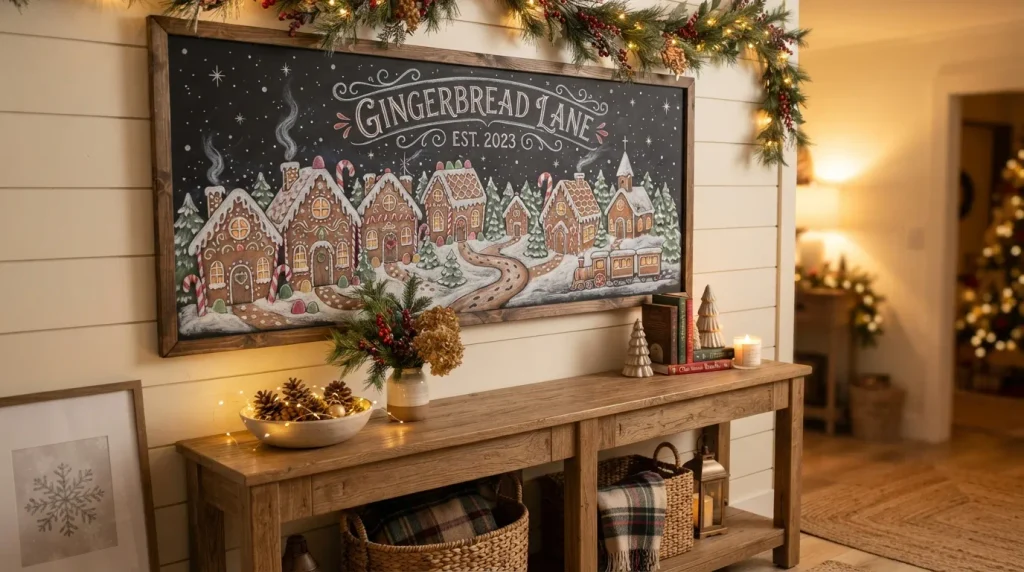
- A row of gingerbread houses creates a charming illustrated village scene.
- Snowy rooftops add depth while keeping the drawing beginner-friendly.
- Tiny candy details bring playful color to an otherwise neutral board.
- Keep the village along the bottom to preserve open space above it.
Bring a little storybook charm to your holiday decorating with a gingerbread village drawn along the bottom of a chalkboard. Create several simple houses with triangular roofs, windows, doors, and snowy caps, then add tiny trees and candy-inspired details between them. White chalk can define the snow, while red, green, and warm brown accents bring the buildings to life. Keep the houses slightly different in size so the scene feels natural. This design works especially well in kitchens, dining rooms, or family spaces where playful Christmas decorations feel right at home.
The village can be as detailed or minimal as your drawing skills allow, which makes it an approachable choice for beginners. Add peppermint circles, candy canes, or tiny stars around the rooftops for extra personality without crowding the board. A short seasonal phrase can sit above the illustration if there is enough space. I’ve seen this style look particularly charming when displayed near actual gingerbread cookies, wooden houses, or warm string lights. The combination creates a cohesive holiday corner while allowing the chalkboard to remain the handmade focal point of the arrangement.
8. Santa Portrait
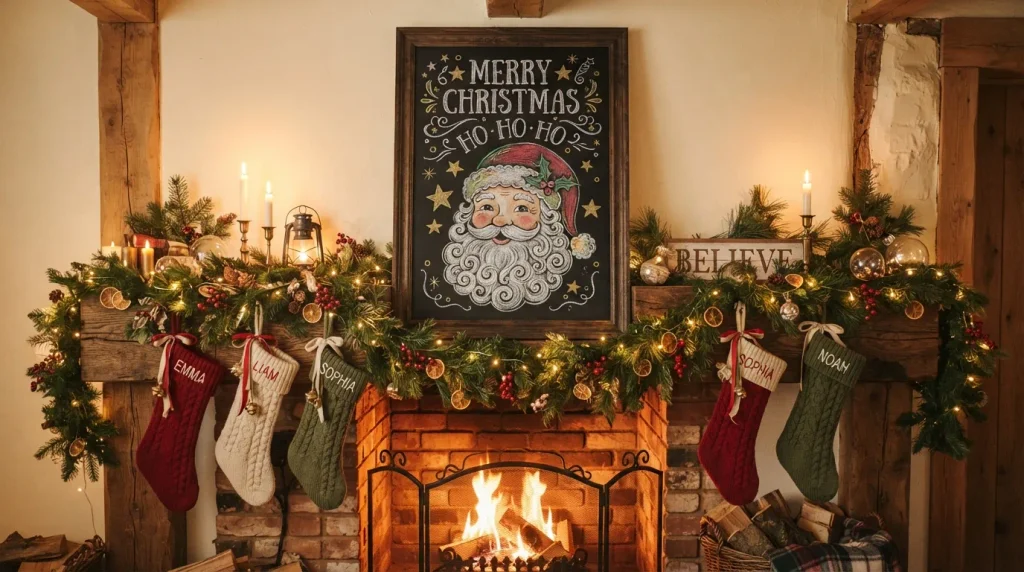
- A simple Santa face instantly gives the board a festive personality.
- Focus on the hat, beard, and facial details instead of complex full-body artwork.
- Use red sparingly so the portrait remains balanced against the dark background.
- Add a few stars or snowflakes around Santa to complete the composition.
A friendly Santa portrait can instantly make a chalkboard feel playful and welcoming. Focus on his recognizable features rather than attempting a detailed full-body illustration: a fluffy white beard, round cheeks, expressive eyes, and a classic red hat are enough to create the character. Use white chalk for the beard and hat trim, then add small touches of red, green, or gold for definition. Keep the face large and centered so the design remains recognizable from across the room. This idea is especially fun for family rooms, children’s spaces, entryways, and holiday gathering areas.
You do not need advanced drawing skills to make Santa look charming. Start with simple shapes, lightly sketch the proportions first, and build the beard with overlapping curved strokes rather than trying to create every hair individually. Add snowflakes, stars, or a short greeting around the portrait once the main features are complete. For a more sophisticated room, keep the palette restrained and use mostly white with just a few colored accents. In my experience, slightly imperfect hand-drawn details actually make this type of Christmas chalkboard feel more personal, cheerful, and handmade than a perfectly polished illustration.
9. Holiday Countdown
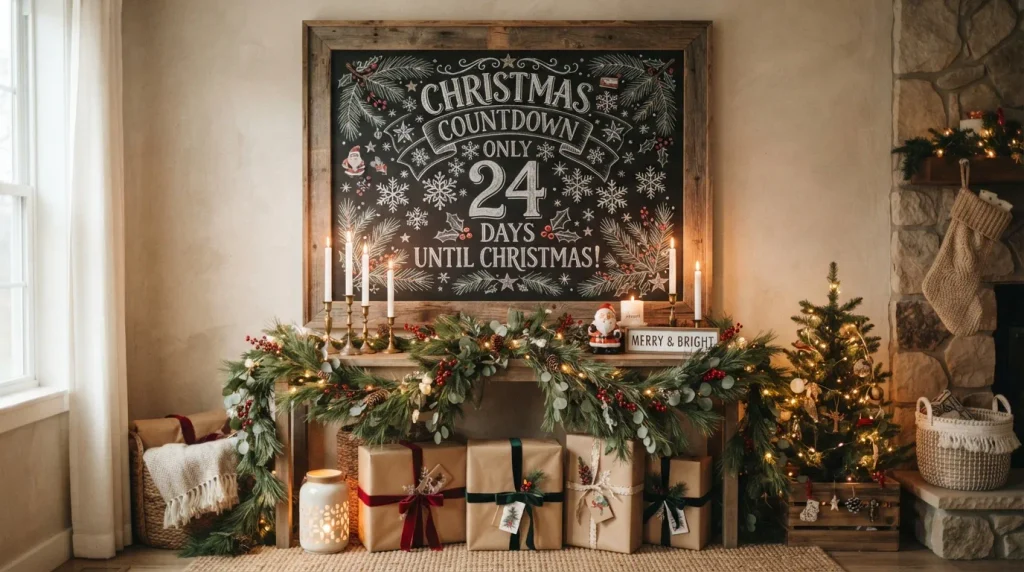
- A countdown adds a fun interactive element to everyday holiday decor.
- Large numbers make the board easy to update and read at a glance.
- Evergreen branches and snowflakes provide simple seasonal framing.
- Leave room beneath the number for daily changes without redrawing the entire design.
Make your chalkboard part of the Christmas excitement with a simple countdown display. Feature one large number as the central element, surrounded by evergreen branches, snowflakes, stars, and a few berries. The oversized number should be easy to update each day, while the surrounding artwork stays unchanged throughout the season. This makes the design both decorative and functional. Place the board in a busy family area where everyone can see it, such as an entryway, kitchen, or living room. A clean layout ensures the changing number remains the star without making the display feel unfinished.
For an easy update system, use a chalk marker for the permanent decorations and regular chalk for the countdown number. That way, you can erase and replace the number without disturbing the surrounding artwork. Add a small phrase such as “days until Christmas” underneath, keeping the lettering simple and readable. I’ve noticed interactive displays tend to become more memorable because family members naturally check them as the holiday approaches. The finished board combines seasonal decoration with a small daily ritual, giving your home something festive to enjoy rather than another piece of decor that simply sits in place.
10. Rustic Christmas Village
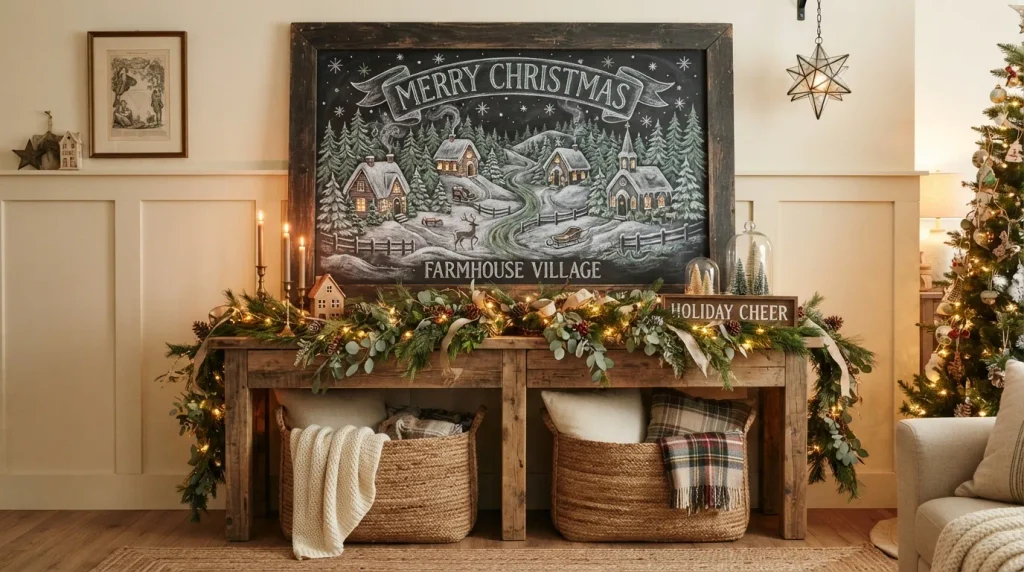
- Snow-covered cottages create a cozy winter landscape without complicated details.
- Simple pine trees help fill empty areas and add visual depth.
- Use soft white chalk for snow to create a naturally textured finish.
- A rustic wooden frame pairs especially well with this countryside-inspired scene.
A snowy Christmas village gives your chalkboard the feel of a miniature winter landscape without taking up any physical space. Draw a few small cottages across the lower half of the board, adding peaked roofs, glowing windows, pine trees, and gentle snow-covered details. Keep the buildings simple and slightly varied so the scene feels handmade. White chalk works beautifully for the snow, while muted green and warm gray can define trees and architectural details. This idea suits farmhouse, cottage, and Scandinavian interiors particularly well, especially when natural wood and greenery already appear elsewhere in the room.
Build the scene from the bottom upward, beginning with the snowy ground before adding houses and trees. This makes it easier to create a balanced composition and prevents the buildings from appearing to float. Add tiny stars or falling snow toward the top to connect the whole illustration. If your board is large, vary the cottage sizes to create a gentle sense of distance. In my experience, keeping the color palette restrained makes detailed chalk scenes look more sophisticated. Pair the finished artwork with warm lamps, pine garland, or wooden ornaments for a welcoming winter display.
11. Reindeer Silhouette
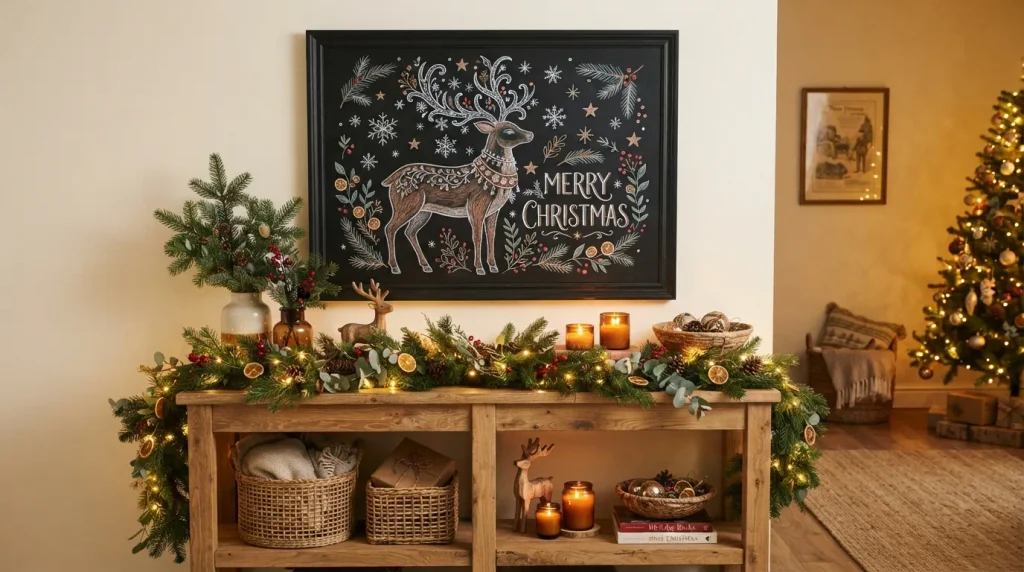
- A reindeer silhouette creates a strong focal point with very little visual clutter.
- Large antlers naturally fill the upper portion of the board.
- White and brown chalk give the design a softer rustic appearance.
- Keep surrounding decorations delicate so the silhouette remains dominant.
A graceful reindeer silhouette can make a Christmas chalkboard feel festive while maintaining a clean, rustic appearance. Draw the reindeer in profile with prominent antlers, using white or warm brown chalk to create a strong contrast against the dark surface. Add a few pine branches, snowflakes, and stars around the figure without competing with its recognizable shape. This idea works particularly well when you prefer holiday decor that feels sophisticated rather than cartoon-like. Positioning the reindeer slightly off-center can also create a more natural composition, leaving room for a short greeting or small decorative cluster.
For a more polished result, lightly sketch the reindeer outline before filling or emphasizing the main silhouette. Keep the body relatively simple and give extra attention to the antlers, because they provide the most recognizable visual feature. A few red berries can introduce traditional Christmas color without overpowering the neutral design. I’ve noticed silhouettes are especially effective in rooms with modern or rustic furnishings because their bold shape adds character without creating visual noise. Place the board near a fireplace, entry table, or dining area where the artwork can become a seasonal focal point.
12. Cozy Fireplace Scene
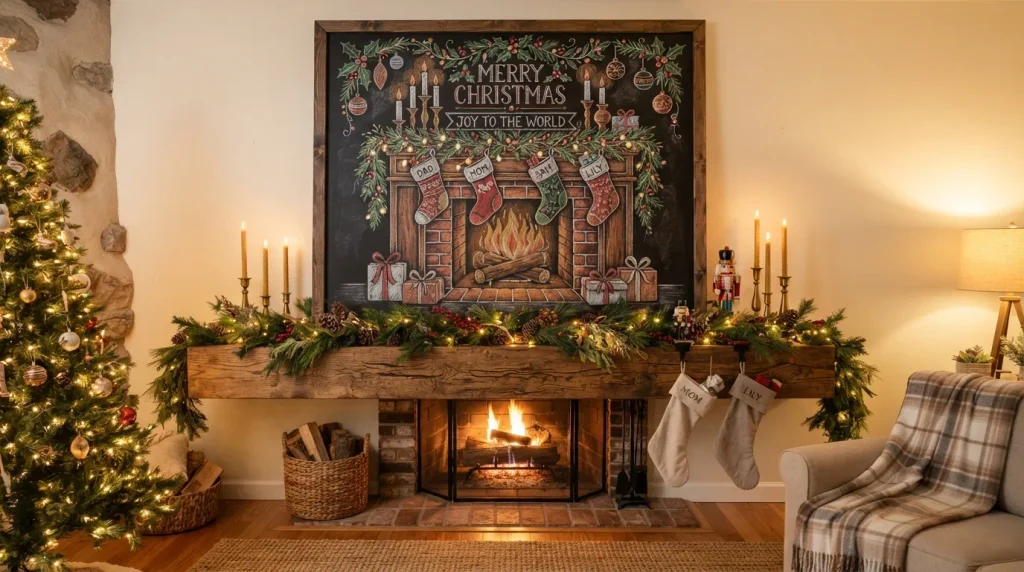
- A fireplace illustration creates instant warmth even when the room lacks a real mantel.
- Stockings and greenery make the scene unmistakably seasonal.
- Small presents beneath the hearth add visual weight to the lower section.
- Use warm white chalk for flames to create a soft glowing effect.
Create the feeling of a warm Christmas hearth by drawing a simple fireplace scene across your chalkboard. Sketch the mantel first, then add evergreen garland, hanging stockings, glowing logs, and a few presents underneath. White chalk can define the structure and snowy details, while muted red and green provide traditional holiday color. You can suggest the fire with layered curved lines rather than drawing every flame individually. This setup works beautifully in apartments, bedrooms, entryways, or other spaces without a fireplace. It brings the visual comfort of a traditional Christmas gathering place into an otherwise ordinary corner.
Keep the illustration symmetrical enough to feel balanced, but introduce small differences in the stockings, presents, and greenery so it feels handmade. A few candles or hanging ornaments can fill empty areas around the mantel without making the drawing too complicated. For a realistic glow effect, softly smudge pale chalk around the fireplace opening before adding crisp flame lines on top. This technique creates subtle depth against the dark background. In my experience, fireplace scenes feel particularly inviting when displayed alongside warm lighting and textured fabrics, because the surrounding decor reinforces the cozy atmosphere suggested by the chalk drawing.
13. Peppermint Garland
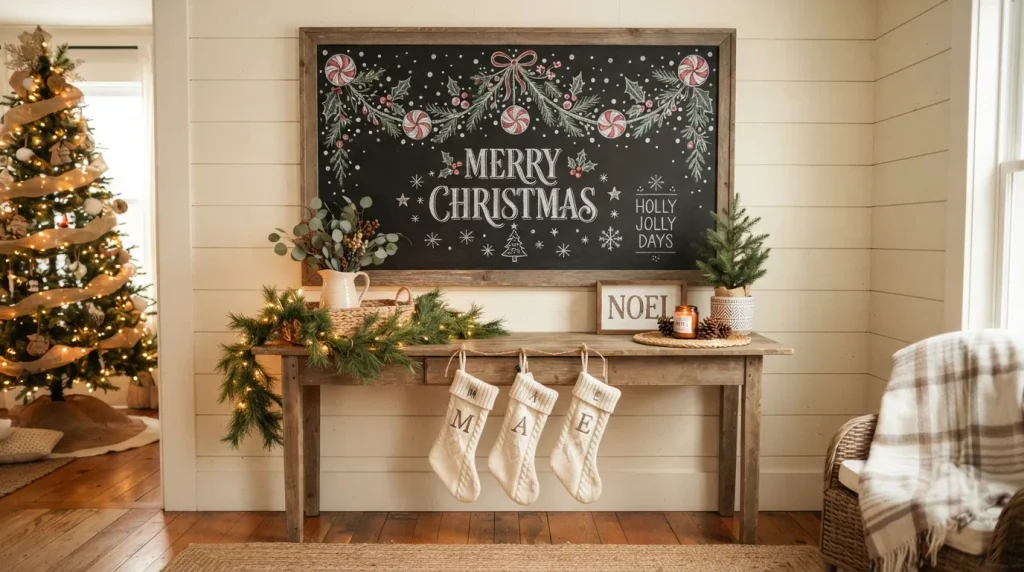
- A curved garland adds movement across the top of the board.
- Peppermint circles create a playful red-and-white holiday accent.
- Small leaves and bows soften the candy-inspired design.
- Keep the lower area open for a short greeting or decorative illustration.
A peppermint garland brings playful Christmas energy to a chalkboard without requiring a complicated illustration. Draw a loose curved line across the upper portion, then attach simple peppermint circles, small leaves, bows, and scattered snow dots. Keep the garland slightly irregular so it resembles handmade holiday artwork rather than a perfectly repeated pattern. Red and white should remain the dominant colors, with small touches of green for contrast. This idea works especially well in kitchens, breakfast areas, or family spaces where cheerful seasonal details feel natural. A simple greeting underneath can complete the design without overcrowding it.
For an especially polished result, vary the size and spacing of the peppermint pieces instead of making every element identical. Use a fine chalk marker for the candy stripes and regular chalk for softer leaves and snow effects. If the board is narrow, let the garland curve gently from one corner toward the center rather than stretching across the entire surface. I’ve noticed that curved elements help rectangular chalkboards feel less rigid and more decorative. Pair the artwork with real peppermint candies, striped ribbon, or red-and-white kitchen textiles to create subtle visual repetition throughout the holiday space.
14. Winter Pine Branches
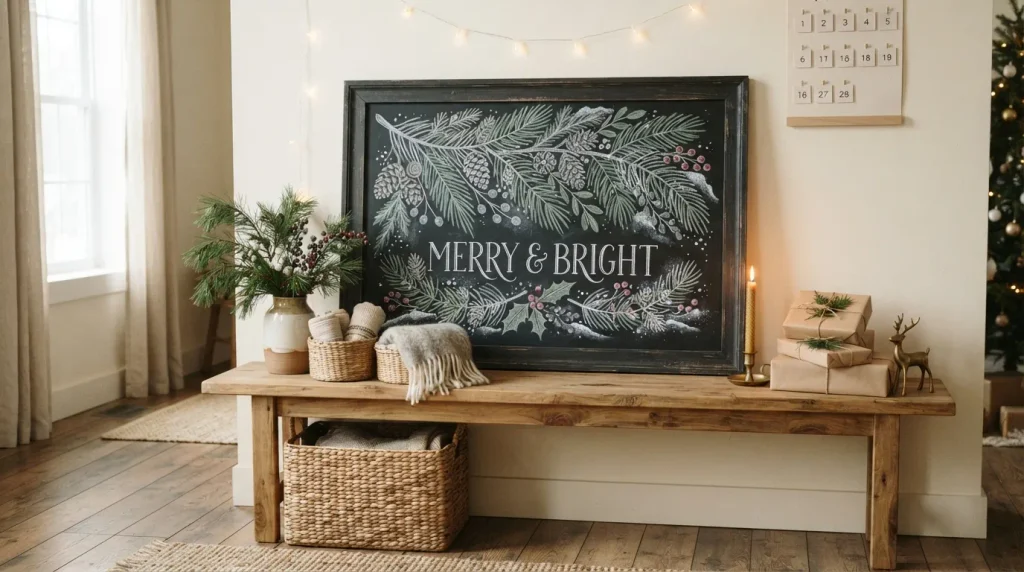
- Layered pine branches create a natural frame around the chalkboard.
- Muted greenery gives the artwork a sophisticated, timeless appearance.
- Small pinecones add texture without requiring intricate illustrations.
- Leave the center open for a clean seasonal message or minimal lettering.
Bring the quiet beauty of winter greenery indoors with layered pine branches around your chalkboard. Start by drawing several sweeping branches from the corners, allowing them to overlap naturally toward the center. Add clusters of needles, small pinecones, and a few berries for texture, while leaving plenty of dark space visible between the branches. White and muted green chalk create a softer look than bright traditional colors. This design is especially useful when you want festive decoration that can blend with existing neutral interiors. It feels seasonal without making the room look overly themed or crowded.
A branch-based design also gives you plenty of flexibility when decorating around the board. For a Scandinavian-inspired look, use mostly white chalk with a few pale green details. For a traditional room, add subtle red berries and warm gold accents. Use varying line pressure to create thicker branches and finer needles, which adds depth without complicated shading. In my experience, natural botanical shapes are forgiving because small imperfections look intentional. Position the finished board near real greenery, a wooden bowl, or pine-scented decor to create a cohesive Christmas corner that feels fresh, warm, and thoughtfully arranged.
15. Christmas Market Sign
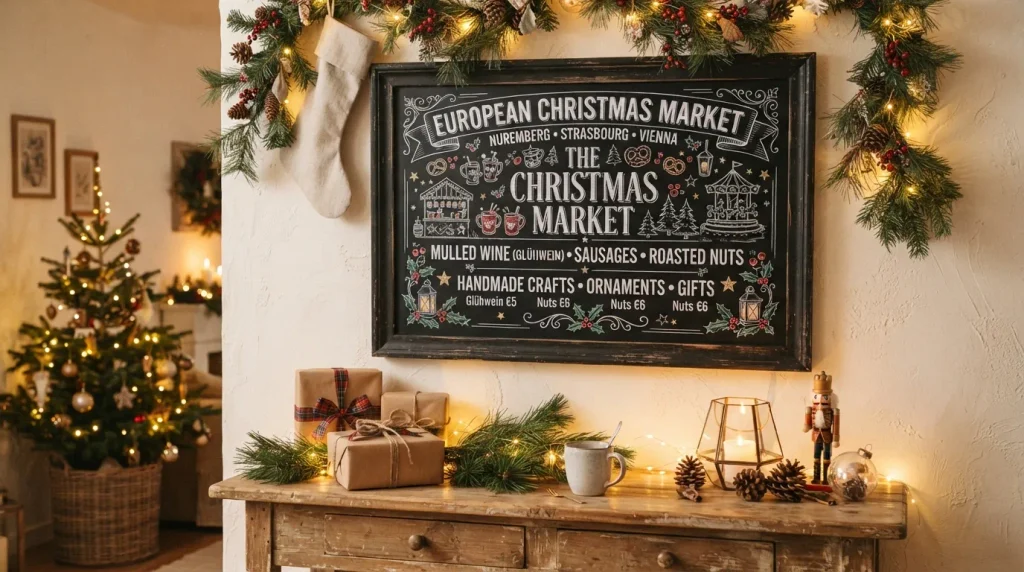
- A market-inspired layout adds character while keeping the design visually organized.
- Small stall illustrations create interest without filling the entire board.
- Bold lettering makes the central message easy to read.
- Lanterns and greenery help reinforce the warm winter-market atmosphere.
Give your chalkboard the charm of a vintage Christmas market sign by combining bold lettering with tiny illustrated stalls. Draw two or three simple market booths along the bottom, adding striped awnings, miniature wreaths, lanterns, and little gift displays. Above them, use large lettering for a seasonal phrase or market-inspired message. White chalk should form the foundation, while muted red, green, and warm gold accents add character. This design works particularly well in entryways and dining spaces because it feels decorative from a distance while rewarding guests who look closer at the smaller hand-drawn details.
You can adapt the concept to match your home’s decorating style without changing the basic composition. Use crisp lettering and restrained details for a modern interpretation, or add ornate borders and vintage flourishes for a more traditional appearance. Keep the stalls relatively small so the lettering remains the main visual anchor. A few hand-drawn lanterns can create the suggestion of warm illumination without needing elaborate shading. I’ve seen this approach work especially well with rustic wood, brass accents, and evergreen garlands because those materials naturally complement the nostalgic market aesthetic and make the chalkboard feel like part of the room.
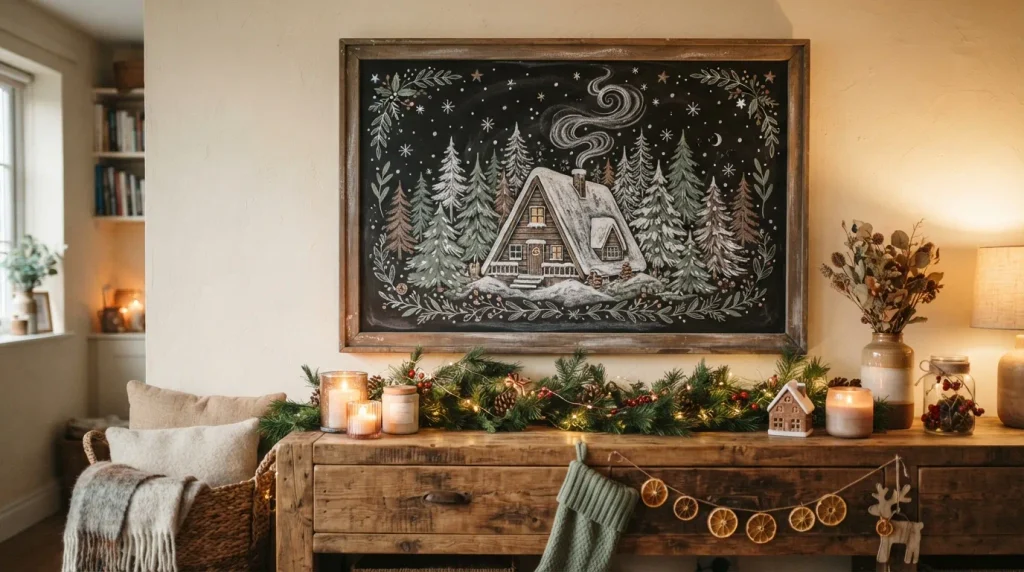
16. Snowy Cabin Scene
- A small cabin creates an instantly cozy winter focal point.
- Snow-covered trees add depth without complicated drawing techniques.
- White chalk keeps the scene bright and easy to see.
- Add tiny stars above the cabin to create more visual height.
A snowy cabin can turn a simple chalkboard into a peaceful winter scene that feels straight from a holiday postcard. Draw a small cottage near the lower center, then surround it with pine trees, snowy ground, drifting flakes, and a little chimney smoke. Use white chalk for snow and muted green or brown for supporting details. Keep the cabin slightly larger than the surrounding trees so it remains recognizable. This design works beautifully in living rooms, bedrooms, and entryways where cozy seasonal artwork can complement warm textiles, natural wood, and understated Christmas decorations.
For a more dimensional effect, layer different chalk pressures throughout the illustration. Use heavier white strokes along the roof and ground, then lighter marks for distant trees and falling snow. A few warm-colored windows can suggest a welcoming glow without requiring detailed shading. Keep the upper portion of the board relatively open so the scene does not feel crowded. In my experience, winter landscapes look most attractive when there is plenty of dark background showing through the artwork. Pair the board with pine branches, candles, or soft lighting to reinforce the cabin-inspired atmosphere.
17. Ornament Collection
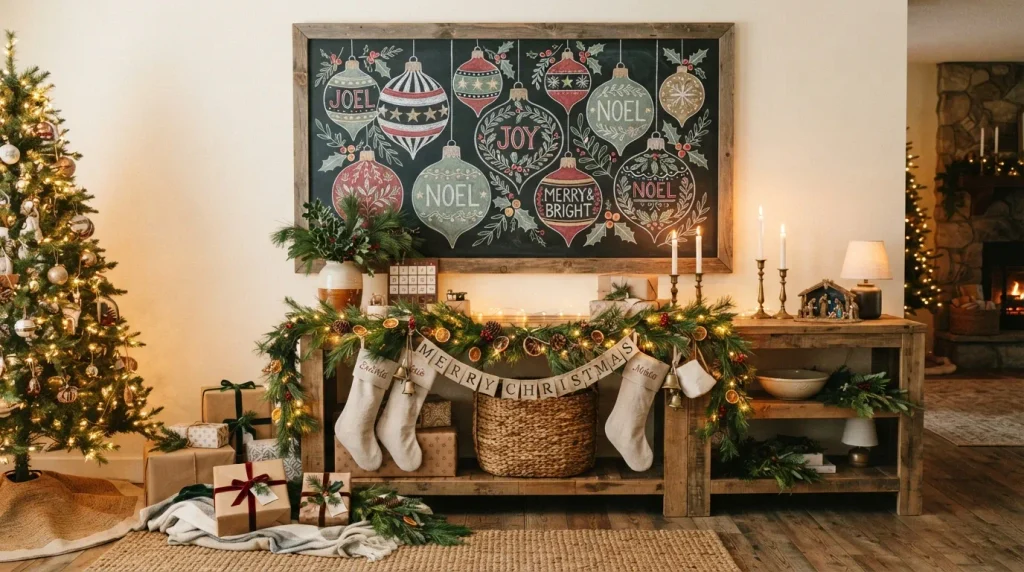
- Oversized ornaments create strong visual impact without complicated scenes.
- Different patterns make each ornament feel unique and decorative.
- A restrained palette keeps multiple colorful shapes from looking chaotic.
- Vary the ornament sizes to create a more natural arrangement.
Oversized ornaments are an easy way to create colorful Christmas artwork without drawing an entire holiday scene. Fill the chalkboard with several large baubles, giving each one a different pattern such as stripes, stars, dots, or leafy motifs. Use white as the foundation, then introduce muted red, sage green, and soft gold for contrast. Vary the ornament sizes and hang them from simple curved lines so the composition feels natural. This approach works particularly well on wide boards because the ornaments can spread horizontally while still leaving enough dark background for visual balance.
To make the collection look more polished, give every ornament a small cap and hanging loop before adding decorative patterns. Keep the patterns simple enough that they remain recognizable from several feet away. If your existing Christmas decorations follow a particular color scheme, repeat those shades on the board for a coordinated effect. Chalk markers can provide crisp outlines, while regular chalk creates softer fills and texture. I’ve noticed that grouping three or five ornaments usually creates a more pleasing arrangement than covering the entire surface. Finish with a few tiny stars or snow dots for subtle seasonal detail.
18. Holiday Baking Board
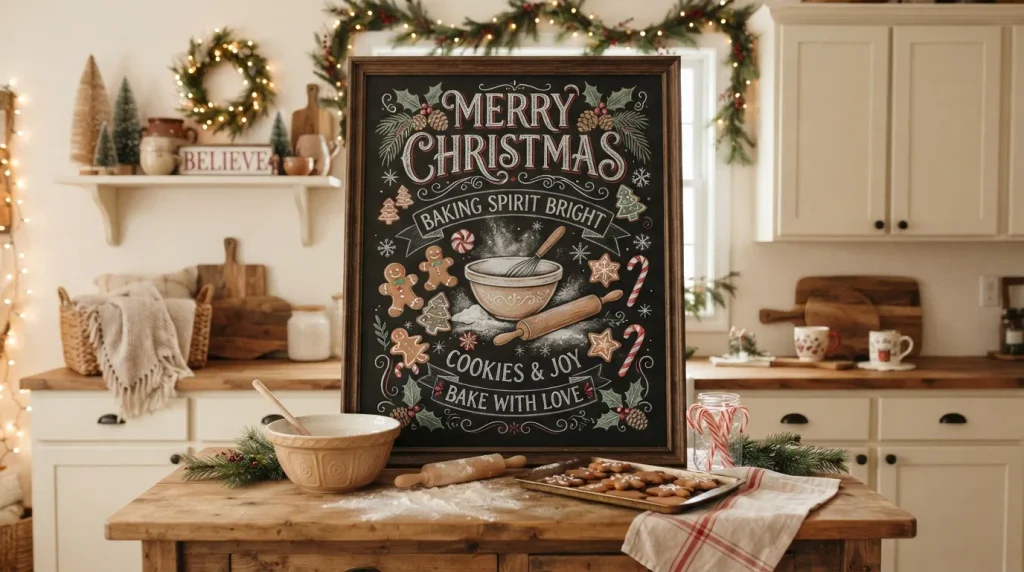
- Baking illustrations make the chalkboard especially fitting for kitchen spaces.
- Cookies and utensils provide recognizable details that are easy to sketch.
- Small flour marks and stars add texture without overwhelming the composition.
- Coordinate the artwork with real holiday baking supplies for extra charm.
A holiday baking theme brings warmth and personality to a kitchen chalkboard while celebrating one of the season’s most enjoyable traditions. Draw a simple mixing bowl, rolling pin, gingerbread cookies, candy canes, and a few scattered flour marks across the board. Use white chalk for the main illustrations, then add small red and green accents to make the details pop. Keep the objects slightly oversized so they remain readable from a distance. This idea works especially well above a baking station, coffee bar, pantry area, or kitchen counter where the artwork naturally connects with the surrounding space.
You can make the design feel more personal by including a short baking-related phrase or a simple handwritten recipe-style detail. Avoid filling every gap with decoration; a little empty black space helps the individual illustrations stand out. For added realism, vary your chalk lines between crisp outlines and soft shading on cookies or bowls. Place the finished board near wooden utensils, linen towels, jars, or a tray of freshly baked treats. In my experience, kitchen-themed holiday artwork feels most convincing when it echoes real objects already present in the space, rather than functioning as an isolated decoration.
19. Holly Berry Corners
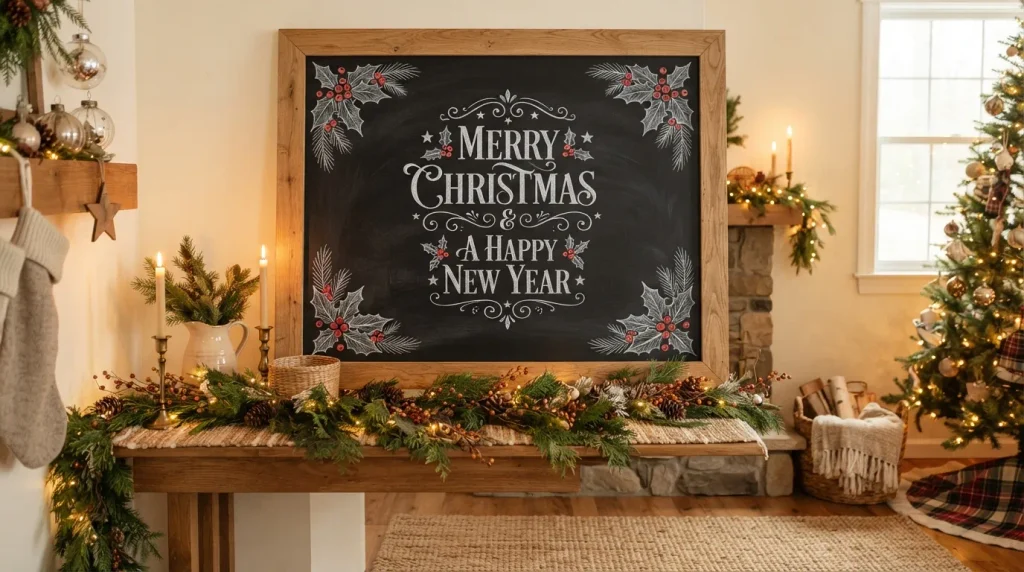
- Holly clusters create a classic Christmas look with minimal drawing.
- Corner placement keeps the center open and highly readable.
- Bright berries provide a small but effective pop of seasonal color.
- Use different leaf sizes to make the botanical details feel natural.
Classic holly leaves and berries can give a chalkboard a festive finish without requiring a large illustration. Place leafy clusters in two or four corners, using white or muted green chalk for the foliage and rich red accents for the berries. Keep the center open for a short holiday greeting or decorative lettering. The corner arrangement naturally frames the message while preserving plenty of dark background. This idea works especially well in dining rooms, entryways, and living rooms where traditional Christmas details can blend easily with existing greenery, wooden furniture, and neutral seasonal accessories.
For a softer handmade appearance, vary the shape and direction of the leaves rather than repeating identical forms. Add a few tiny white snow dots around the clusters if you want a more wintry finish. Chalk markers are helpful for clean berry circles and fine leaf outlines, while regular chalk can create gentle texture. I’ve noticed that botanical corner details are particularly useful when a board already has strong lettering because they decorate the surface without competing for attention. Keep the clusters balanced but not perfectly identical, allowing the handmade quality to remain part of the finished display.
20. Christmas Starry Sky
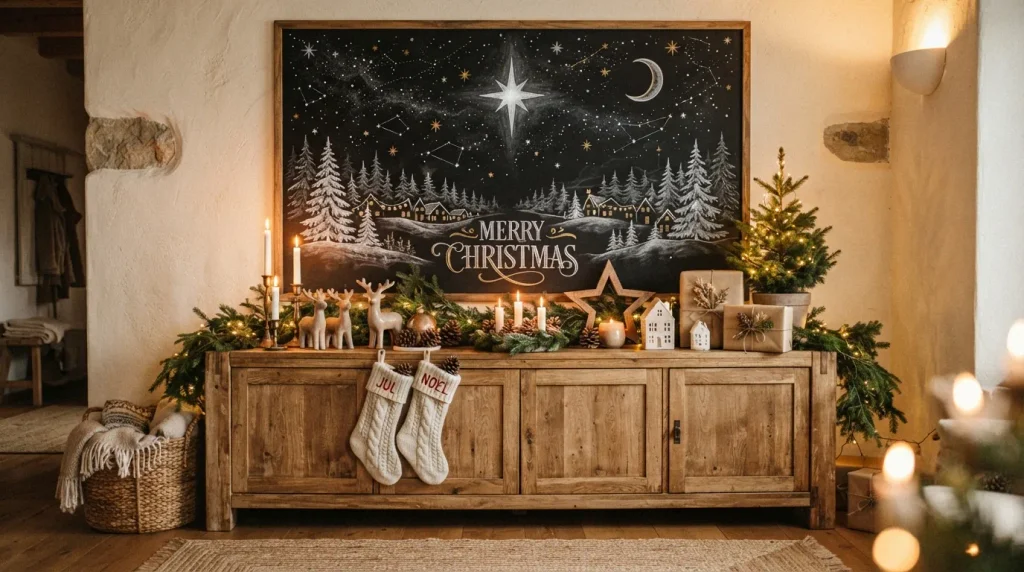
- A starry background creates a magical winter atmosphere with simple shapes.
- White stars contrast beautifully against a deep black chalk surface.
- Pine silhouettes add grounding detail along the bottom edge.
- Keep the upper sky lightly decorated so the composition stays airy.
Create a magical Christmas night scene by covering your chalkboard with a few bright stars, a larger central star, and delicate snowy pine silhouettes. Use white chalk for the brightest elements, then add tiny touches of muted gold or silver to create subtle variation. Keep the stars irregular in size and spacing so the sky feels naturally scattered. A low row of pine trees can anchor the bottom of the design while leaving plenty of open space above. This idea works beautifully in bedrooms, hallways, and quiet corners where a softer holiday atmosphere feels more appropriate.
The starry-sky concept is especially flexible because you can make it as minimal or detailed as your board allows. Add a crescent moon, tiny snowflakes, or a short Christmas phrase if the composition needs more interest. Use lighter chalk pressure for distant stars and stronger strokes for the main star to create depth. For a modern interior, keep the colors almost entirely white; for a rustic room, add muted greenery and warm metallic-looking accents. In my experience, this style looks best when the decorations remain delicate, allowing the dark background to create most of the visual drama.
21. Christmas Eve Scene
- Combining familiar Christmas symbols creates a complete seasonal composition.
- A decorated tree provides the strongest central focal point.
- Small gifts and stockings add visual interest near the bottom.
- Use warm chalk accents to make the scene feel inviting rather than overly bright.
Capture the feeling of Christmas Eve by combining several familiar holiday elements into one balanced chalkboard scene. Place a decorated Christmas tree near the center, then add stockings, wrapped gifts, candles, stars, and a small crescent moon around it. Use white chalk for the main outlines and introduce restrained red, green, and gold details for warmth. Keep each element relatively simple so the composition remains readable. This idea works particularly well in living rooms and family spaces because it visually connects several Christmas traditions in one display without requiring additional wall decorations.
Build the scene from the largest element outward, beginning with the tree before adding smaller decorations around it. Keep the lower section slightly fuller with gifts and stockings, while allowing the upper area to remain lighter with stars and snow. This creates a natural visual balance and prevents the board from feeling top-heavy. If your room already has a decorated tree, echo its ornament colors in the chalk artwork for consistency. I’ve seen this approach work well when homeowners want one statement piece that brings together the colors and traditions already present throughout their Christmas decorating scheme.
22. Minimalist Christmas Message
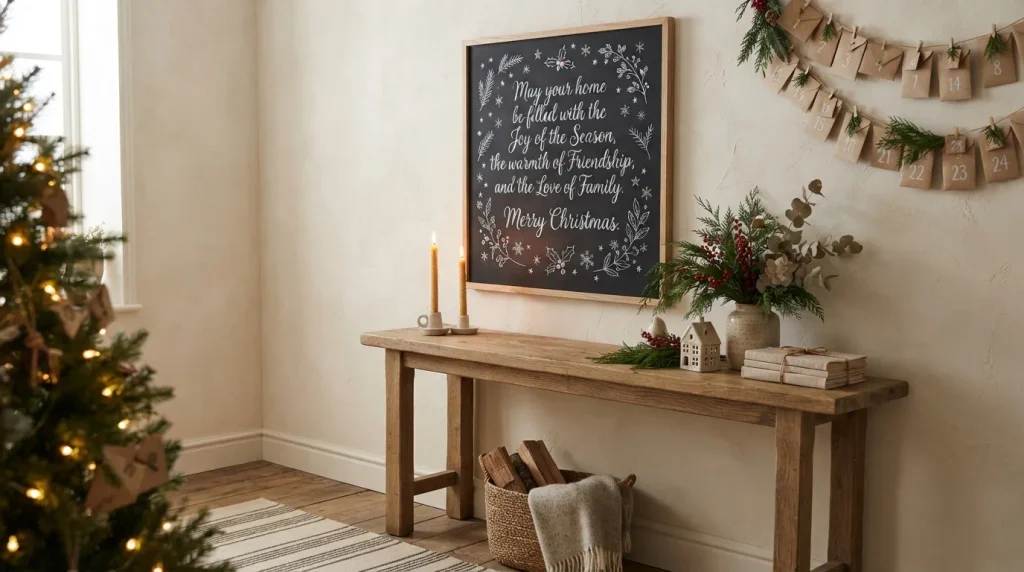
- Minimal lettering keeps the display clean, modern, and easy to recreate.
- Small greenery accents add Christmas character without overwhelming the message.
- White chalk provides crisp contrast and excellent readability.
- Leave generous black space to make the design feel intentional and sophisticated.
Sometimes a few carefully chosen details create more impact than a fully illustrated chalkboard. Center a simple Christmas greeting in large, elegant lettering, then add tiny evergreen sprigs, stars, or berry clusters around the edges. Keep the color palette restrained, using mostly white with one subtle accent color. The generous black space becomes part of the design, helping the lettering stand out immediately. This approach works beautifully in modern, Scandinavian, minimalist, and neutral homes where elaborate holiday artwork might feel too busy. It is also one of the easiest styles to recreate when time is limited.
The key to this look is restraint. Choose one strong message and avoid surrounding it with too many decorative elements. A fine chalk marker can create clean lettering, while small hand-drawn branches soften the edges without distracting from the words. Position the board somewhere visible, such as an entryway, kitchen shelf, mantel, or console table. Add nearby candles, natural greenery, or simple wooden accents to reinforce the understated style. In my experience, minimalist Christmas chalkboard art can feel especially elegant because it gives the eye somewhere to rest while still adding a clear seasonal touch to the room.
Conclusion
With the right idea, a simple chalkboard can become a memorable part of your holiday decor. These Christmas chalkboard art designs offer easy ways to add personality, warmth, and seasonal charm without spending much. Choose a style that fits your space, recreate it with chalk or markers, and make it your own. I’ve seen how small handmade touches can completely transform a room. Save this post on Pinterest so you can return to your favorite ideas, try one in your own space, and share the article with someone who loves creative Christmas decorating. Let your board bring a little extra holiday magic home.