How to Hang Christmas Garland Without Nails Easily Done
Garland is the swishy, graceful layer that makes a room feel finished — draped on the mantel, swept up the staircase, framing the front door. The trouble is that the traditional way of hanging it involves nails, screws, or staples exactly where you least want holes.
You absolutely do not need them. When you know how to hang christmas garland without nails, the whole job turns into clips, ties, hooks, and clever draping — and takedown in January is just as gentle. Your paint, banisters, and brick stay pristine while the greenery does all the showing off.
Below is the full step-by-step: measure first, anchor smart, swag evenly, and fix the little problems before they start. Work in order and your garland will look calm, lush, and professionally hung.
1. Measure the Run and Fluff the Garland First

Start by measuring the exact path your garland will travel — along the mantel, up the banister, around the door frame — and then add drape. Every lovely swag eats up length, so plan on roughly one and a half times the straight distance for gentle dips, or twice the distance for deep, dramatic swags.
Next, fluff before you hang. Artificial garland arrives flattened from the box, and shaping it on the floor — pulling branches outward in alternating directions — is ten times easier than shaping it overhead. Real garland benefits from an overnight drink in a bucket of water before it goes up. Doing this prep first is the unglamorous secret behind every effortless-looking display.
Length note: If two strands barely reach, overlap them generously in the middle and fluff the join. A fat, hidden seam looks better than a stretched, skimpy end.
2. Anchor with Adhesive Hooks on Mantels and Shelves
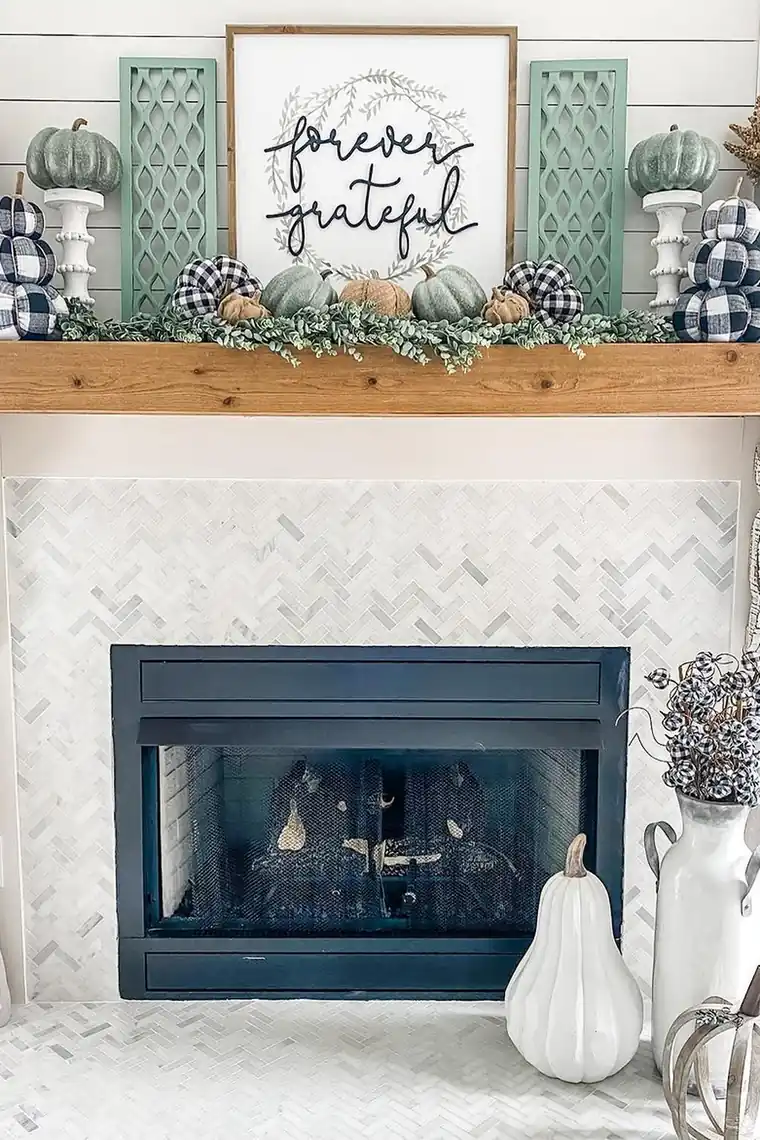
Photo credit: @wilshire_collections on Instagram
For mantels, bookcases, and shelf edges, adhesive hooks are the workhorse of no-nail decorating. Stick small clear hooks facing downward along the front edge every 18 to 24 inches, let them cure for an hour, then loop the garland's branch wire or a short twist of floral wire over each hook as you drape.
Hiding the hooks is easy — place them just under the top lip of the mantel where the garland's foliage spills over and covers them. This is the most reliable way to hang christmas garland without nails above a fireplace, and it leaves the wood or paint completely untouched when the strips come off in January.
Heat note: Keep real greenery a respectful distance from a working fireplace's heat, and never let garland drape where flames or a hot insert can reach it.
You May Also Like: 25 Christmas Mantel Ideas to Make Your Home Glow
3. Twist and Tie Garland Around Banisters and Railings

Staircases were practically made for the tie method. Start at the top post and wrap the garland in a loose spiral down the handrail, securing it with ribbon ties, floral wire, or clear zip ties every two or three feet. Feed the tie around the rail and through the garland's inner branches so the fastening hides inside the foliage.
Between ties, let the garland billow slightly rather than hugging the rail tight — that softness is what looks expensive. At the newel post, finish with a gathered swag, a bow, or a cluster of ornaments to anchor the whole run visually. Nothing touches a wall, nothing drills into wood, and the staircase becomes the showpiece of the house.
Ribbon note: Velvet or wired satin ribbon ties double as decoration. Tie them in simple bows on top of the rail and nobody will ever guess they are structural.
4. Drape Door Frames and Arches with Hooks and Drape

To frame a doorway or interior arch, place adhesive hooks at the two top corners and one at the top center, then drape the garland across so it falls in three soft swags. The corner hooks carry the weight; the center hook sets the middle dip. Step back and even out the falls on each side so they finish at the same height.
For the front door surround outside, clear outdoor-rated clips along the trim do the same job. If your trim is brick, brick clips grip the mortar joints and hold garland ends firmly without a single hole. Let a little extra foliage spill at the corners — door-frame garland looks best slightly generous rather than stretched tight.
Symmetry note: Mark the center hook's spot with a bit of painter's tape before you stick anything. Balanced swags start with a truly centered middle point.
You May Also Like: 23 Front Porch Christmas Decor Ideas for a Festive Welcome
5. Layer Stockings, Lights, and Ornaments After It Is Secure

Photo credit: @balsamhill on Instagram
Once the garland is holding its own weight confidently, decorate it in place. Weave a strand of warm white fairy lights through the branches first, working from the plug end outward. Then tuck in ornaments, pinecones, berry picks, and ribbon tails, pushing each pick deep so gravity works for you instead of against you.
Add the heavy pieces near the anchor points, where the garland is strongest, and keep the mid-swag sections light and airy. Stockings hung from the same mantel garland should hang from their own dedicated hooks nearby rather than from the greenery itself — the garland is a backdrop, not a load-bearing beam.
Order note: Always thread lights before ornaments. Trying to weave a cord around hung baubles is how ornaments meet the floor.
6. Protect Surfaces Wherever Garland Touches

The hidden half of hanging christmas garland without nails is making sure a month of contact leaves no trace. Real pine and cedar can weep sap onto painted mantels, and wire ends inside artificial garland can scratch wood as pieces shift. A strip of felt, a folded ribbon, or clear shelf liner under resting garland solves both problems invisibly.
Wipe up any sap promptly with a dab of rubbing alcohol rather than letting it set for weeks. On delicate or antique wood, a layer of kraft paper or felt under the whole mantel run is cheap insurance that completely disappears under the foliage.
Scratch note: Bend every floral wire and zip tie end inward, into the branches, the moment you fasten it. Thirty seconds of tidiness protects a whole season of surfaces.
You May Also Like: 25 Christmas Wreaths Ideas for a Beautiful Holiday Welcome
7. Step Back and Even Out the Swags
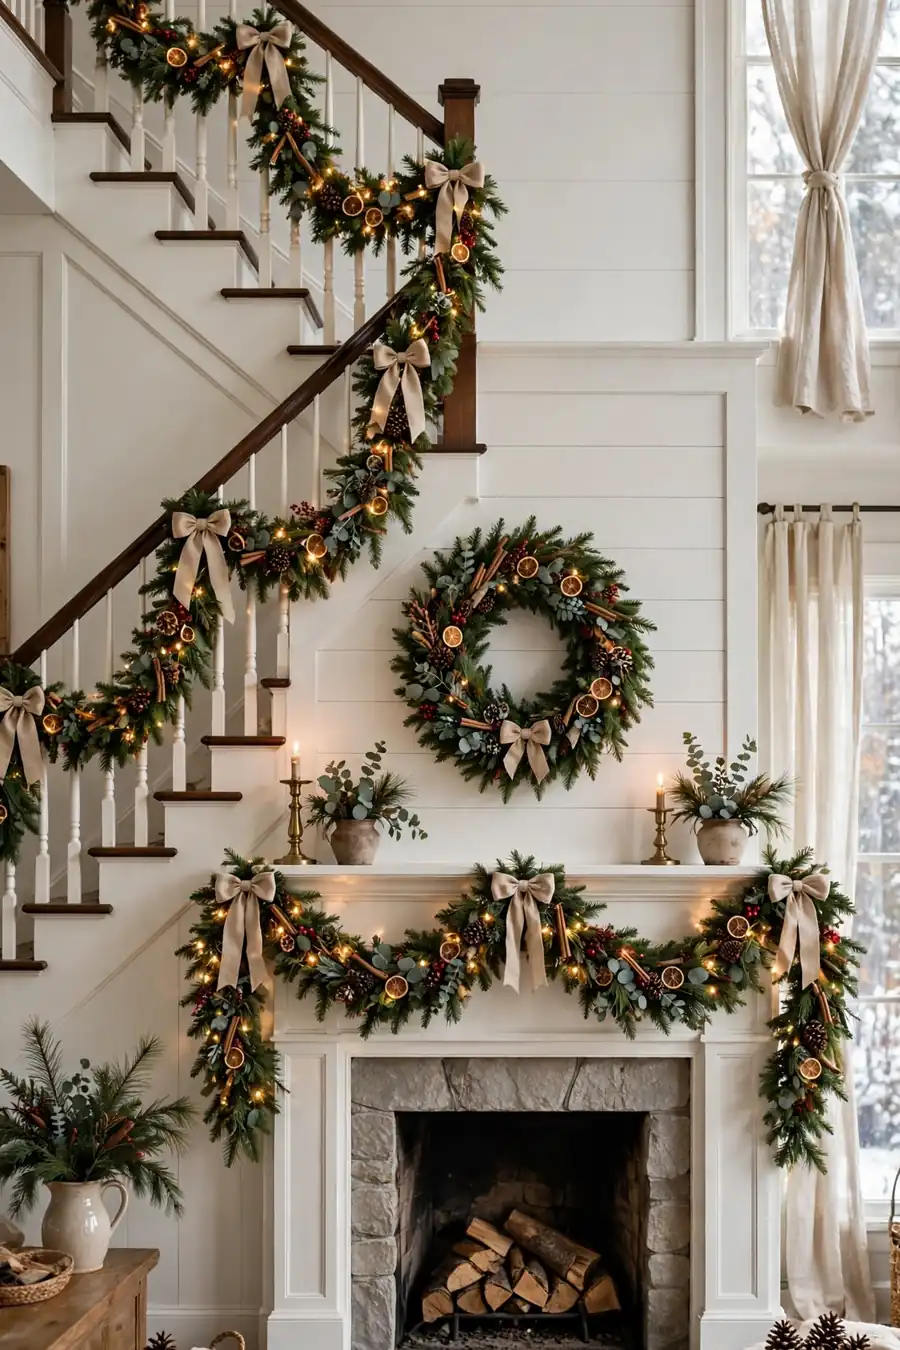
Finish the way decorators do: from across the room, or from the street for outdoor runs. Look for swags that dip noticeably deeper than their neighbors, ends that finish at different heights, and any spot where the garland pulls tight and thin instead of resting full.
Adjust one anchor at a time, lifting and re-seating rather than yanking. Fluff the branch tips upward at each dip to fake extra fullness, and tuck one or two filler picks into any thin place. When the line of the garland looks like one calm, even rhythm from end to end, you are done — and everything comes down in January by simply unhooking, untwisting, and lifting away.
Takedown note: Photograph your finished garland before you remove it. Next December you will recreate it in half the time, hooks in exactly the right places.
Quick Fixes for Common Garland Problems

- Sagging middle: Add one more hook or tie at the center of the dip. Most sagging is simply anchors spaced a little too far apart.
- Sliding on a banister: Tighten ties to every 18 inches and grip the garland's inner wire, not just its outer branches, so it cannot roll.
- Too short to reach: Overlap two strands by a full foot in the middle, fluff both layers together, and hide the join under a bow or ornament cluster.
- Hook popped off: Clean the spot with rubbing alcohol, reapply a fresh strip, and give it the full cure hour. Dust or cold is almost always the culprit.
- Garland looks thin: Twist a second inexpensive strand through the first, or tuck in sprigs from the yard — cedar, pine, and magnolia leaves all layer beautifully.
- Wire ends scratching: Bend every cut end back into the foliage, or cap it with a tiny wrap of floral tape.
- Uneven swags: Adjust from the anchor points, not the middle of the swag, and match dip depths by counting branch lengths between hooks.
Frequently Asked Questions
How do I hang garland on a mantel without nails or screws?
Stick small clear adhesive hooks facing down along the front edge of the mantel every 18 to 24 inches, let them cure for an hour, and loop the garland's wire or floral-wire ties over them. The foliage spills over and hides the hooks completely.
Will adhesive hooks hold heavy real garland?
They will if you space them closer together — about every 12 to 18 inches — and choose hooks rated above the weight each span carries. Real garland is heaviest when fresh, so generous spacing math keeps it safe all season.
How do I keep garland from sliding down the banister?
Tie or wire it to the handrail every two to three feet, gripping the garland's inner wire core. Ribbon ties work beautifully and double as decoration. On very smooth rails, closer spacing — every 18 inches — stops any creep.
How much garland do I need for a doorway or mantel?
Measure the straight distance and multiply by about 1.5 for soft swags or 2 for deep, dramatic ones. A standard 6-foot mantel typically takes 9 to 12 feet of garland to look full and graceful.
You Would Also Love
💬 Join Our Decor Community
Decor Fern | Home Decor Ideas & Inspiration — share your rooms, get ideas, and chat with fellow decor lovers.
Join the Facebook GroupFollow on Facebook



One Comment