21 DIY Christmas Ornament Ideas for Beginners to Make at Home
There is a special kind of pride in pointing at your Christmas tree and saying, “I made those.” Handmade ornaments turn a tree into a story — the salt dough stars from a slow Sunday, the orange slices that made the whole kitchen smell like Christmas, the bauble a friend painted with you over hot chocolate. And here is the part nobody believes until they try it: the best-looking handmade ornaments are also the easiest ones. None of the 21 projects in this guide needs artistic talent, a craft room or expensive tools. If you can pour, fold, tie or glue, you can fill an entire tree this weekend — and most of these cost less than a dollar each to make. Unlike a store-bought set, every one of them is made at the kitchen table, mostly from things you already own.

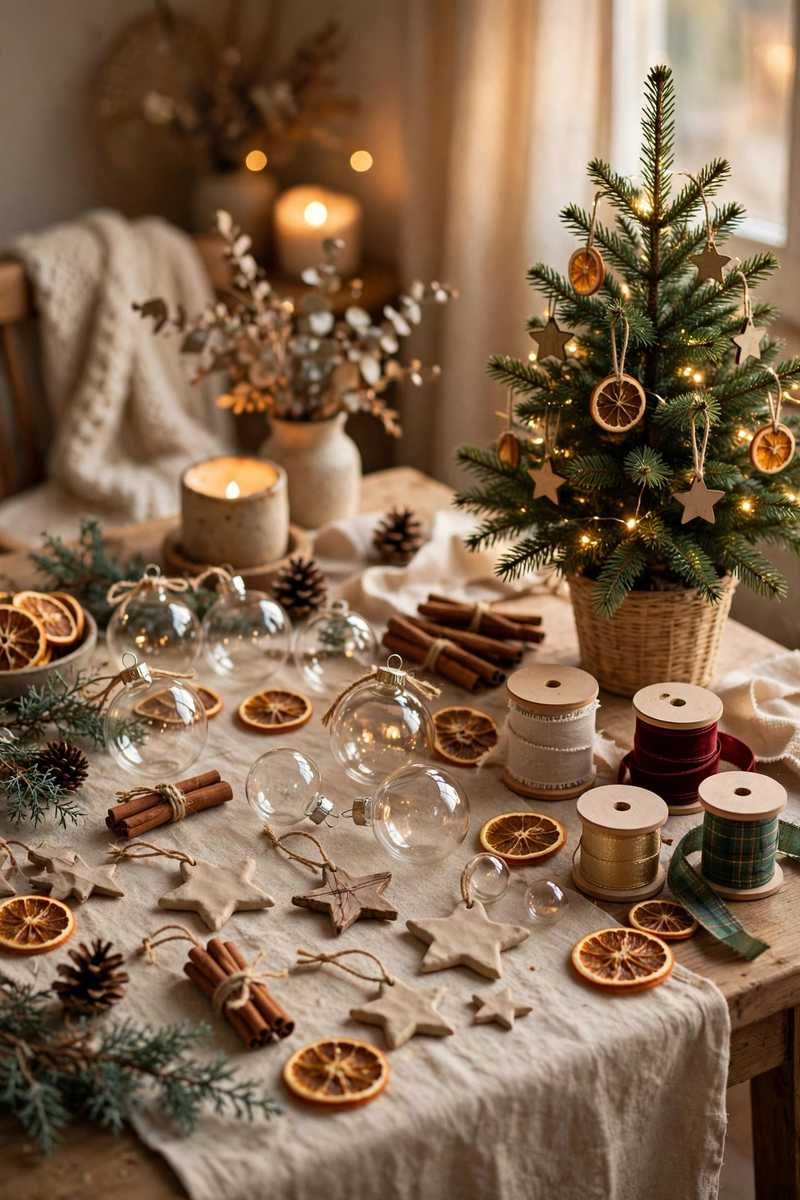
The projects are grouped by what they are made from — fillable baubles, kitchen ingredients, paper, nature finds, and fabric — so you can shop once, work through one group in a single sitting, and repeat your favorite technique in different colors. Every idea lists exactly what you need, the method in one breath, and an honest time and difficulty rating. If this is your first handmade tree, pair this guide with our ultimate Christmas decorating guide for the full decorating order, and keep our beginner tree guide open for the fluffing and lighting basics underneath it all.
★ QUICK FACTS
| TIME 5–20 minutes per ornament; a full tree fills one relaxed weekend |
BUDGET Most ornaments cost under $1; the whole starter kit runs $15–$25 |
| DIFFICULTY True beginner — pouring, folding, tying and gluing only |
BEST FOR First trees, tight budgets, craft nights and unbreakable decor |
✓ THE BEGINNER ORNAMENT KIT — SUPPLIES CHECKLIST
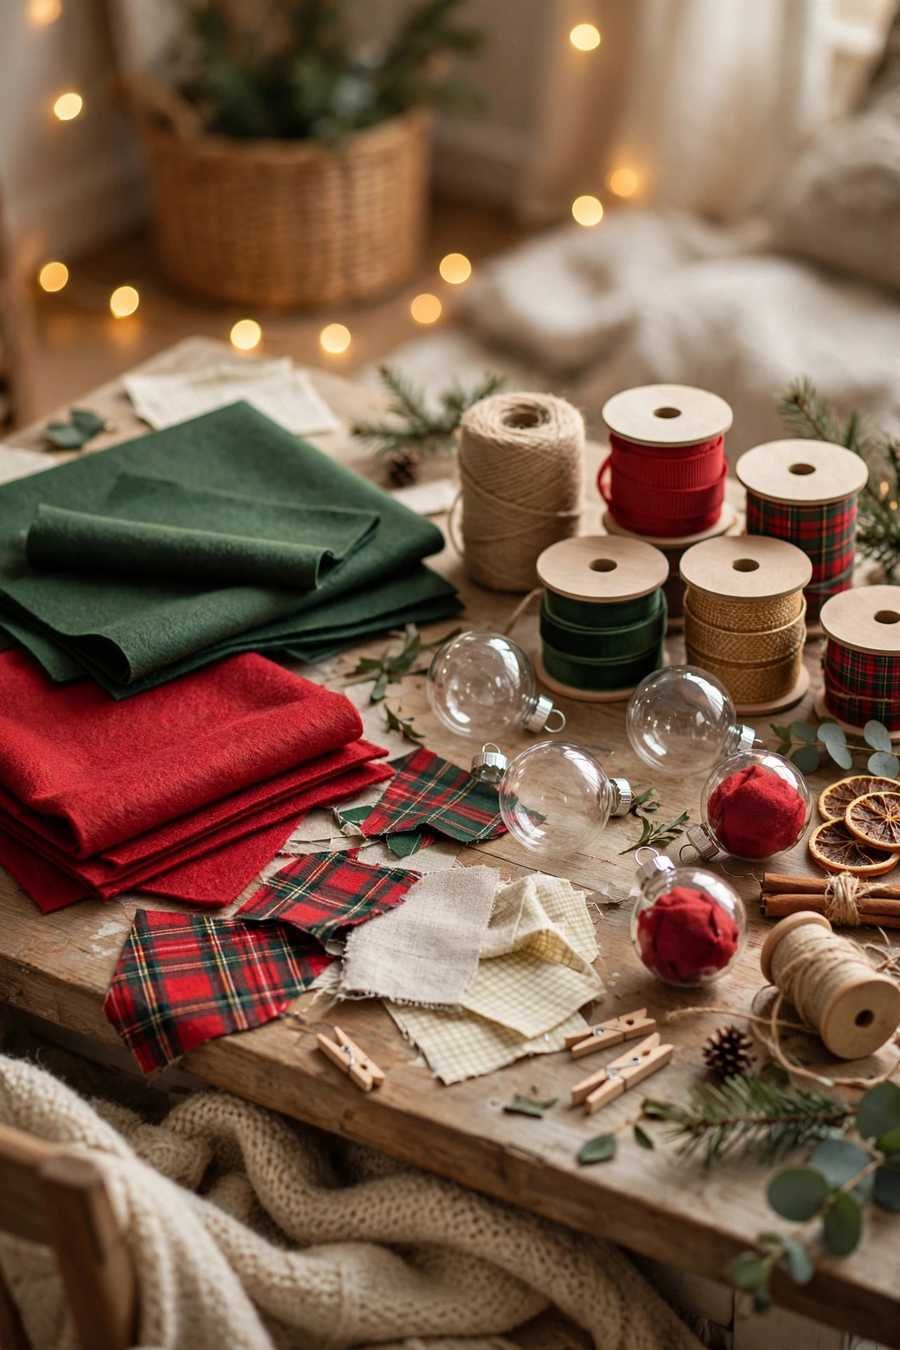
Buy these once and all 21 projects are covered. Everything is a standard craft-store or pantry item, grouped by the cluster that uses it.
| FILLABLE BAUBLES Clear plastic fillable baubles (the kind that split in half — unbreakable) · acrylic craft paint in 2–3 colors · faux snow · fine glitter or metallic confetti · tiny bottle-brush trees · paper strips for scrolls |
FROM THE KITCHEN Plain flour + table salt (salt dough) · ground cinnamon + plain applesauce · oranges for drying · whole cinnamon sticks · fresh rosemary sprigs · cookie cutters + a drinking straw |
| PAPER & CARD White paper or light card stock · old book pages or sheet music · patterned scrapbook paper · kraft gift tags · scissors · glue stick · paper fasteners (brads) |
NATURE FINDS + FABRIC & FINISHING Pinecones · straight twigs · acorns · evergreen clippings · felt sheets · fabric scraps (old shirts count) · hot glue gun + sticks · twine · ribbon offcuts · a few buttons |
Cluster One — Fillable Baubles: Five Minutes, Zero Skill

1. Snowy Scene Baubles
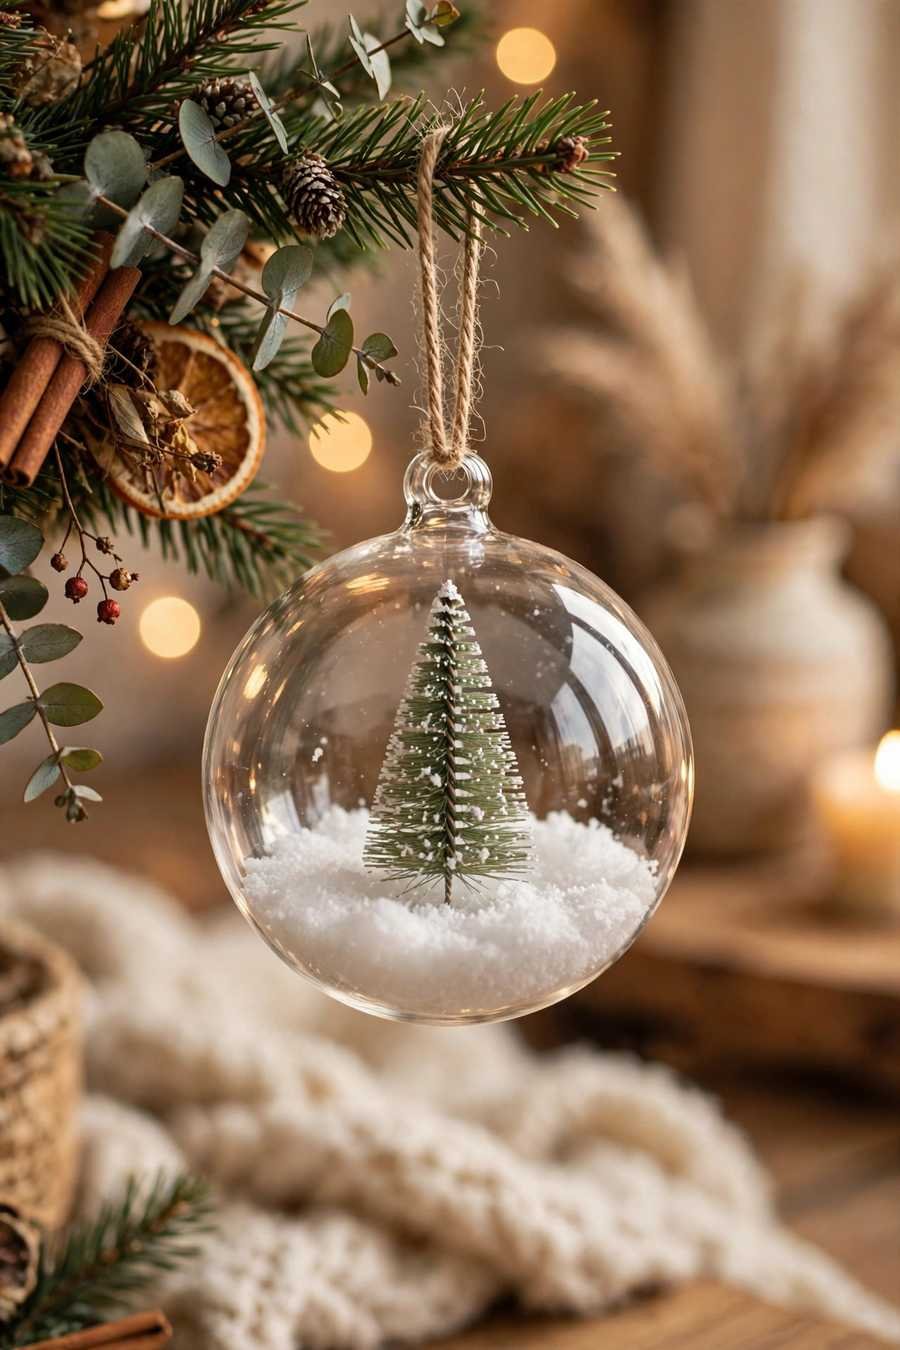
You need: a clear fillable bauble, a pinch of faux snow, one tiny bottle-brush tree, hot glue. Method: glue the little tree to the inside base of one bauble half, sprinkle snow around its feet, close the bauble and tie on a ribbon hanger. It looks like a miniature snow globe scene and reads beautifully against warm tree lights. Time: 5 minutes. Difficulty: Easy.
2. Paint-Swirl Baubles
You need: a clear bauble, two or three acrylic paint colors, a paper cup. Method: pop the cap off, squirt paint inside, then rotate the bauble slowly until the inside is fully coated; rest it upside down in the cup overnight so the excess drains and dries. Two colors swirled together give a marble effect that looks genuinely expensive. If you want the palette to match your tree, run it through our color palette generator before you buy paint. Time: 10 minutes + overnight drying. Difficulty: Easy.

3. Confetti and Glitter Baubles
You need: a clear bauble, metallic confetti or fine glitter, ribbon. Method: fill the bauble about a third full, close it, and add a ribbon hanger — that is the whole project. The trick is restraint: a third full sparkles and moves when the tree lights catch it, while a stuffed bauble just looks heavy. Static making the confetti cling to the sides is a feature, not a flaw. Time: 5 minutes. Difficulty: Easy.

4. Wish Scroll Baubles
You need: a clear bauble, a small strip of paper, a pen, twine. Method: write a wish, a name or the year on the strip, roll it into a tight scroll, tie it with twine and drop it inside the bauble. Make one every year and the tree slowly becomes a record of your Christmases — these are the ornaments people ask about. The scroll shows through the clear shell like a message in a bottle. Time: 10 minutes. Difficulty: Easy.

Cluster Two — From the Kitchen: The Ornaments That Smell Like Christmas

5. Salt Dough Stars and Hearts
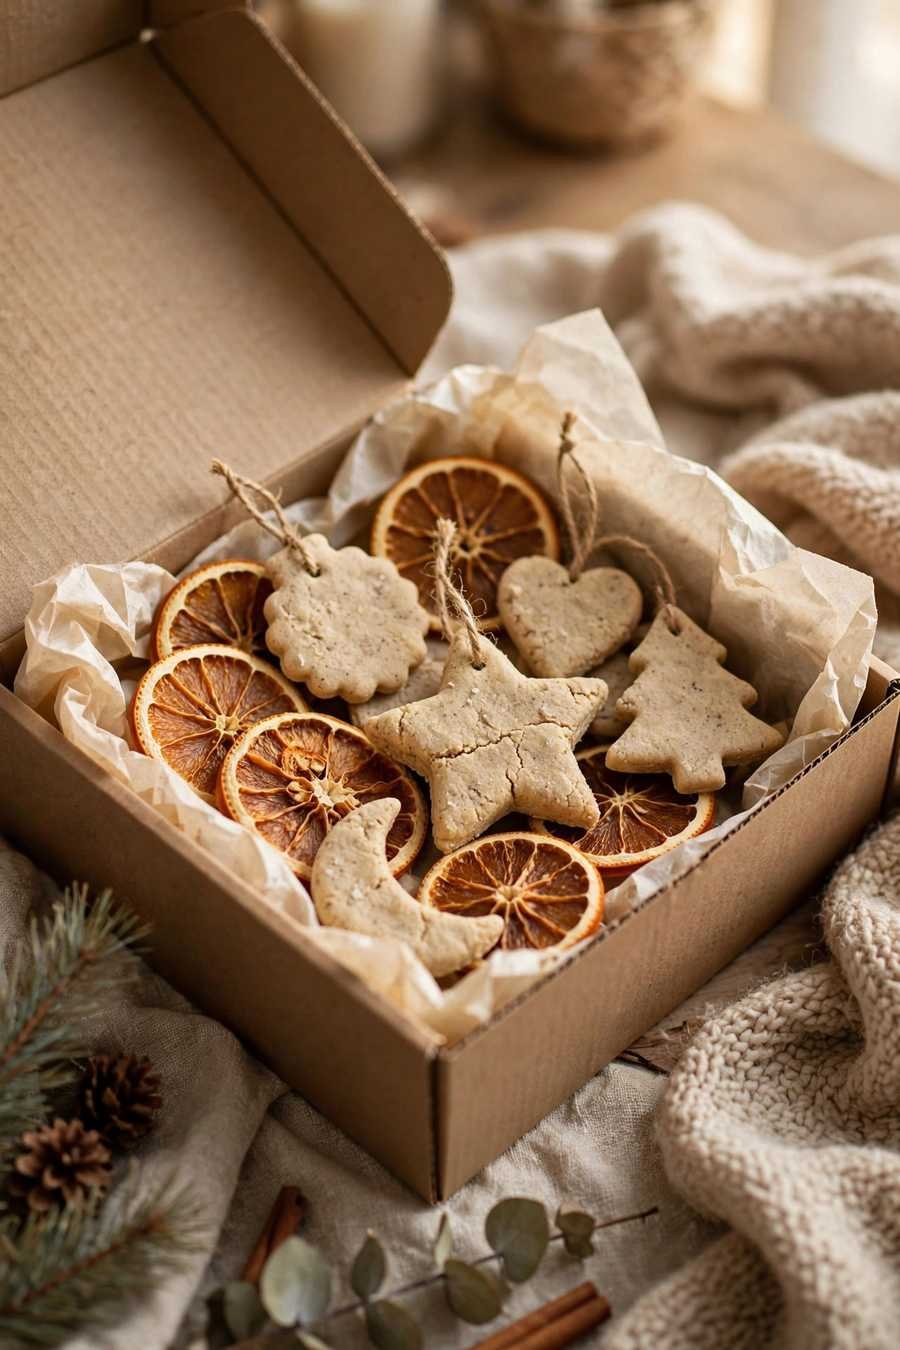
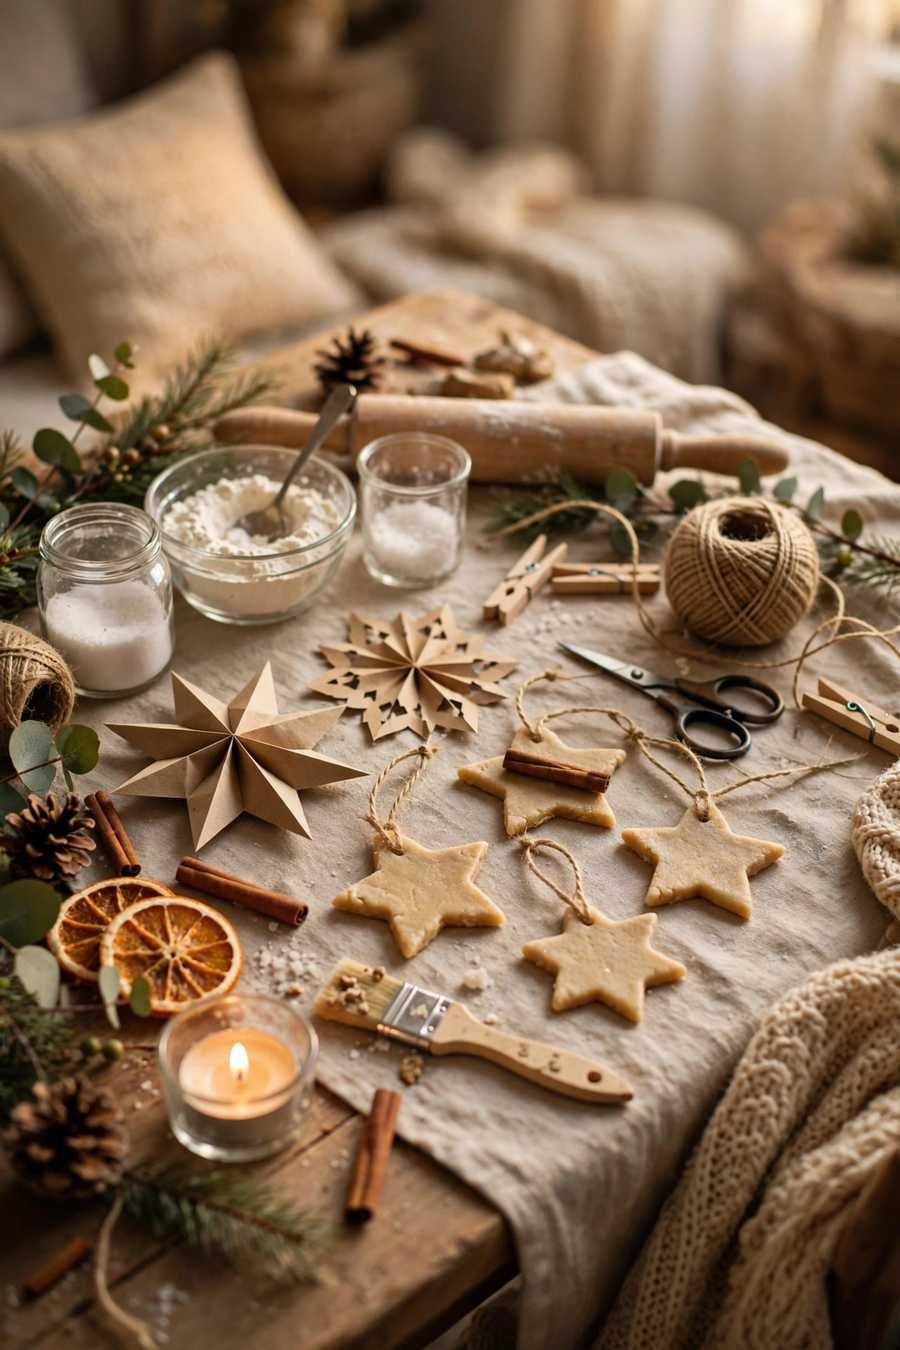
You need: 1 cup flour, ½ cup table salt, ½ cup water, cookie cutters, a straw. Method: mix and knead the dough, roll it 5mm thick, cut shapes, poke a hanging hole with the straw, press a pattern in with a fork or a piece of lace, then bake at your oven’s lowest setting for 2–3 hours (or air-dry for two days). Paint them white, red or gold — or leave them plain for a Scandinavian look. One batch makes fifteen to twenty ornaments, so this is also the fastest project for filling a big tree on a small budget. Time: 20 minutes + drying. Difficulty: Easy.

6. Dried Orange Slices
You need: oranges, a sharp knife, twine, optional star anise. Method: slice the oranges about 5mm thick, pat the slices dry with a towel, then dry them in the oven at its lowest temperature for 2–3 hours, turning once — they are done when they feel light and papery. Thread twine through the top, or glue a star anise to the center for a finished look. They glow like stained glass when a tree light sits behind them. Time: 15 minutes hands-on + oven time. Difficulty: Easy.
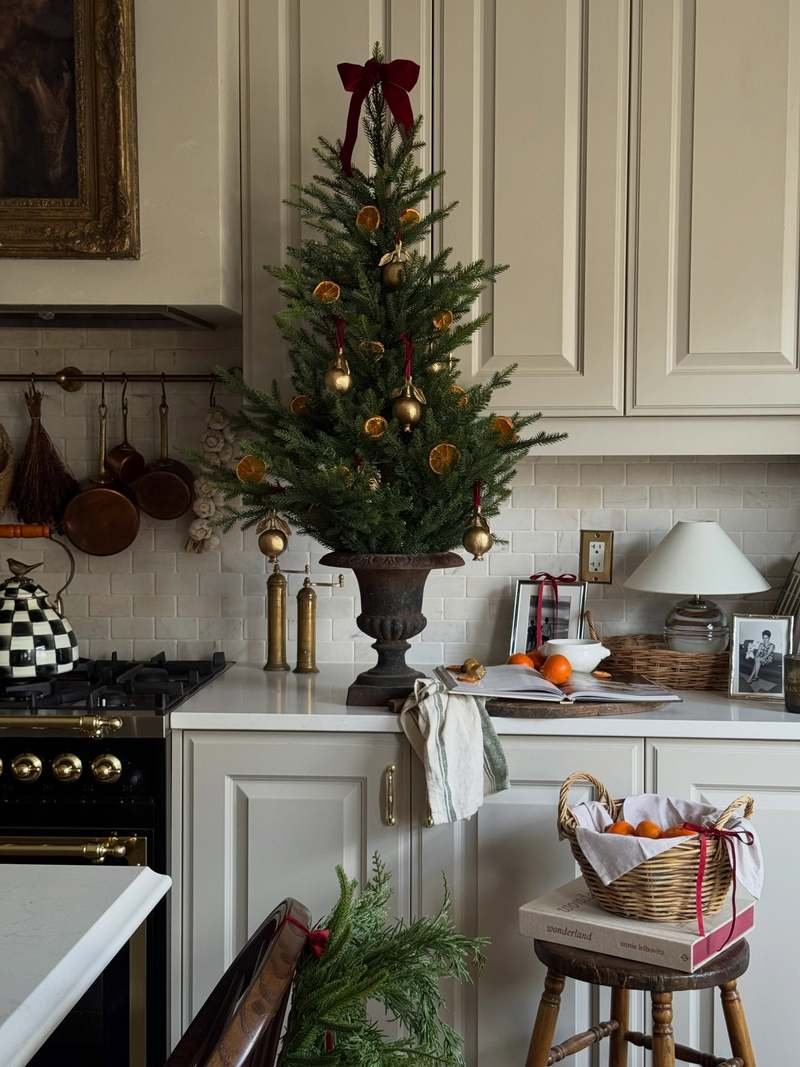
Photo: Salina Maria (@salinamariahome) on Instagram
7. Cinnamon-Applesauce Dough Ornaments
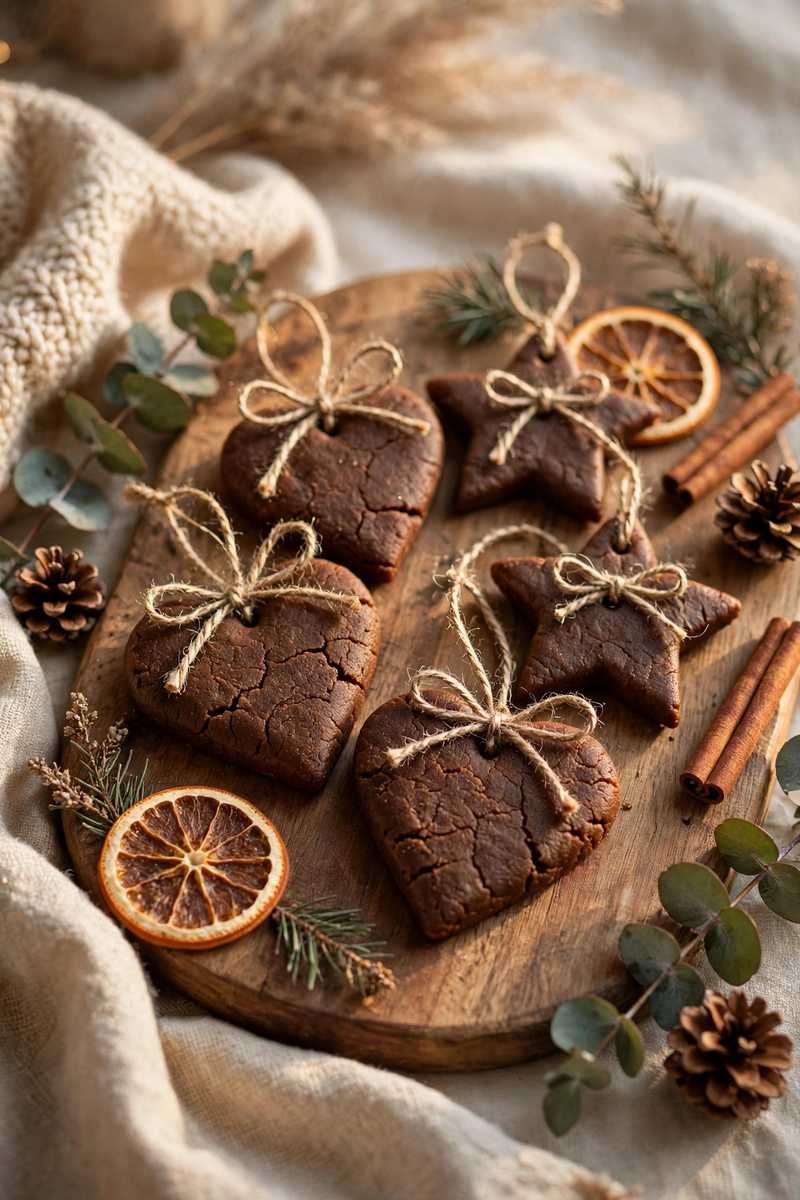
You need: ground cinnamon and plain applesauce in roughly equal parts, cookie cutters, a straw. Method: stir the two into a stiff dough, roll it out between two sheets of baking paper, cut shapes, poke a straw hole, then air-dry for 24 hours or bake low for 1–2 hours. Two ingredients, no cooking skill, and the scent genuinely lasts for seasons — these are the ornaments that make guests lean into the tree. Time: 15 minutes + drying. Difficulty: Easy.
8. Cinnamon Stick Bundles
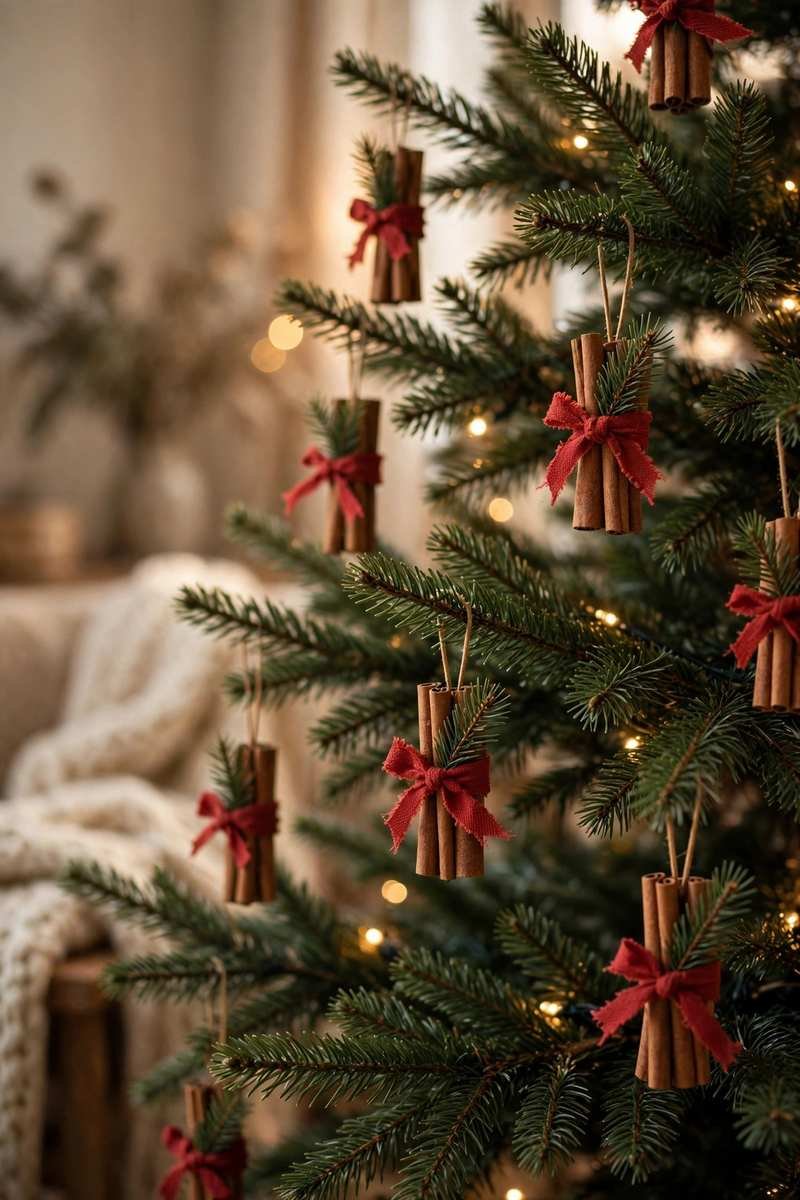
You need: whole cinnamon sticks, twine, a scrap of ribbon, a tiny sprig of greenery. Method: bundle three sticks together, wrap the middle tightly with twine, finish with a small ribbon bow and the greenery tucked under it, and add a twine hanging loop. They look like tiny firewood bundles and suit rustic, farmhouse and woodland trees perfectly. Group three bundles at different heights on the same branch area for the full effect. Time: 10 minutes. Difficulty: Easy.
9. Rosemary Mini Wreaths
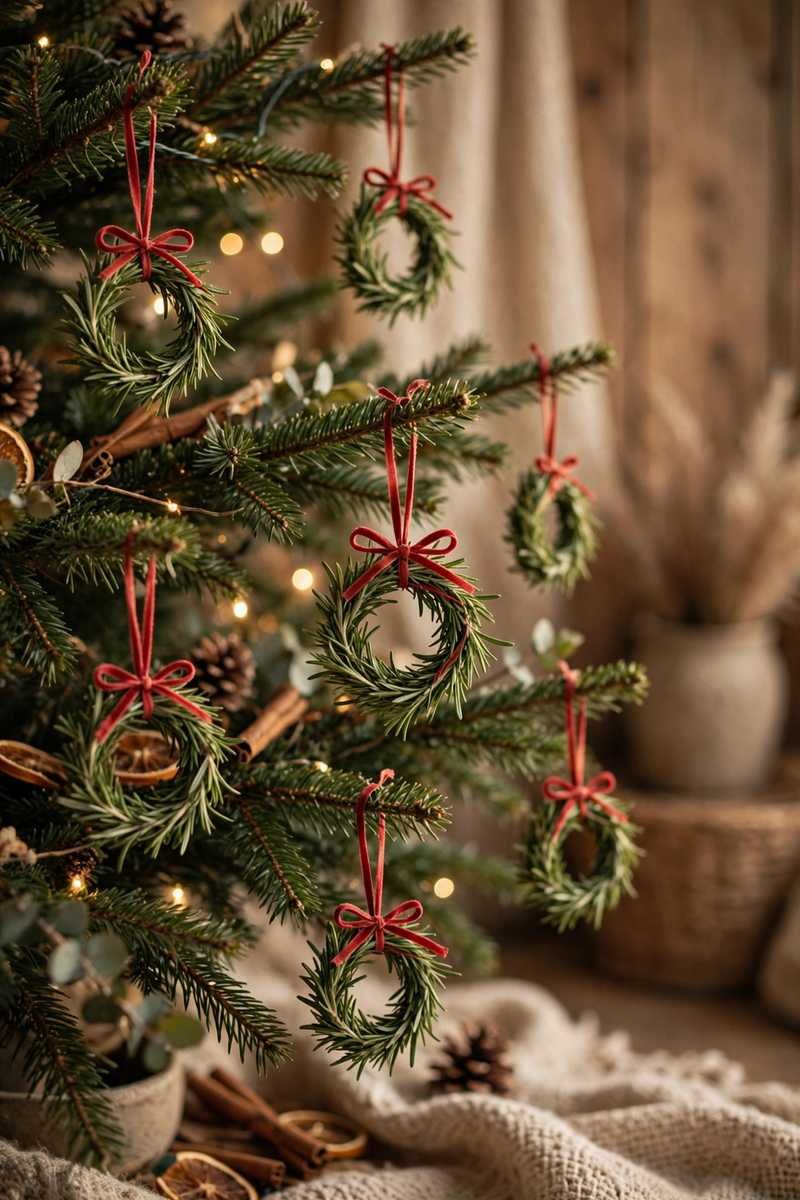
You need: long fresh rosemary sprigs, thin wire or twine, narrow ribbon. Method: soak each sprig in warm water for ten minutes first — this makes it bend without snapping — then curve it into a small circle, overlap the ends, and bind them with wire or twine before adding a tiny bow. The wreaths dry in place on the tree, keep their shape, and smell wonderful for the whole season. Time: 10 minutes. Difficulty: Easy, with the soaking trick.
PRO TIP: Work like a bakery, not a jeweler. Set up an assembly line and make all of one design in a single sitting — and start with the projects that need drying time (salt dough, cinnamon dough, paint-swirls) so they cure while you make the instant ones. By the second day, everything is ready to hang at once, and your hands have learned each technique well enough that the last ornaments look noticeably better than the first.
Cluster Three — Paper and Card: The Almost-Free Ornaments
10. 3D Paper Snowflakes
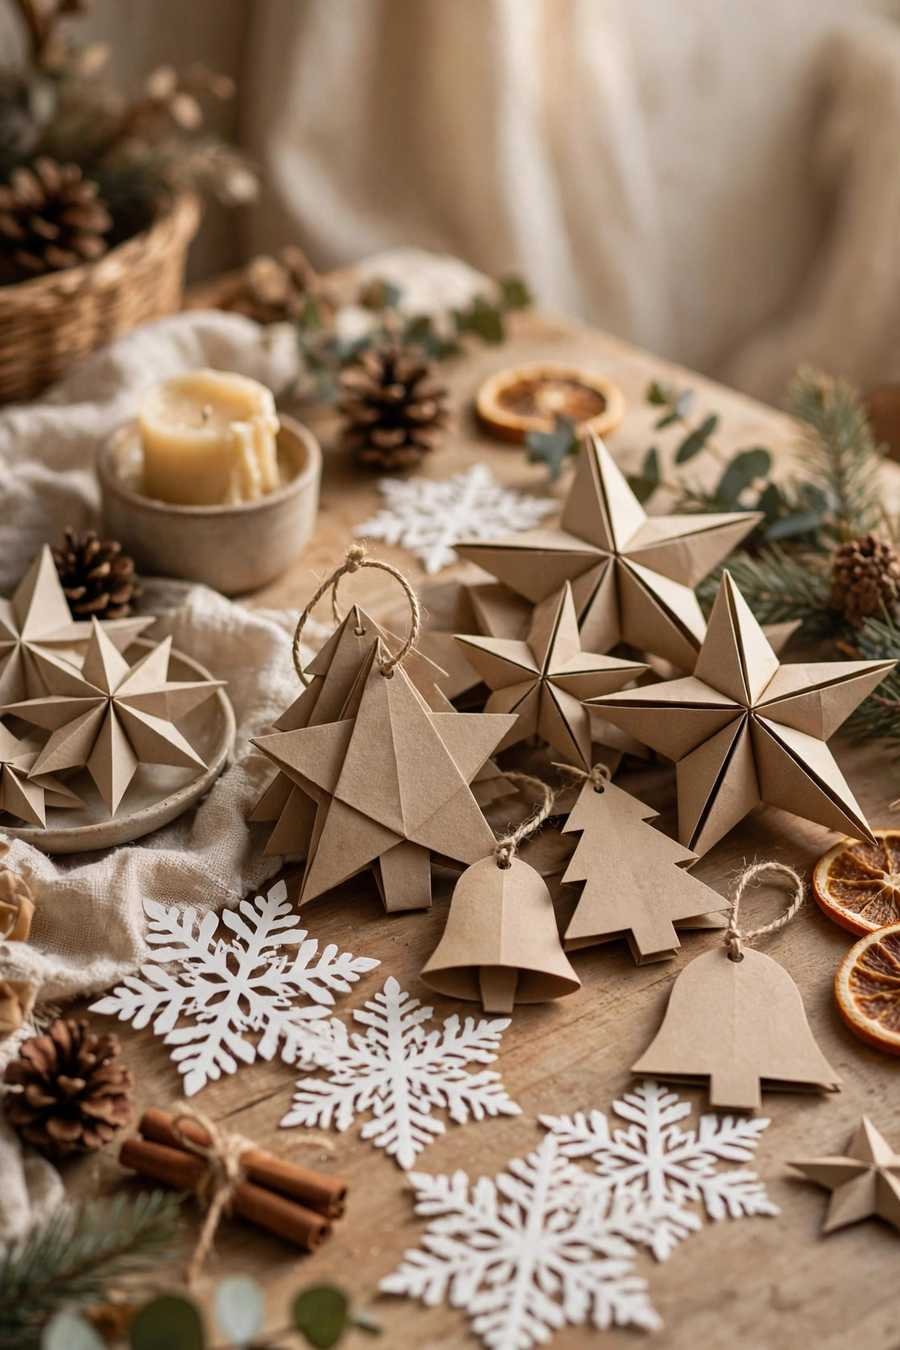
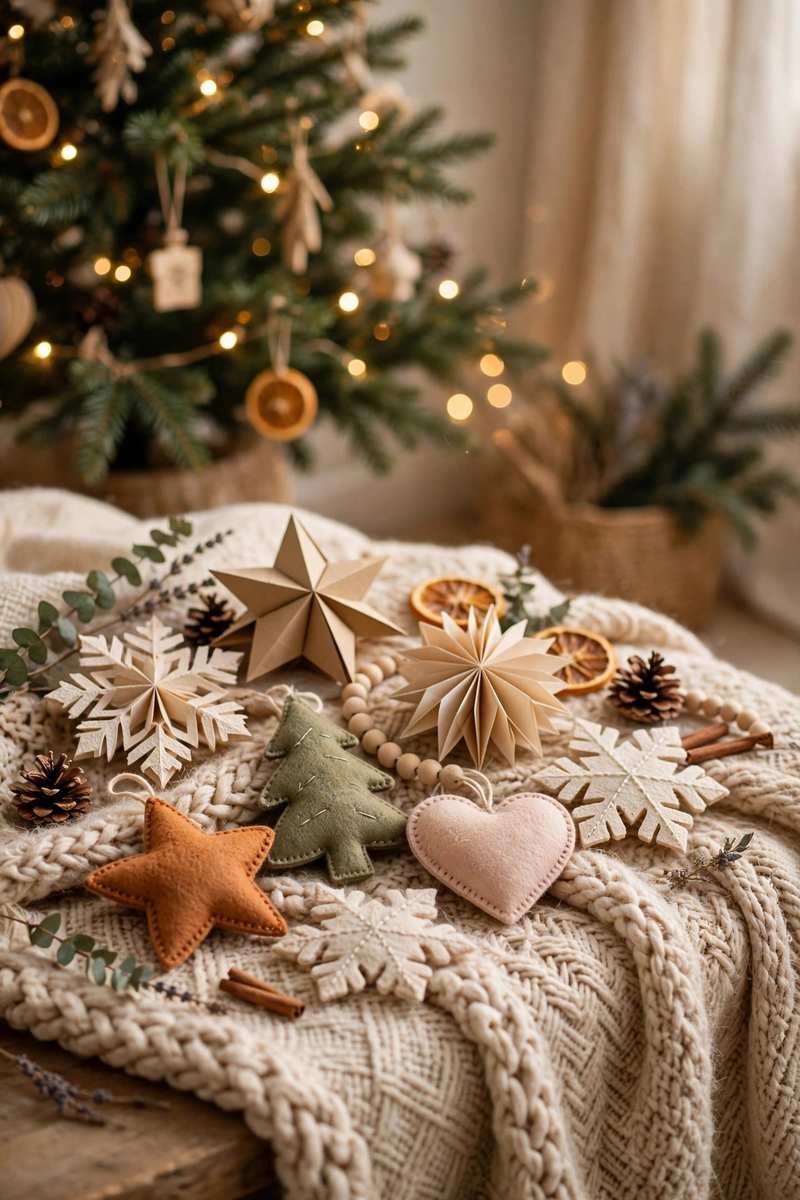
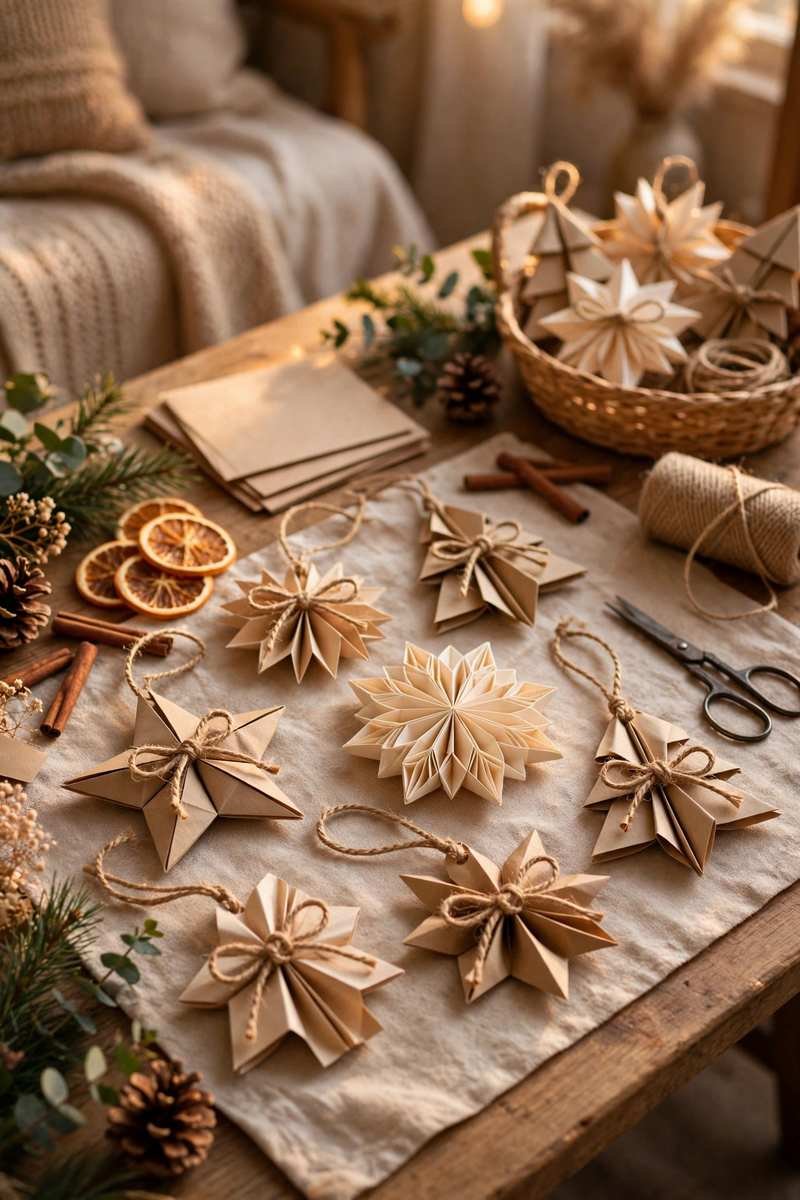
You need: six squares of white paper, scissors, a glue stick or stapler. Method: fold each square diagonally, cut three slits toward the fold without cutting through, unfold, then roll and glue alternating points together to form a curled petal; join six petals into one snowflake. The first one takes concentration; every one after it is quick. They are big, light and dramatic — perfect for filling gaps on larger trees. Time: 15 minutes each. Difficulty: Easy after the first.

11. Book-Page Stars
You need: pages from a damaged old book or printed sheet music, a glue stick, twine. Method: fold each page into a tight accordion, fold the strip in half, tie twine around the center, then fan both ends out into a star and glue the meeting edges together. The printed text becomes the pattern, so no two are alike. Only ever cut up books that are already falling apart — charity-shop rejects are ideal. Time: 10 minutes. Difficulty: Easy.

12. Paper Strip Baubles
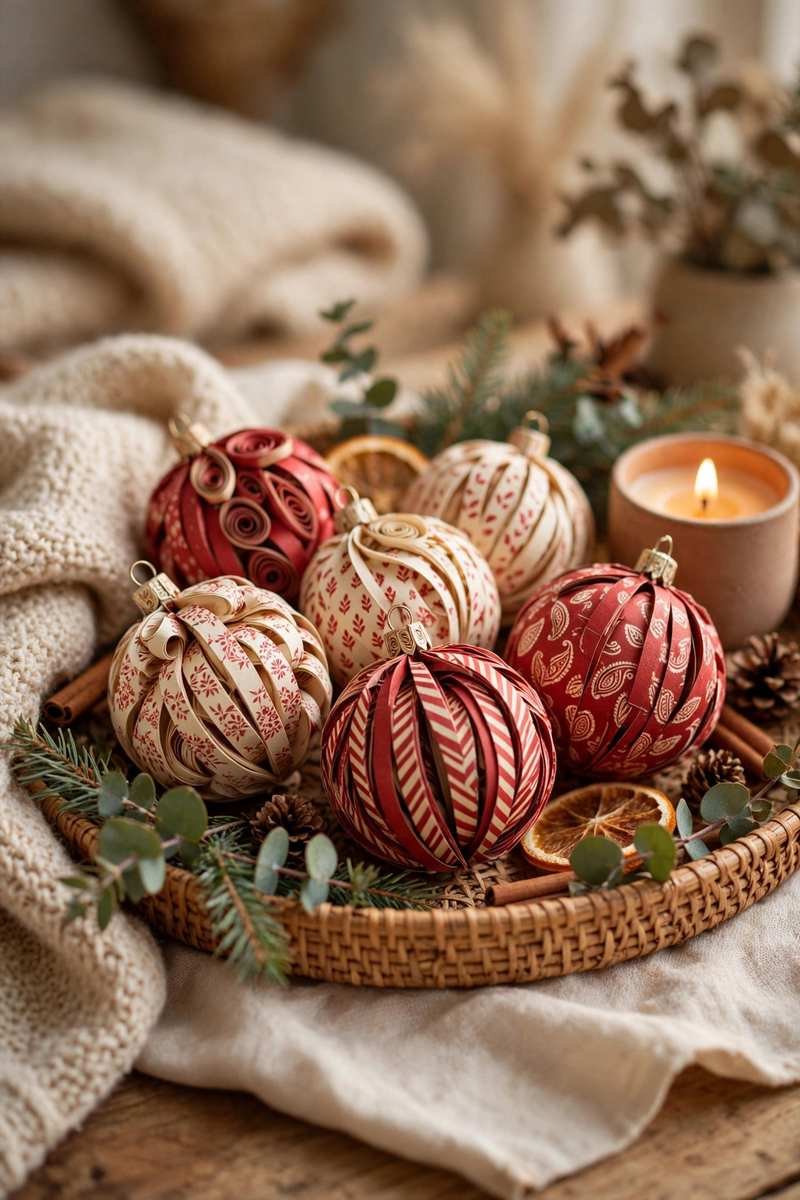
You need: eight strips of patterned paper (about 2cm × 15cm), two paper fasteners (brads). Method: stack the strips, push a fastener through both ends, then fan the strips out evenly into a sphere and hang it from the top fastener. Scrapbook paper, wrapping paper offcuts and even last year’s Christmas cards all work — match the paper to your tree colors and they look boutique-bought. Time: 15 minutes. Difficulty: Easy.
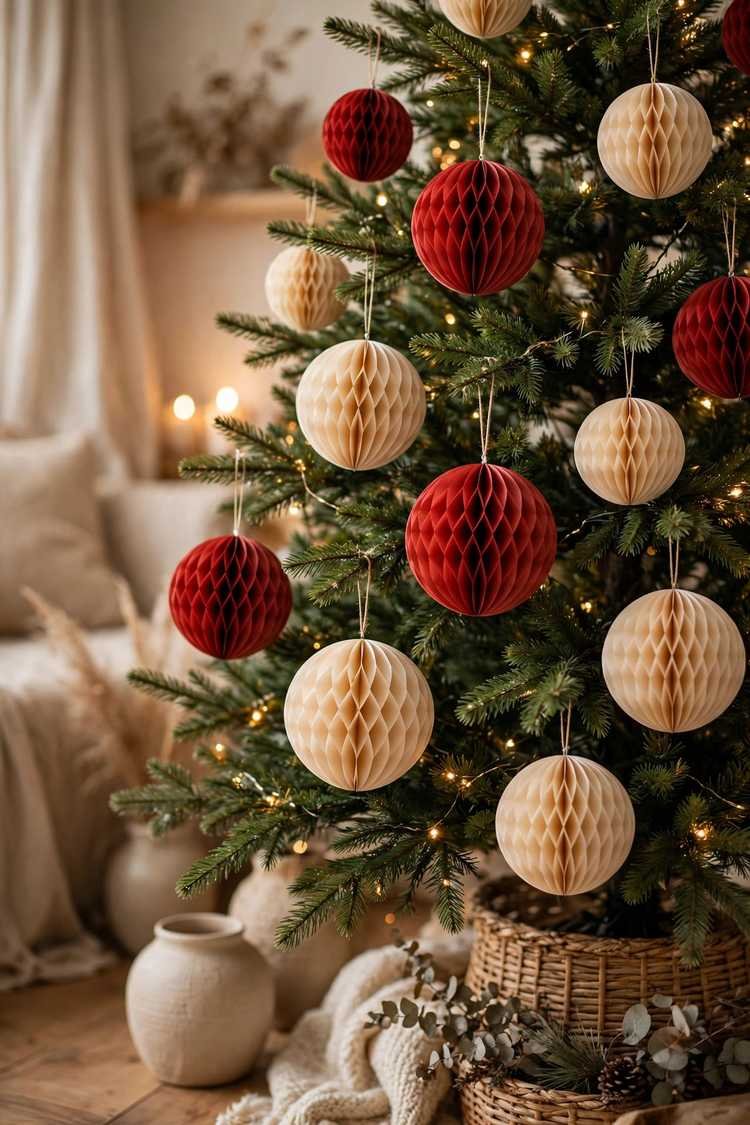
13. Honeycomb Paper Balls
You need: tissue paper or thin craft paper, a glue stick, a semicircle template cut from card. Method: stack eight to ten sheets, run glue lines across them in alternating positions, cut the stack into a semicircle, then unfold it into a ball and glue the last edges closed. This is the fiddliest project in the guide, but the honeycomb texture is the one that makes people ask where you bought them. Work over a tray — cut tissue drifts everywhere — and hang each finished ball from a simple thread loop through its top join. Time: 20 minutes. Difficulty: Medium — thin paper is the secret.
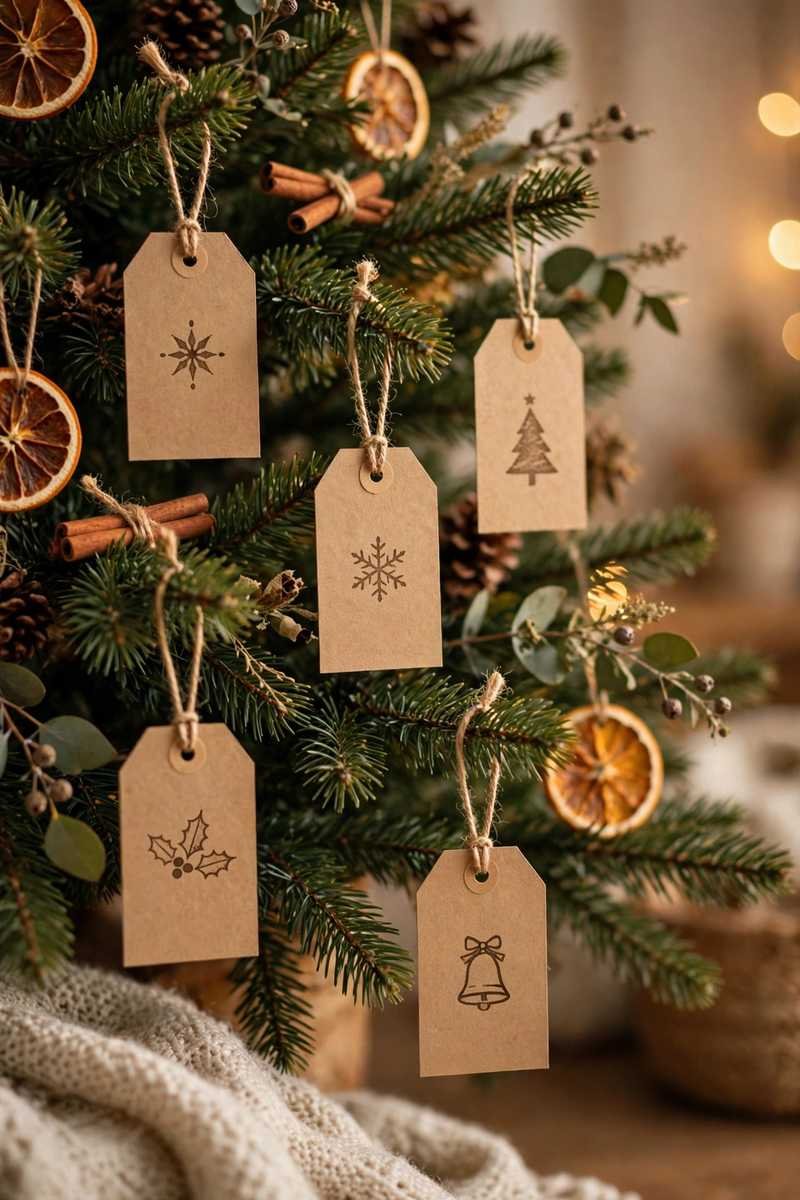
14. Kraft Tag Ornaments
You need: plain kraft gift tags, a white paint pen or simple stamps, twine. Method: draw or stamp one simple motif per tag — a star, a tree, a scattering of dots — thread the twine, and hang. Write a name on each and they double as place cards, gift tags or a family advent. Their flat shape also makes them the easiest ornaments to store: they stack in an envelope. Time: 5 minutes each. Difficulty: Easy.
Cluster Four — Nature Finds: A Walk Is Your Shopping Trip

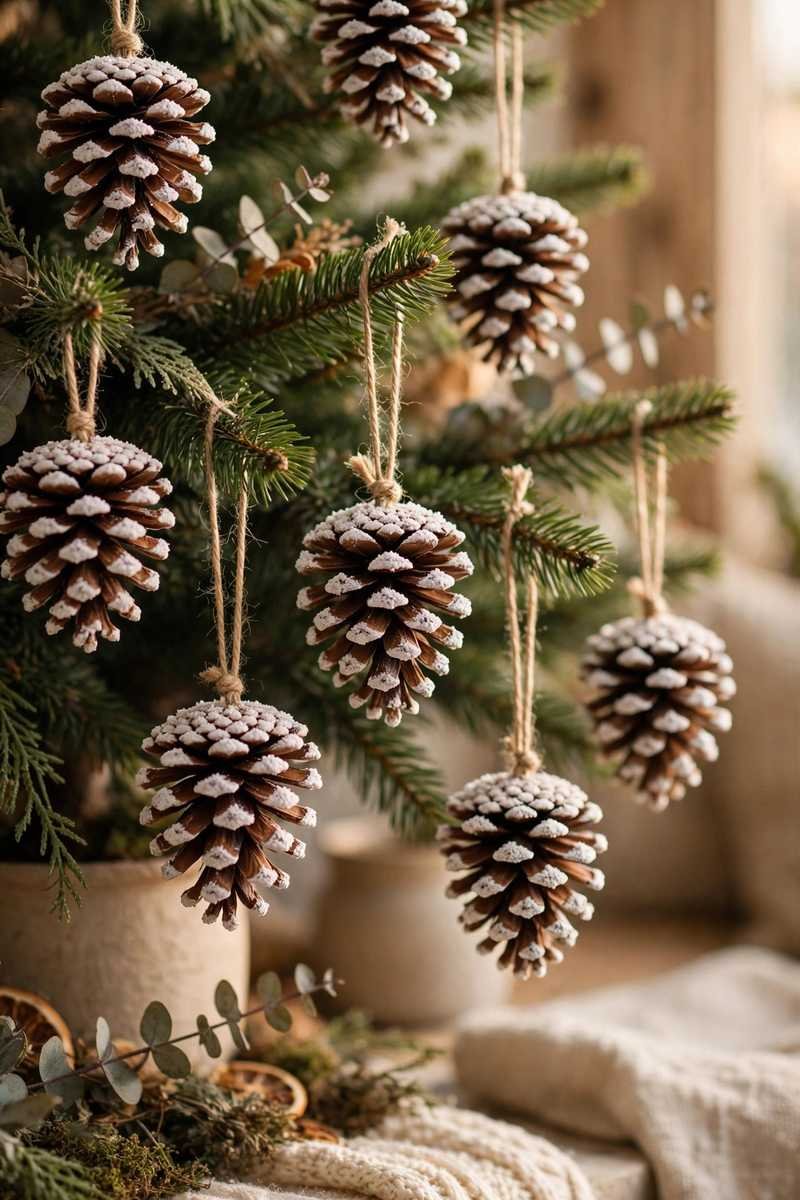
15. Frosted Pinecones
You need: pinecones, white acrylic paint, a stiff brush, twine, hot glue. Method: first bake gathered cones at 100°C (200°F) for 30 minutes — this cleans them and opens them fully — then dry-brush white paint onto just the tips of the scales for a snow-kissed effect, and glue a twine loop into the top. Nothing about them is fragile, so they are ideal for the lower branches toddlers and cats can reach. Time: 10 minutes + drying. Difficulty: Easy.
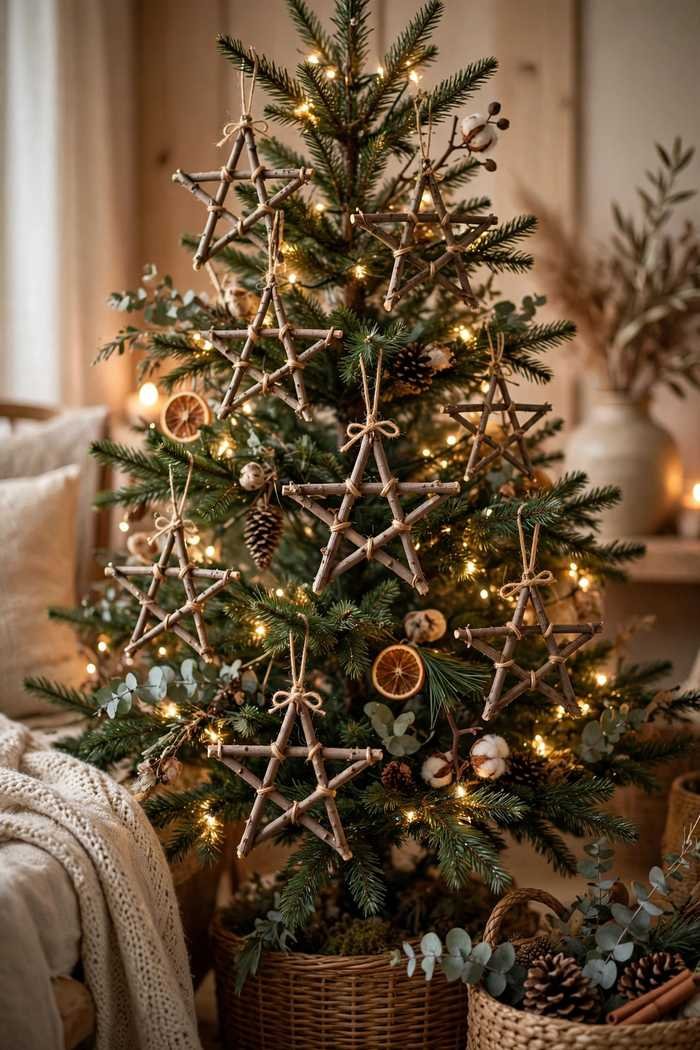
16. Twig Stars
You need: five straight twigs of equal length, hot glue or twine. Method: lay the twigs out in a five-pointed star, then glue — or lash with twine — each of the five crossing points, and add a hanging loop at the top point. Slightly uneven twigs are better than perfect ones: the charm of these is that they look gathered, not manufactured. Make them in two sizes and cluster small ones around a large one. Time: 15 minutes. Difficulty: Easy.
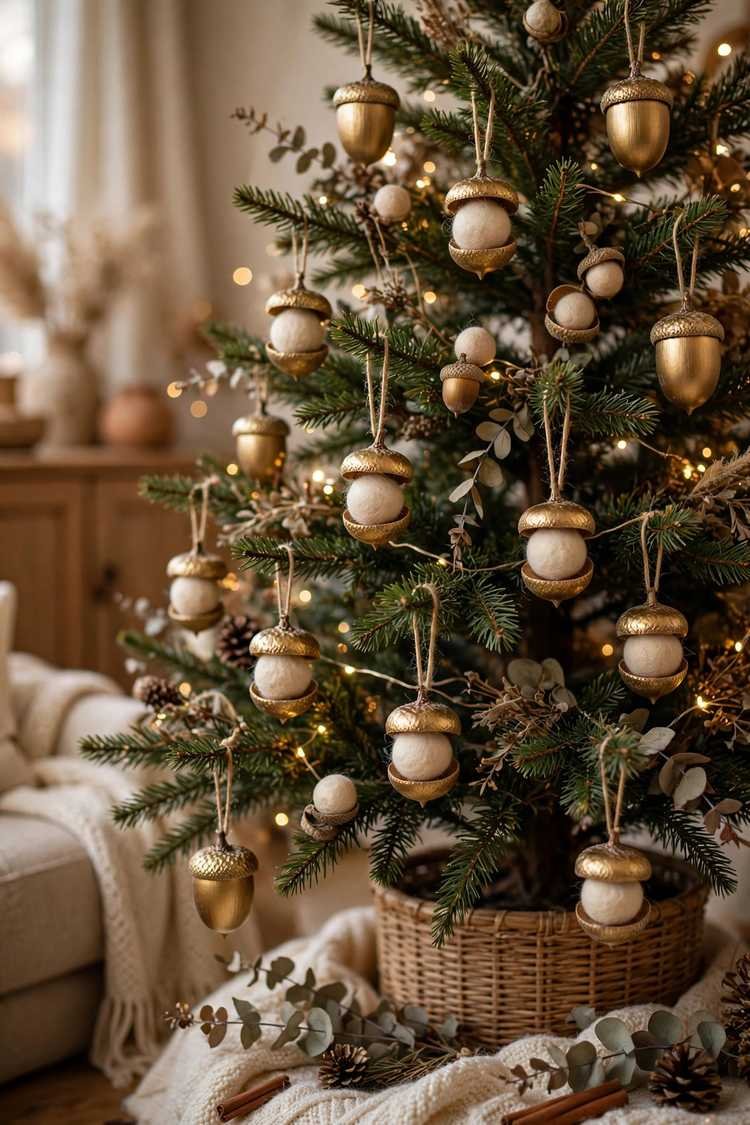
17. Acorn Cap Baubles
You need: acorn caps, gold acrylic paint, small felt balls or beads, hot glue, twine. Method: paint the caps gold inside and out, let them dry, then glue a felt ball into each cap so it sits like a tiny bauble in a golden cup, and add a twine loop through the cap’s stem. Felt balls cost pennies in a craft store, and the finished ornaments look like something from a Christmas market stall. Time: 10 minutes + drying. Difficulty: Easy.
18. Evergreen and Berry Baubles
You need: a clear bauble, tiny evergreen clippings, a few red berries (faux berries last longest), a pencil. Method: push a small sprig of greenery and two or three berries inside the bauble with the pencil, close the cap, and hang. They look like little terrariums. Fresh clippings stay green for about a week, so either make these last, just before guests arrive, or use faux greenery and keep them forever. Time: 5 minutes. Difficulty: Easy.

→ THE UNDER-$25 HANDMADE TREE — BUDGET BREAKDOWN
| SUPPLIES | TYPICAL COST | COVERS |
|---|---|---|
| Pack of 12 clear fillable baubles | ~$6 | All of Cluster One + evergreen terrariums |
| Acrylic paints, glitter, faux snow | ~$5 | Paint-swirls, pinecones, acorn caps, dough painting |
| Flour, salt, cinnamon, applesauce, oranges | ~$4 | All of Cluster Two — 20+ ornaments |
| Paper, card, kraft tags, fasteners | ~$3 | All of Cluster Three |
| Felt sheets, twine, ribbon offcuts | ~$4 | All of Cluster Five + every hanging loop |
| Total for 40+ ornaments | ~$22 | Nature finds (Cluster Four) are free — a similar store-bought set easily runs $60+ |
Cluster Five — Fabric, Felt and Ribbon: The Soft, Unbreakable Ones
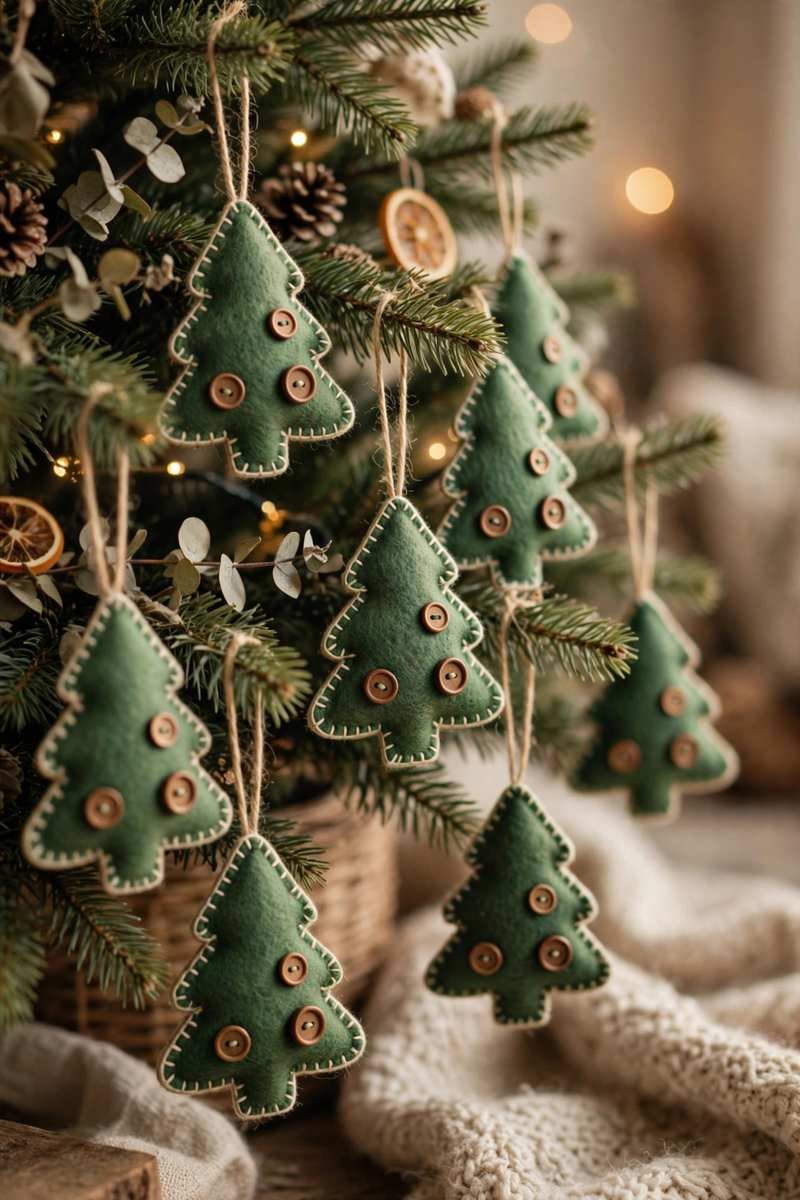
19. No-Sew Felt Trees
You need: green felt, scissors, hot glue, a handful of stuffing or scrap felt, tiny buttons or beads. Method: cut two matching tree shapes, glue around the edges leaving the top open, stuff lightly, glue shut, then dot on buttons as baubles and add a ribbon loop. Nothing to sew, nothing to break, and the soft edges look charmingly handmade. Cut stars, hearts and stockings from the same template logic. They also mail beautifully flat, which makes them a sweet handmade gift for far-away family. Time: 15 minutes. Difficulty: Easy.
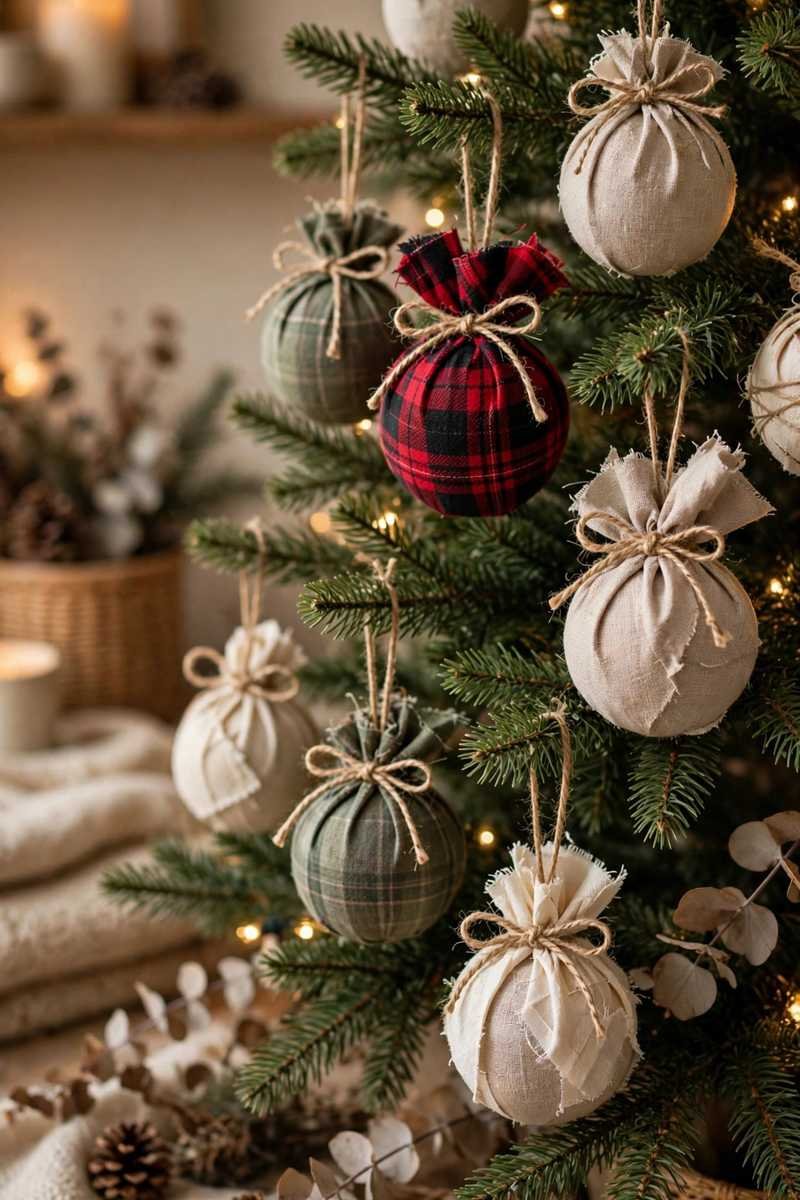
20. Fabric-Wrapped Baubles
You need: plain cheap baubles (or tired old ones), fabric scraps, hot glue, twine. Method: cut a fabric square big enough to wrap the bauble, pull it up around the ball, glue it neatly at the top, then hide the gathered join under a twine bow. Flannel shirts, plaid napkins and leftover curtain fabric all give a different character — a set in one fabric family looks like a designer collection. Time: 10 minutes. Difficulty: Easy.
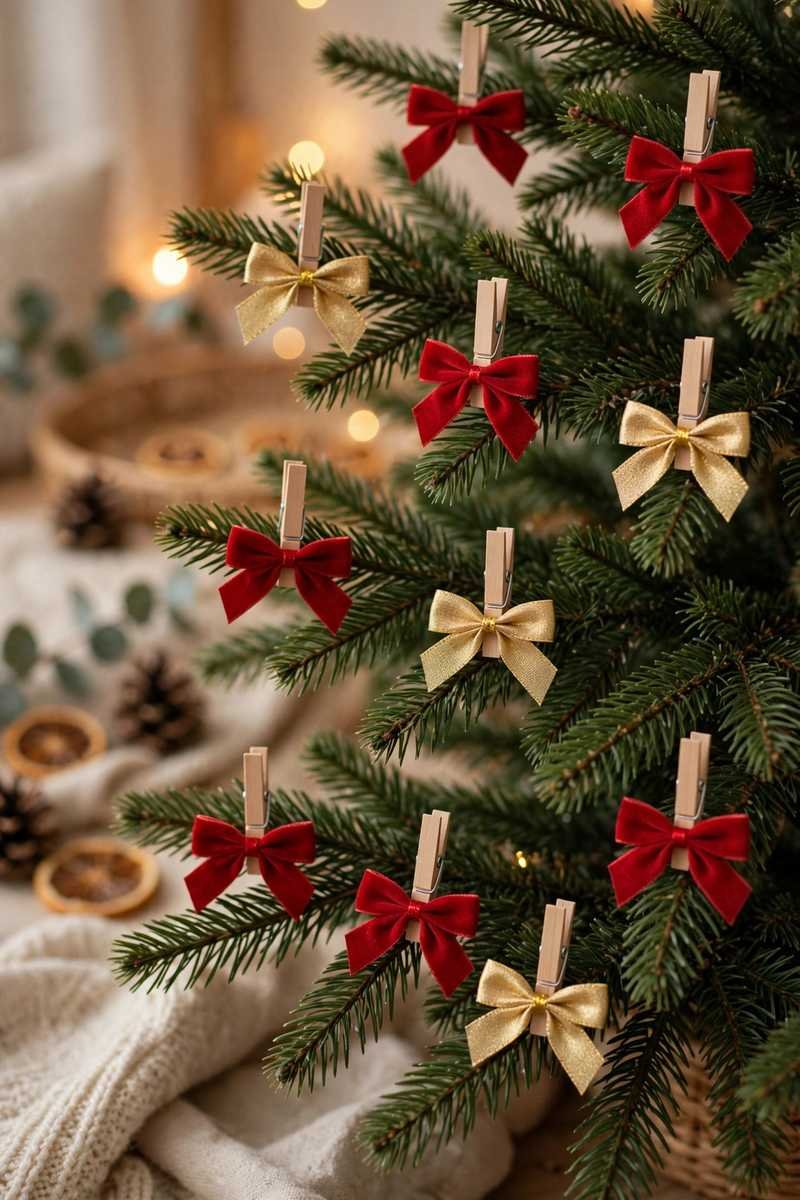
21. Mini Ribbon Bows
You need: ribbon offcuts (wired ribbon holds the best shape), scissors, thin twine or twist ties. Method: tie a simple bow, pinch and bind its center with twine, trim the tails at an angle, then tie or clip the bow straight onto a branch tip. Make them in sets of six to ten in one color — a repeated bow is the fastest way to pull a mixed handmade tree together, and it uses up every ribbon scrap in the house. Time: 5 minutes each. Difficulty: Easy.
A handmade tree comes together the same way as any styled tree: repetition and restraint. Make at least three — better, five — of every design you love, spread each set evenly around the tree rather than clustering your favorites at the front, and keep every material inside one color palette. Heavy dough ornaments sit best on strong lower branches, paper belongs on the top half away from hot bulbs, and the lightest baubles fill the tips. Those simple rules are why the mixed tree in every photo here looks intentional instead of crafty — the same principles sit behind classic Christmas decor ideas that never date.
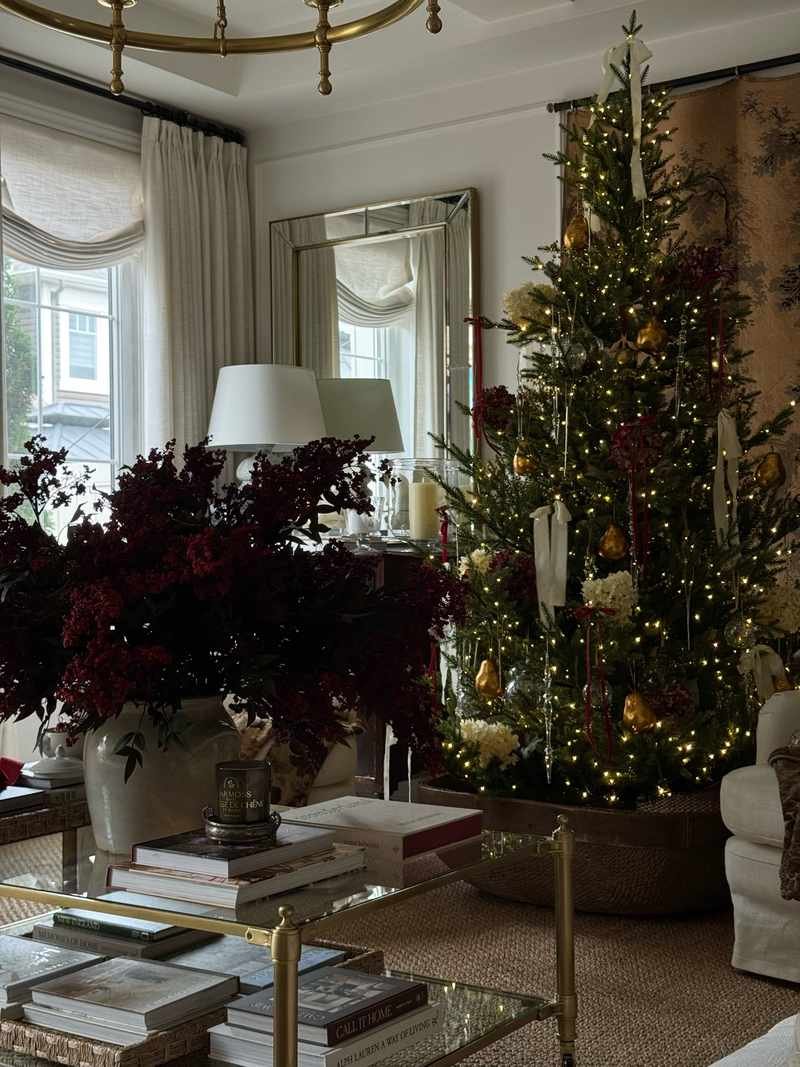
Photo: Salina Maria (@salinamariahome) on Instagram
✓ DO / ✗ DON’T
| ✓ DO | ✗ DON’T |
|---|---|
| Repeat every design at least three times so the tree reads styled, not random | Don’t make 21 one-offs — a tree of single ornaments looks scattered |
| Start drying projects (dough, paint-swirls) a day ahead of hanging day | Don’t rely on glitter glue alone — hot glue or craft glue actually holds |
| Use plastic fillable baubles and felt low down where hands and paws reach | Don’t hang heavy dough ornaments on weak outer branch tips |
| Keep every material inside one color palette for a pulled-together tree | Don’t mix every color you own — handmade plus rainbow reads as clutter |
Conclusion
A tree full of ornaments you made yourself does something no store-bought set can: it remembers. The wonky first snowflake, the orange slices from the year everyone came home, the scroll baubles collecting wishes one December at a time. Start with one cluster this weekend — the kitchen projects are the most forgiving — and let the tree build its own traditions. None of it needs to be perfect; slightly uneven is exactly what handmade is supposed to look like. And when the tree is dressed, carry the handmade feeling across the room: our Christmas bookshelf decor ideas show how to style the shelves around it with the same warm, collected touch.

Photo: Leben Riebe (@vintageholiday) on Instagram
FAQ
Are handmade ornaments safe around kids and pets?
Most of these are ideal for busy homes: felt, paper, fabric and plastic fillable baubles are all unbreakable, so put them on the lower half of the tree where small hands and wagging tails reach. One real caution — salt dough looks exactly like cookies but is far too salty to eat, so hang dough ornaments high if you have toddlers or curious dogs, or skip that cluster entirely.
How long do dried orange slices and salt dough ornaments last?
Orange slices usually last one to two seasons before darkening; store them in a dry box with tissue between layers. Salt dough is the marathon runner — sealed with a coat of clear varnish or craft sealant and stored dry, it easily lasts five years or more. The enemies of both are humidity and attic heat, so a cool cupboard beats the roof space every time.
Which of these ornaments are the cheapest to make?
The paper cluster wins — snowflakes, book-page stars and kraft tags cost almost nothing, especially from paper already in the house. Salt dough and cinnamon dough come next at a few cents per ornament, and the nature cluster is effectively free beyond paint and twine. If money is the tightest constraint, those three clusters alone — which is exactly the spirit of decorating a Christmas tree on a budget — can fill a whole tree.
Can I make these without a glue gun?
Yes — a glue gun is a speed tool, not a requirement. Wish scrolls, confetti baubles, dried oranges and paper strip baubles need no glue at all; twig stars and rosemary wreaths hold with twine alone; and everything else works with ordinary craft glue if you give joints a few minutes to set. If you craft with small children, skipping the hot glue gun is honestly the safer plan anyway.
How many handmade ornaments do I need for a full tree?
A good rule is 10–12 ornaments per foot of tree, mixed across sizes. For a six-foot tree, aim for five or six favorite designs made five or six times each — roughly 30 ornaments — then fill the remaining gaps with cheap filler: ribbon bows (idea 21) and frosted pinecones cost almost nothing and stretch a handmade set a long way. It is better to repeat fewer designs well than to attempt all 21 at once. Place the biggest ornaments low on the tree and the smallest near the top, and the proportions take care of themselves.

💬 Join Our Decor Community
Decor Fern | Home Decor Ideas & Inspiration — share your rooms, get ideas, and chat with fellow decor lovers.
Join the Facebook GroupFollow on Facebook

One Comment