21 Fridge and Cleaning-Supply Organization Ideas for Small Homes
I know the feeling of opening the fridge and finding the same jar of pickles at the front while the thing I actually need hides behind the milk. The yoghurt I bought twice, the vegetables that went soft in a drawer I never open, the sauce that expired because it slid to the back. A small fridge is not the problem. A small fridge with no system is the problem, and the same is true of the cupboard where the cleaning supplies live. I have reorganized my own fridge more times than I can count, and the versions that lasted were the ones where everything had a place I could reach.
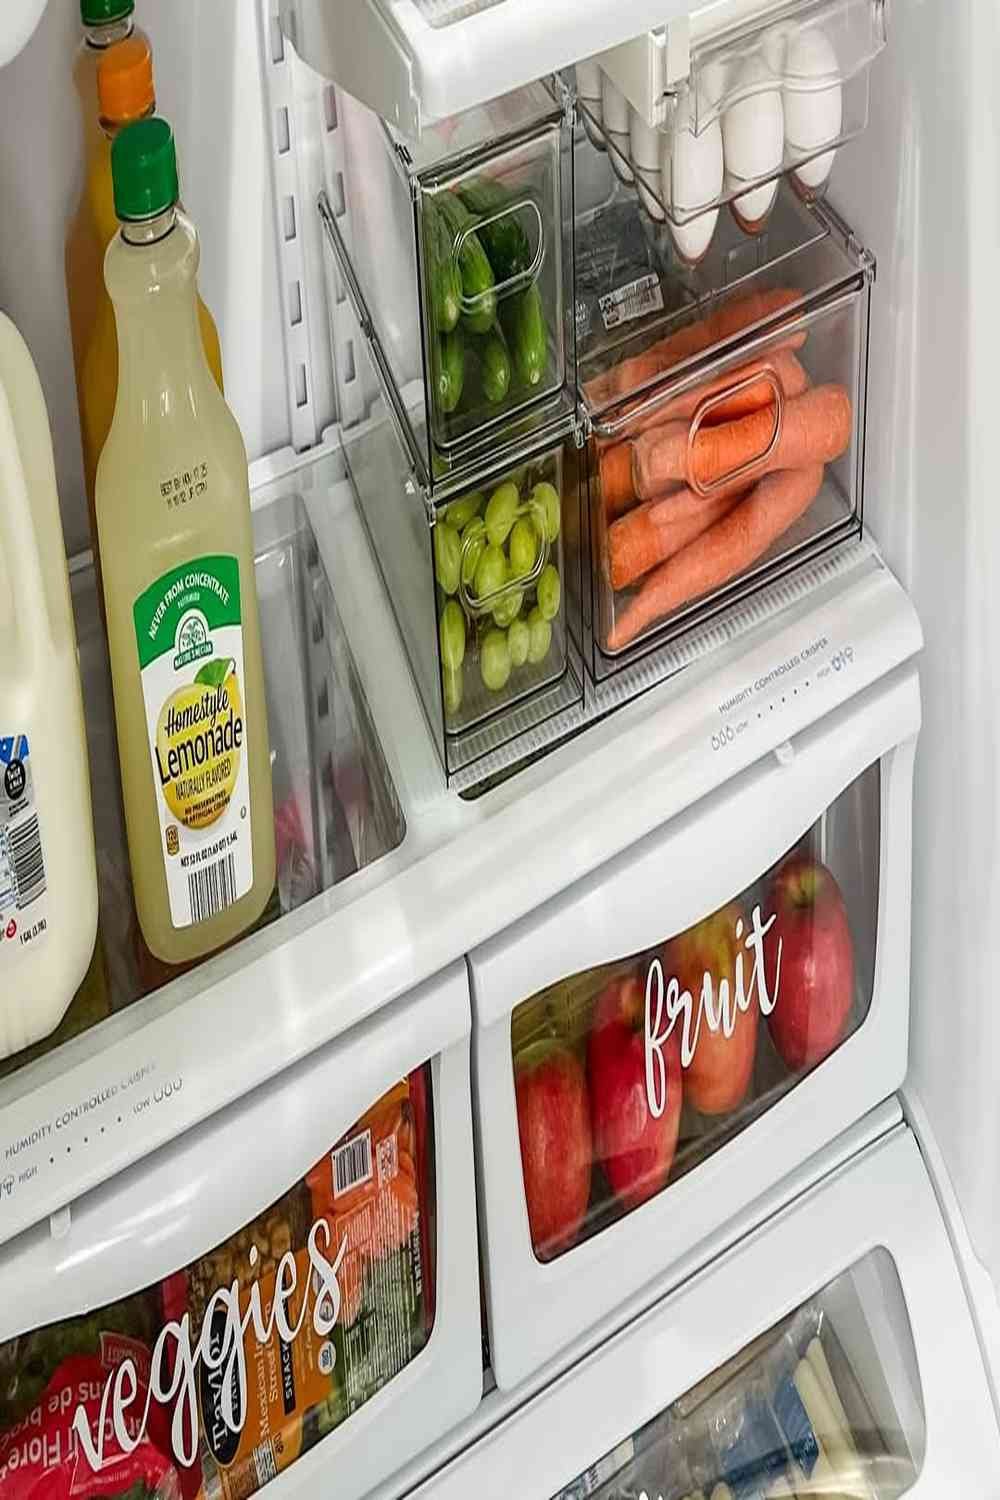
Photo: Lela Burris (@lelaburris) on Instagram
These fridge and cleaning-supply organization ideas for small homes are built for real kitchens: one fridge, one cupboard, one wall, and a caddy you can carry. No extra storage bought first, no matching bins ordered before you know what goes where. The method is simple: zone the fridge first, then use the space over it, then gather the cleaning supplies into caddies that go where the mess is, and finish with a pegboard for the utility wall. If the whole house needs the same treatment, these home organization ideas are a good place to start the wider reset.

Photo: Shelby Wright (@itsshelbywright) on Instagram
How Do You Organize a Fridge So Food Stops Going Missing?
A fridge goes wrong in the same way a pantry does: things hide at the back, categories blur, and the door becomes a graveyard of half-used jars. The fix is the same too. Give every shelf one job, put food in bins you can pull out, and keep the things you use daily where your eyes land first.
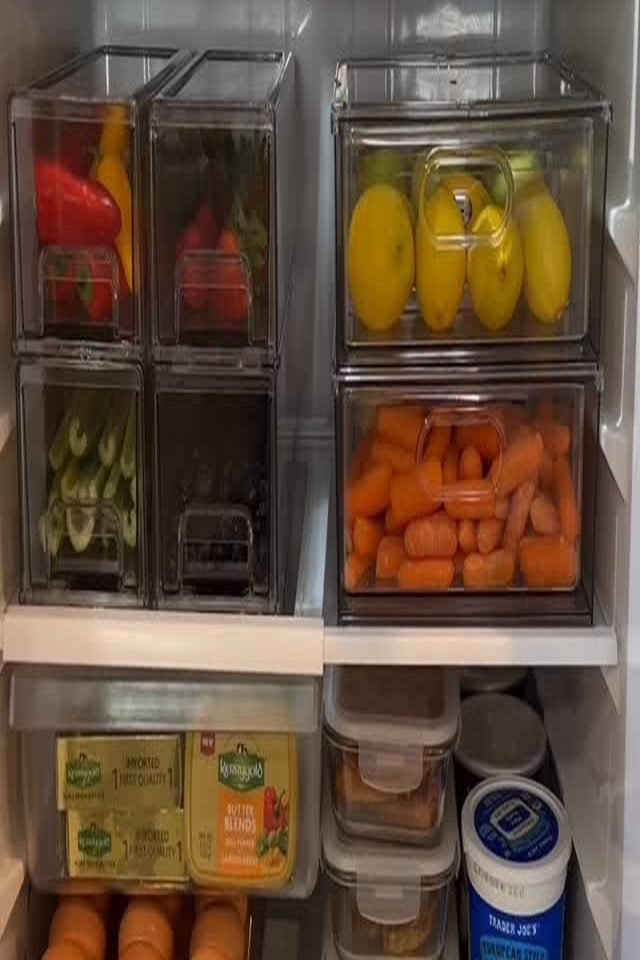
Photo: Shelby Wright (@itsshelbywright) on Instagram
1. Give Every Shelf a Job
Best For: fridges where everything ends up mixed together and the things you use daily hide behind the things you use twice a month. One job per shelf matches the shelf to your meals instead of to chance. How to Create It: put ready-to-eat food and leftovers on the top shelf, dairy and deli in the middle, raw meat on the lowest shelf where it cannot drip, and fruit and vegetables in the drawers. Breakfast things can share one shelf, but the job of the shelf never changes.
2. Use Clear Bins You Can Pull Out Like Drawers
Best For: deep fridge shelves where jars and tubs slide to the back and disappear for weeks. A clear bin that pulls out turns dead space into usable space, and seeing through the sides means you never lift everything out to find one thing. How to Create It: measure the depth and height of each shelf, then choose bins that leave a finger’s width on each side so they slide freely. Keep one category per bin. If the rest of the house feels just as crowded, these small home declutter ideas will help you clear space before you buy a single bin.
3. Keep Produce Where You Can See It
Best For: households that throw away vegetables because they forgot them in a drawer. Produce you cannot see is produce you will not cook, so the most-used fruit and vegetables belong at eye level in a clear bin, not buried in a crisper. How to Create It: keep the vegetables you cook with every day in a shallow clear bin on a middle shelf, and save the drawers for the things that last longest, like carrots, cabbage, and citrus. Wash and trim what you can when it comes home, because produce that is ready to cook gets cooked.
4. Give Dairy and Deli Their Own Shelf
Best For: fridges where cheese, yoghurt, and cold meats end up scattered across three shelves and go out of date unnoticed. One shelf for dairy and deli makes checking dates a ten-second job instead of a hunt. How to Create It: choose one shelf, ideally the middle one where the temperature is steadiest, and keep all dairy and deli there in one or two bins. Put the things that run out first at the front, and check the dates every time you unpack the shopping.
5. Put Condiments on the Door, Not the Shelves
Best For: fridges where bottles and jars crowd the shelves and leave no room for food. The door is the warmest part of the fridge, which suits condiments perfectly and frees the shelves for the food that needs the cold. How to Create It: move every sauce, jam, and dressing to the door shelves, tallest bottles at the bottom and short jars above. Keep milk and eggs off the door, because they need the steady cold of a shelf.
6. Empty the Fridge Before You Organize It
Best For: anyone who has ever tried to organize a full fridge and given up halfway. You cannot zone shelves you cannot see, and an empty fridge shows you the truth about what you actually own. How to Create It: take everything out onto the counter, throw away anything past its date, and wipe the shelves before a single thing goes back. Sort what is left into piles on the counter, then put each pile on its shelf in one move.
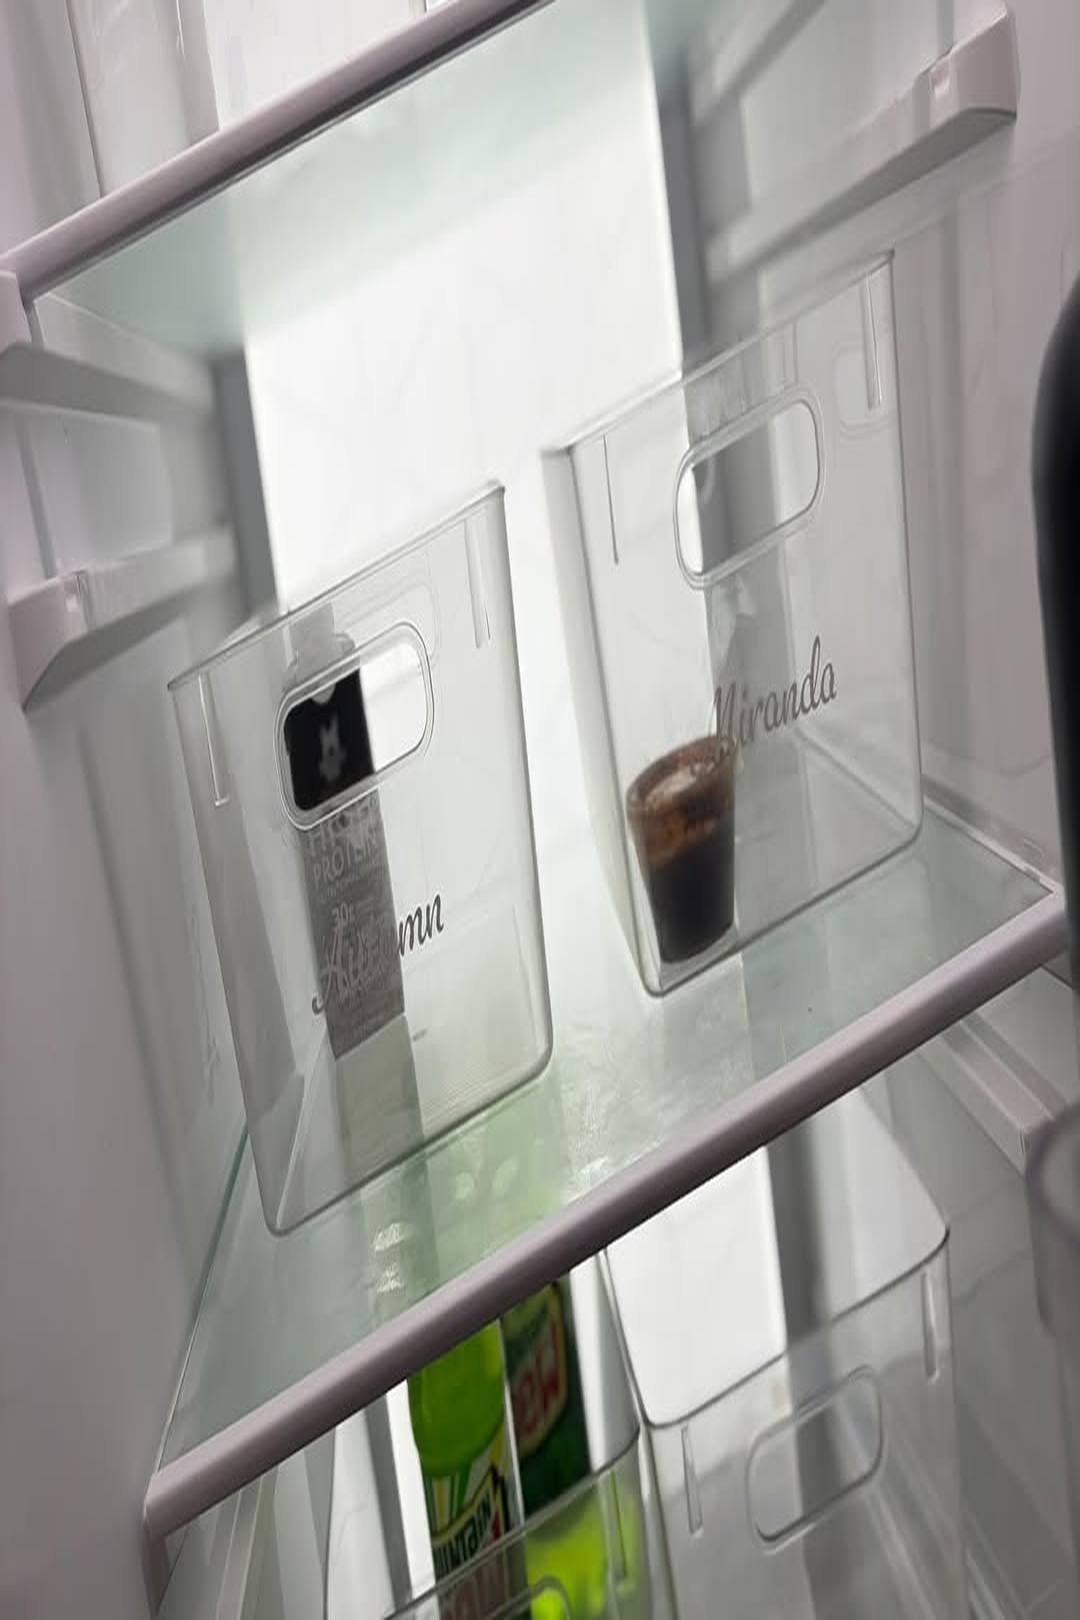
Photo: Miranda (@randijean1186) on Instagram
What Do You Do With the Space Over the Fridge?
The space over the fridge is the most wasted storage in a small kitchen. It is too high for everyday things and too useful to leave empty, so it becomes a graveyard of dusty boxes. Give it one job, keep it reachable, and it earns its place. Calm storage like this sits naturally in Scandinavian kitchen ideas, where every shelf has a purpose.
7. Add Baskets Above the Fridge for Rarely Used Things
Best For: kitchens where the top of the fridge holds a dusty pile of things with no home. Two matching baskets turn the pile into storage you can actually use, and they look intentional instead of accidental. How to Create It: choose baskets that fit the width of the fridge with room to lift them down safely. Keep rarely used things in them, like spare baking trays and picnic supplies, and label the front of each basket.
8. Keep Cookbooks Over the Fridge
Best For: cooks whose books live in three different rooms and never get opened. The space over the fridge is exactly the right height for a row of cookbooks, and keeping them in the kitchen means they get used. How to Create It: stand the books you cook from most on their sides in a row, with a small bookend to stop them toppling. Keep the ones you reach for weekly at the front and the special-occasion books behind them.
9. Store Rarely Used Appliances Up Top
Best For: small kitchens where the bread maker and the food processor crowd the worktop and the cupboards. Appliances you use once a month belong up high, where they are out of the way but still in the kitchen. How to Create It: keep each appliance in its own box or bag with its parts inside, and label the box on the side you see from the floor. Lift them down with both hands and never stack a heavy appliance on top of a light one.
10. Use the Top for Trays and Platters
Best For: households with serving trays and platters that do not fit in any cupboard. Flat things store beautifully on top of the fridge, standing on their sides in a rack or leaning against the wall in a neat row. How to Create It: stand trays upright in a simple rack or a large basket, biggest at the back and smallest at the front. Keep a tea towel over them if the top gathers dust.
11. Keep a Step Stool Nearby So the Top Stays Useful
Best For: anyone who has stopped using the space over the fridge because reaching it means dragging a chair across the kitchen. Storage you cannot reach is not storage. How to Create It: keep a small folding step stool in the gap beside the fridge or hanging on a hook nearby, never in another room. When reaching the top takes five seconds, you will actually use it.
How Do You Organize Cleaning Supplies in a Small Home?
Cleaning supplies fail in the same way food does: they spread across every cupboard, nobody knows what is there, and the thing you need is always in the other room. The fix is to gather them into caddies, one per task, and store each caddy where the work happens. A caddy you can carry is a caddy you will use.
12. Keep One Caddy per Floor or Task
Best For: homes where cleaning supplies live in one cupboard and every clean starts with a hunt. One caddy for the kitchen, one for the bathroom, and one for the floors means the supplies are already where the mess is. How to Create It: choose a caddy with a handle you can carry with one hand, and fill it with only what that room needs. For the rooms around them, a tidy laundry space helps too, and these modern laundry room ideas show how a small utility corner can hold a whole cleaning kit.

Photo: Jessica Nicole (@itsjessnicole) on Instagram
13. Label Your Cleaning Bins
Best For: households where everyone uses the wrong spray on the wrong surface because the bottles all look the same. A label on the bin and on the bottle stops the guesswork. How to Create It: label every bin with its room or task, and label any bottle you decant into a plain container. Use one label style across the house, and keep anything harsh on a high shelf out of children’s reach.

Photo: Kate S. (@kate_cleanhome) on Instagram
14. Store the Caddy Where You Actually Clean
Best For: caddies that live in a hall cupboard and never make it to the bathroom. A caddy stored where the work happens gets used; a caddy stored somewhere sensible on paper gathers dust. How to Create It: keep the bathroom caddy under the bathroom sink or on a shelf in the bathroom, and the kitchen caddy under the kitchen sink. If space is tight, a slim caddy fits in the gap beside the washing machine.
15. Give Cleaning Supplies Their Own Closet Shelf
Best For: homes with no utility room, where cleaning supplies end up mixed in with food and towels. One shelf, given over entirely to cleaning, keeps chemicals away from food and makes stock-checking a glance. How to Create It: choose one shelf in a hall closet or a laundry cupboard and keep only cleaning supplies there, grouped by task in labelled bins. Keep backstock on the shelf above and everyday things at eye level. A shelf like this is a small part of a wider reset, and these fresh start home refresh ideas cover the rest of the house in the same spirit.
16. Decant Laundry Products Into Matching Bottles
Best For: laundry corners where five different bottles crowd the shelf and the labels face every direction. Matching bottles let you see at a glance what is running low, and a pump bottle is easier to use with wet hands than a heavy jug. How to Create It: decant detergent, softener, and stain remover into matching pump bottles and label each one clearly, including the dose. Keep the original bottles as backstock on a high shelf.
17. Keep a Laundry-Room Shelf for Cleaning Supplies
Best For: homes where the laundry room already holds the washer and dryer but the cleaning supplies live somewhere else entirely. The laundry room is the natural home for cleaning supplies, because the water, the drain, and the mess are already there. How to Create It: fit one shelf above the machines for cleaning supplies, with cloths and sprays in labelled bins and heavier bottles on the shelf itself. Keep the shelf clear of laundry so the cleaning things are always reachable.
Can a Pegboard Fix Your Utility Wall?
A pegboard is the cheapest wall storage there is, and it suits a utility wall better than any shelf. Hooks, baskets, and shelves move when your needs change, and everything hangs where you can see it. If you have one bare wall near the kitchen or the laundry, a pegboard turns it into storage that works as hard as a cupboard. The same kind of flexible, use-what-you-have thinking runs through these kitchen trends to inspire a smarter small kitchen.
18. Hang Everyday Tools on a Kitchen Pegboard
Best For: kitchens where tongs, ladles, and scissors live in a drawer and you can never find the one you need. A pegboard on a free stretch of wall puts the tools you use daily in sight and in reach, and it frees a whole drawer. How to Create It: fit the pegboard at eye level on a wall near the hob, and hang the tools you use every day where your hand falls naturally. Keep heavy things low on the board and light things high, and leave a third of the board empty.
19. Give Mops and Brooms a Pegboard Home
Best For: mops and brooms that lean in a corner and fall over every time the door opens. Pegboard hooks hold them upright, off the floor, and out of the way, and a small shelf above holds the dustpan. How to Create It: use sturdy hooks made for long handles, spaced so each tool hangs straight without tangling. Hang the dustpan on a hook beside them, and keep the floor beneath clear.
20. Add Baskets and Hooks to the Pegboard
Best For: pegboards that hold tools but waste the space between them. Small baskets and extra hooks turn the gaps into storage for cloths, brushes, gloves, and spare bulbs, so the board works twice as hard. How to Create It: clip small wire baskets to the board for the things that cannot hang, and add hooks at the edges for gloves and aprons. Keep the baskets shallow so they do not block the tools.
21. Put the Pegboard in the Laundry Room or Utility Corner
Best For: laundry rooms where the wall above the machines is bare and the cleaning supplies have no home. A pegboard above the washer holds the brushes, cloths, and drying racks where the work happens, and it costs less than a single shelf. How to Create It: fit the board above the machines at a height you can reach without stretching, and hang the things you use every wash where your hand falls. Keep a small basket on the board for pegs and cloths. A utility wall like this is a small change with an outsized payoff, and the same thinking shapes the boldest kitchens in these maximalist kitchen ideas, where every wall is put to work.
A small home does not need more storage. It needs a fridge with a job for every shelf, a caddy that goes where the mess is, and a wall that works as hard as a cupboard. Start with the fridge tonight: empty it, wipe it, and put everything back by category before you buy a single bin. When the fridge works, the cleaning cupboard is next, and the pegboard after that.
💬 Join Our Decor Community
Decor Fern | Home Decor Ideas & Inspiration — share your rooms, get ideas, and chat with fellow decor lovers.
Join the Facebook GroupFollow on Facebook




One Comment