24 Pot Painting Ideas for Creative Home Decor
A plain terracotta pot is really just a blank canvas waiting for a little attention. With some paint, a few household tools, and an hour or two of free time, an ordinary planter can turn into something that looks handpicked from a boutique shop. Whether you’re drawn to soft watercolor blends, bold geometric lines, or simple single-color finishes, there’s a technique here that fits your skill level and style, no art background required.
In my experience, pot painting is one of the most rewarding small projects precisely because the results feel bigger than the effort involved. A single afternoon can produce a pot you’ll actually want to display, rather than one that simply holds a plant. This guide walks through 24 creative pot painting ideas, ranging from beginner-friendly techniques like sponge dots and stripes to slightly more detailed options like marbling and floral sprigs. Pick one that matches your current space, gather a few basic supplies, and get started.
1. Classic Terracotta Whitewash
A whitewash is the simplest way to soften the bright orange of a plain terracotta pot and give it a calm, chalky finish that suits almost any room. Mix white acrylic paint with a little water until it looks like thin cream, brush it over a clean, dry pot, and wipe some back off with an old rag so warm clay shows through in patches. Two thin coats look far better than one thick one. Seal the inside first, and add clear sealer outside for balcony or windowsill pots. It suits trailing pothos, a small fern, or fresh herbs.
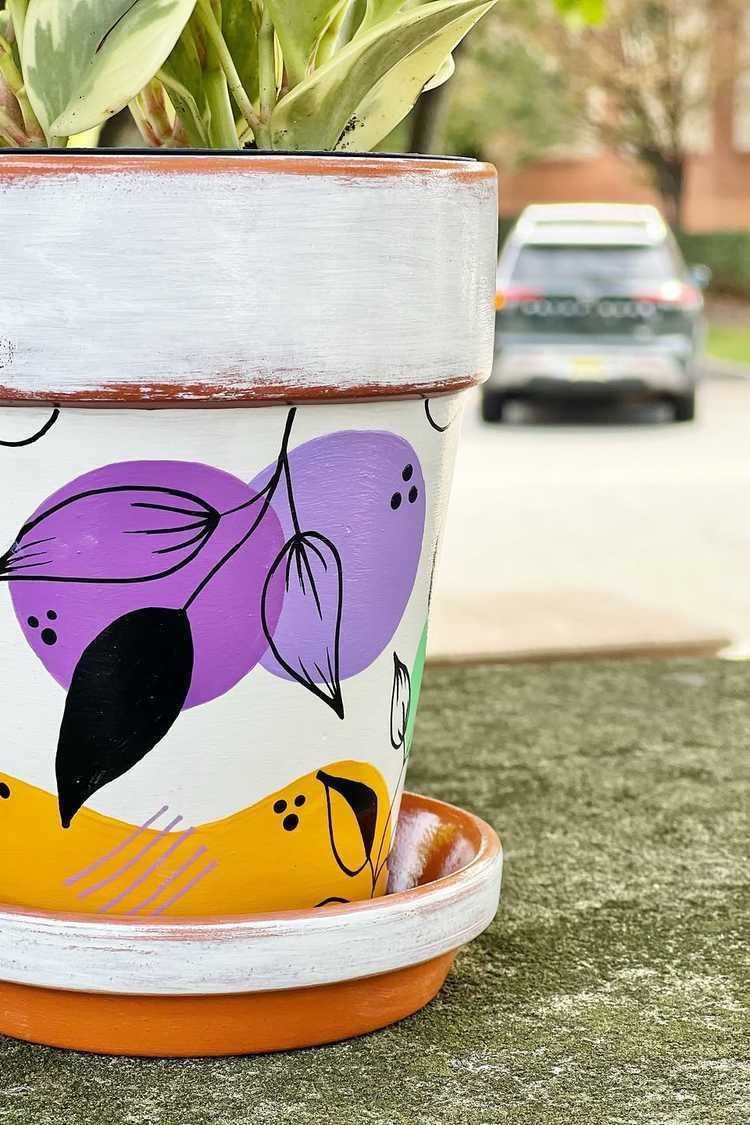
Photo: @garageshop.br on Instagram — View post
2. Sponge Dot Confetti Pots
If you have never painted anything before, start here. Dip a round kitchen sponge, a wine cork, or even a pencil eraser into acrylic paint and stamp dots all over the pot in two or three cheerful colors. Keep the dots uneven and let some overlap; the handmade look is the charm. A white base makes bright colors pop; terracotta keeps the confetti warm and earthy. Let each color dry before you add the next so nothing smudges. These happy pots suit succulents, small cacti, or a cheerful gift for a friend in a new home.

Photo: brush_ur_art (@brush_your_art) on Instagram — View post
3. Bold Geometric Triangles
Triangles look far harder than they are, and painter’s tape does most of the work for you. Tape off a zigzag band of triangles around the pot’s middle, pressing the edges down firmly, and paint the exposed shapes in two contrasting colors such as black and terracotta, or navy and mustard. Peel the tape off while the paint is still slightly damp for the cleanest lines. A white base keeps the pattern crisp. This graphic look suits a snake plant or a bold-leafed plant on a shelf or desk, and it suits simple, uncluttered rooms.

Photo: Krupa N Vargante (@krupa20102023) on Instagram — View post
4. Soft Watercolor Wash
A watercolor wash gives a pot a dreamy, cloudy finish that looks like it took real skill, but it is mostly about letting the paint do its own thing. Thin acrylic paint with water, brush on loose patches of two or three soft colors, and let them bleed together while wet. Work quickly, keep colors close on the color wheel, and do not over-blend or you will end up with mud. Seal it well, then plant something delicate like a maidenhair fern or a small flowering plant.
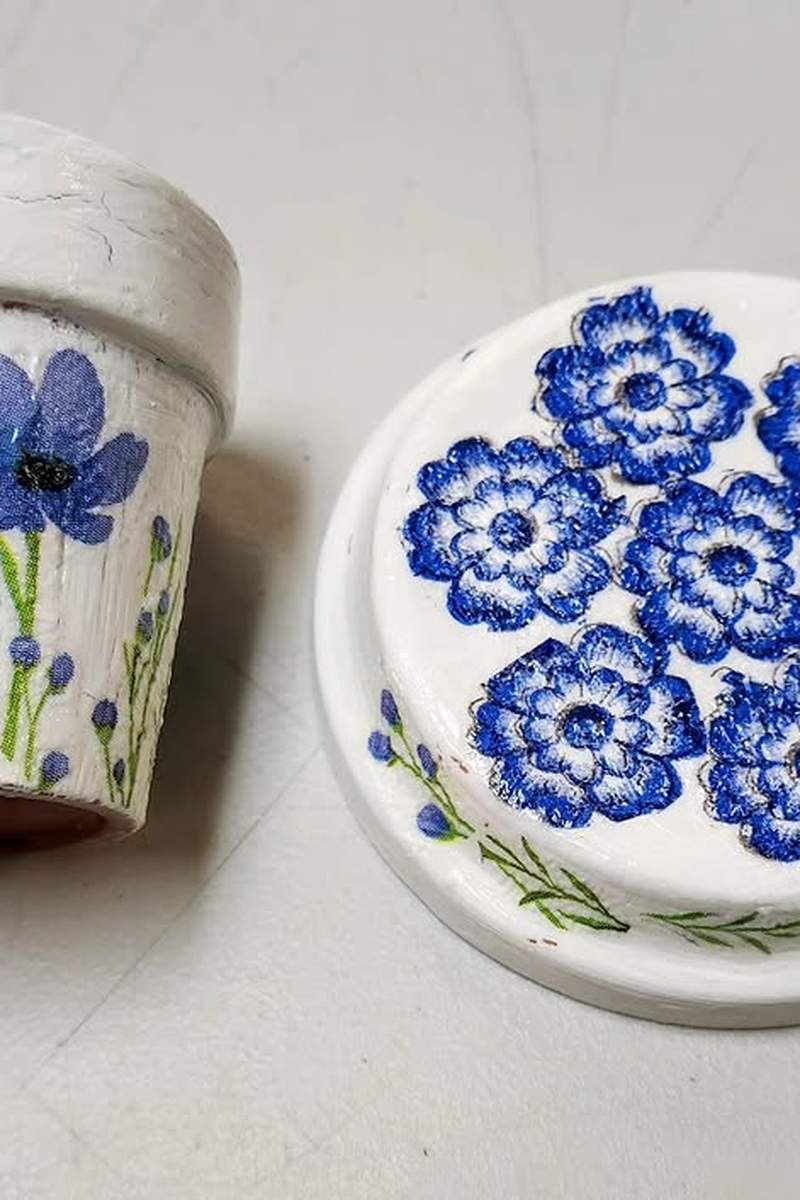
Photo: Krystle’s Creations (@kryduquette) on Instagram — View post
5. Striped Linen-Look Pots
Thin, slightly uneven stripes in a soft neutral give a pot the relaxed feel of woven linen, and they are much more forgiving than perfectly straight lines. Wrap painter’s tape around the pot to mark your bands, then paint the stripes in a warm beige, soft gray, or dusty blue over a cream base. A dry brush dragged lightly across the paint adds a faint woven texture. Leave the rim plain terracotta, or paint it to match one stripe. Grouped in threes on a windowsill, these calm pots look wonderful with leafy herbs or trailing plants spilling over.

Photo: Jo Bertram (@fizzbubbleartanddesign) on Instagram — View post
6. Marbled Swirl Pots
Marbling looks expensive, but you can get the effect with a tub of water and a few drops of nail polish or marbling paint. Fill a spare container, drop in two or three colors, swirl gently with a stick, and dip the pot in slowly. The swirled pattern wraps around the surface in one go. Work fast, because the paint skins over quickly, and wear gloves. Choose colors that go together, like white and gray with a thread of gold, or soft blue and green. A marbled pot turns an ordinary succulent into a little piece of art on a bookshelf.
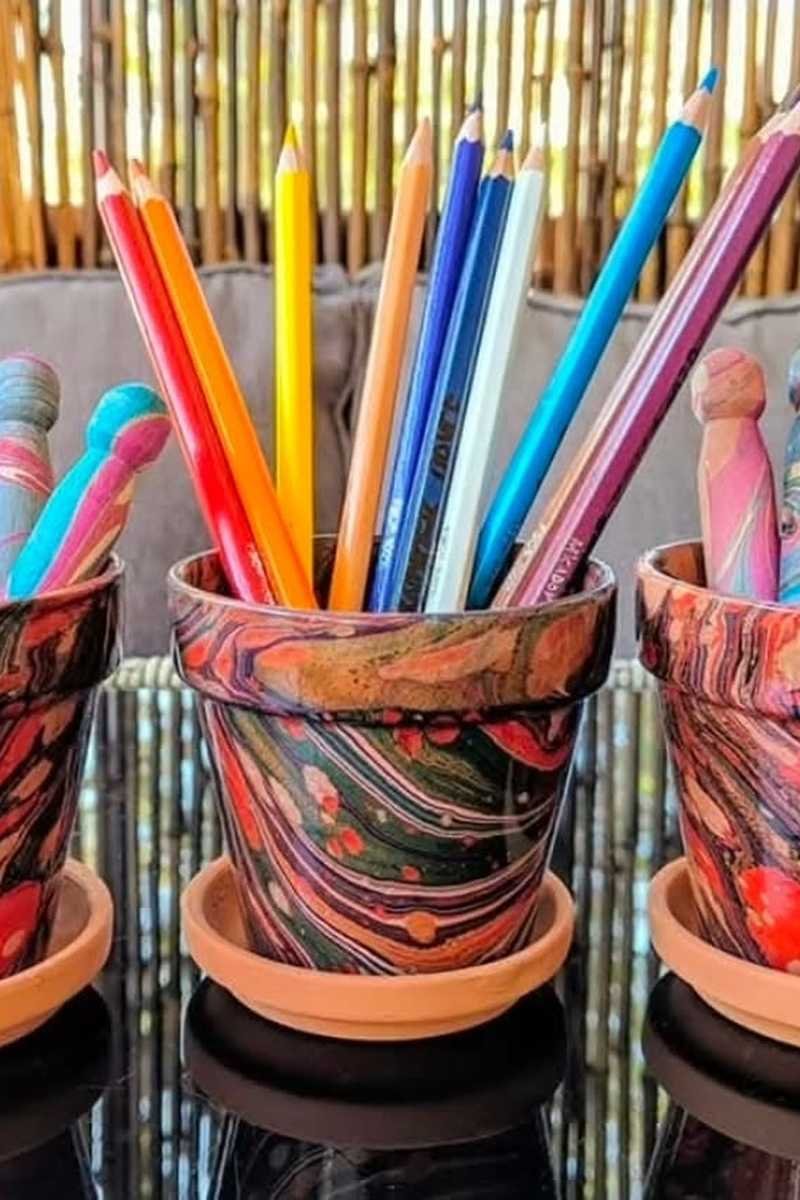
Photo: Bronwyn Rayner (@raynbowcrowstudios) on Instagram — View post
7. Hand-Painted Floral Sprigs
Tiny painted sprigs are the kind of detail that makes a pot feel personal, and you only need a thin brush and a steady hand. Paint a simple stem with small leaves and five-petal flowers in soft pink, lavender, or white, repeating it around the pot. Keep flowers small and stems loose so the design feels fresh, not fussy. A white or pale sage base shows the sprigs best. These gentle pots fit your spring table decor ideas, holding fresh flowers or a dainty herb like thyme.
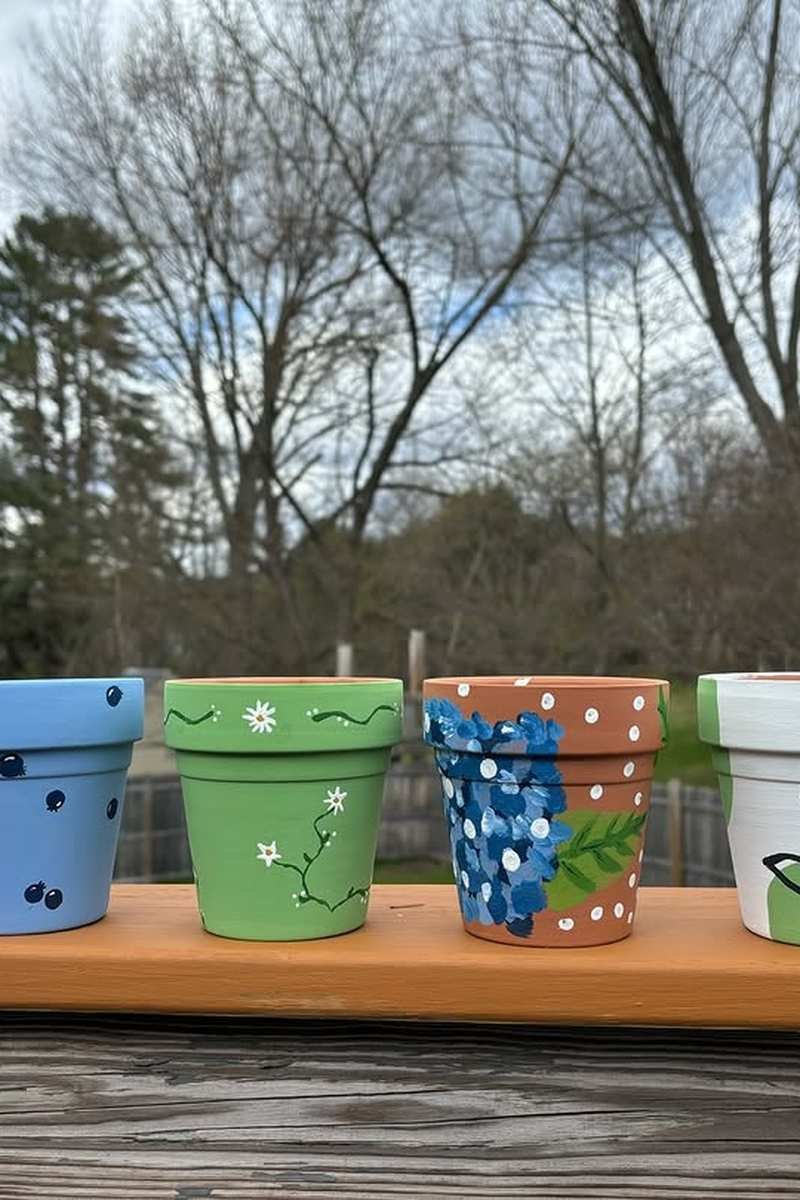
Photo: Johanna (@johannaelyseee) on Instagram — View post
8. Terracotta Ombre Fade
An ombre fade takes a plain pot from dark at the bottom to pale at the top, or the other way round, and it looks far more polished than the effort suggests. Pick one color, mix three shades from deep to almost white, paint horizontal bands, and blend the edges while the paint is still wet. Terracotta and cream is classic, but dusty rose or soft blue work beautifully too. Three ombre pots in one color family make a lovely spring centerpiece with small flowering plants.
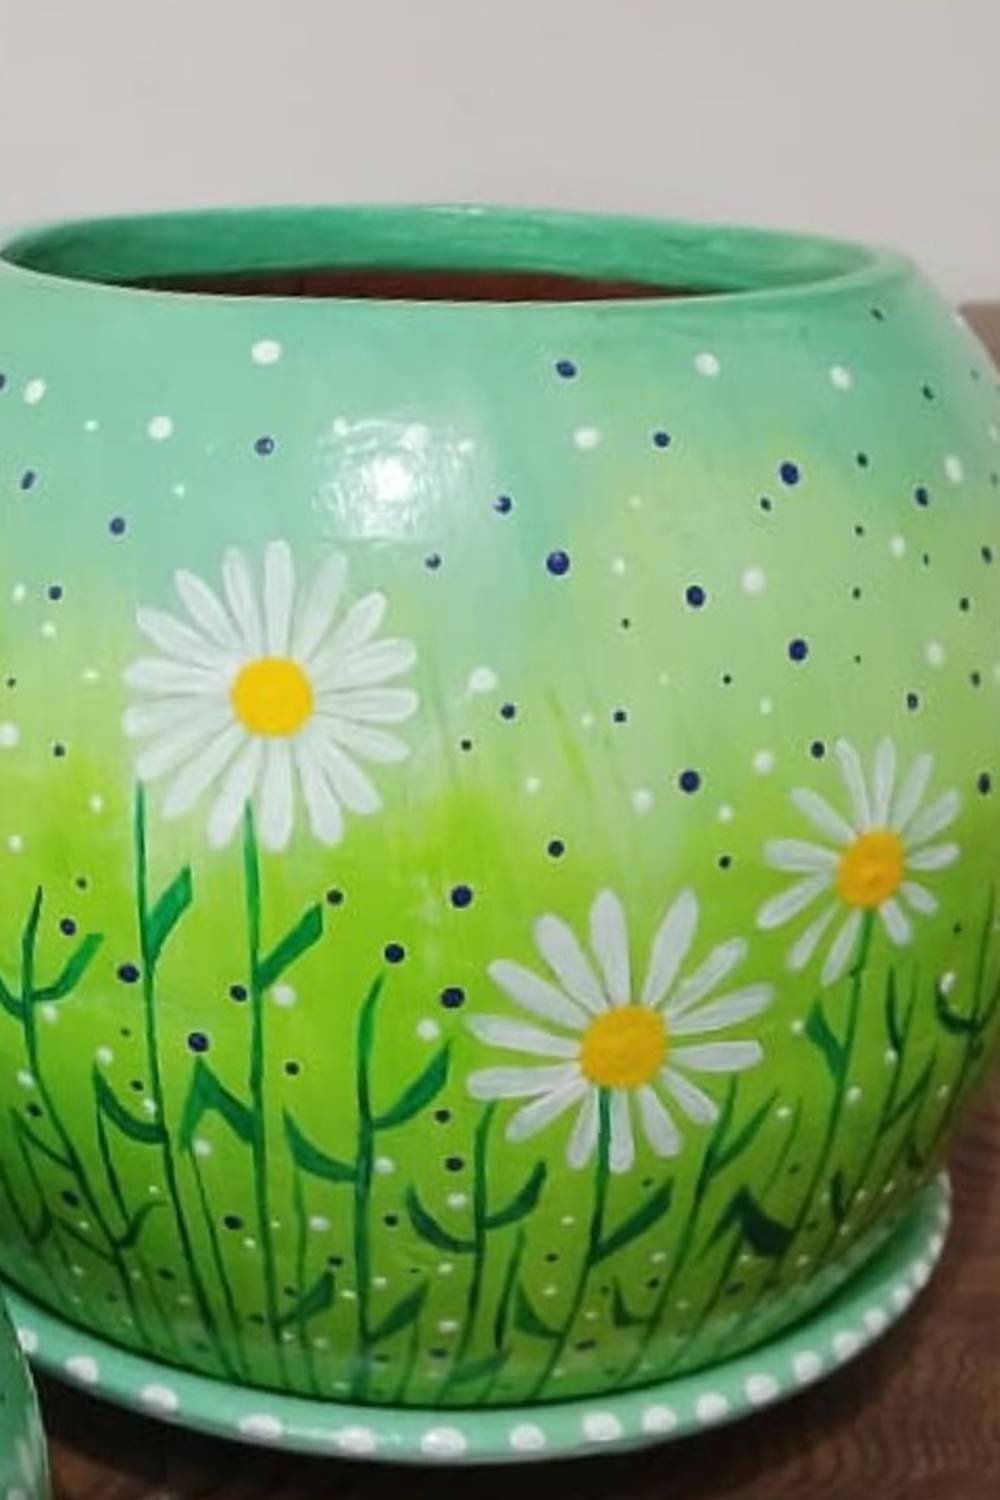
Photo: Happypots (@happypots2018) on Instagram — View post
9. Chalkboard Label Pots
A band of chalkboard paint turns any pot into a label you can rewrite, a lifesaver when seedlings all look the same. Paint a rectangle or wide band with two coats of chalkboard paint, let it cure for a day, then rub chalk over it and wipe it off to season the surface. Write the plant name, or a sweet note like “grow” or “hello spring.” The dark band looks smart against terracotta, and it is handy for a kitchen herb row where basil, mint, and parsley need telling apart.

Photo: Hillsborough greengrocer (@onlyflowershillsborough) on Instagram — View post
10. Gold Foil Accent Rims
A touch of gold around the rim is the fastest way to make a painted pot feel finished and special. Paint the pot a solid color, then apply gold leaf adhesive or metallic paint around the top rim and a thin line near the base. Gold leaf needs patience and a soft brush, but metallic acrylic paint gives nearly the same glow with much less fuss. These pots suit a special plant, a gift, or a shelf that needs one small sparkle. One gold-rimmed pot can lift a whole shelf.
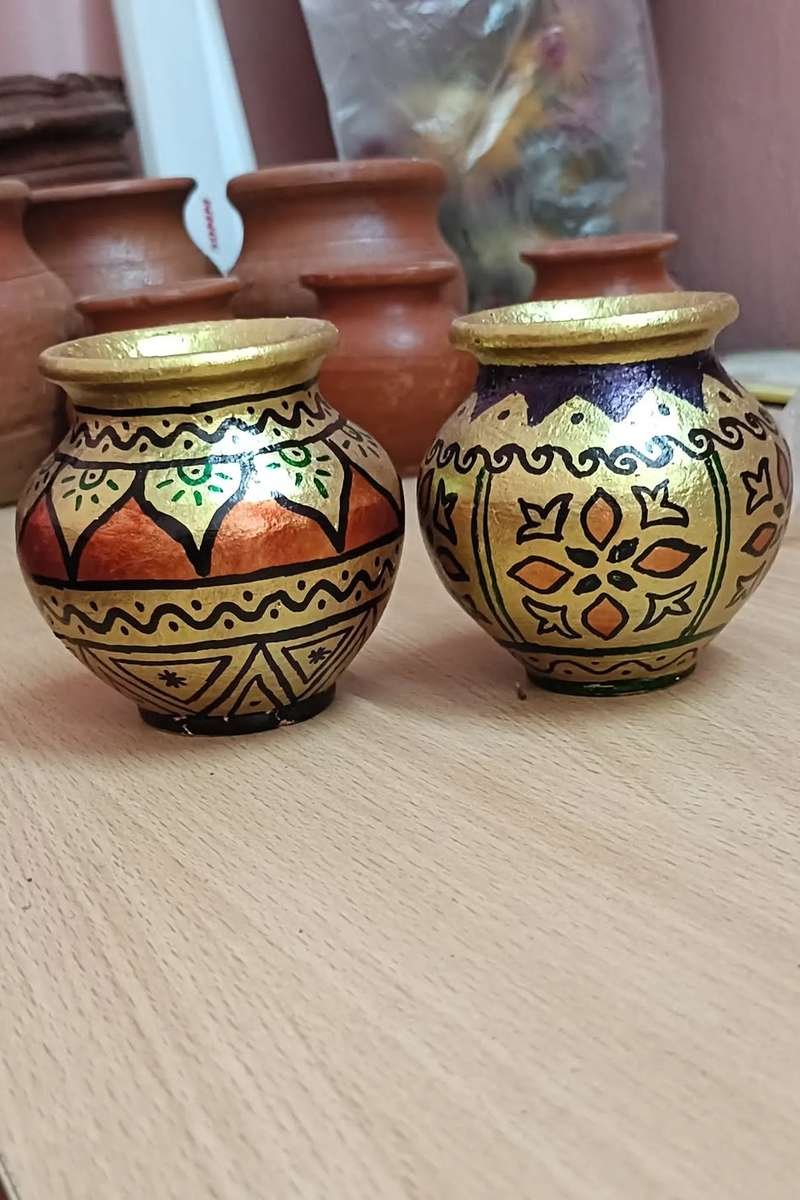
Photo: Bala Pottery (@bala_pottery_products__001) on Instagram — View post
11. Pastel Colour-Block Pots
Colour-blocking is just painting big, confident blocks of color, and pastels keep it soft enough for a cozy home. Tape off the pot into two or three sections, then fill each one with a different pastel, like blush pink, mint, and butter yellow. Leave a thin strip of plain terracotta between blocks for warm contrast, or butt the colors together for a cleaner look. Two coats of each color give the smoothest finish. These gentle pots suit a bright windowsill, a desk, or a cheerful row of small succulents and cacti.

Photo: The Busy Bristle (@whimsical_crafts4you) on Instagram — View post
12. Black and White Minimalist Pots
Black and white never goes out of style, and a pot in this palette fits every room. Paint the pot matte white, then add one bold black element: a wide band, a single stripe, or a neat row of black dots. Keep it to one idea per pot so the design stays calm and intentional. A clear matte sealer keeps the black from scuffing. Choose this pot when your plant is the star, like a sculptural snake plant or lush monstera, and you want the container to quietly frame it.
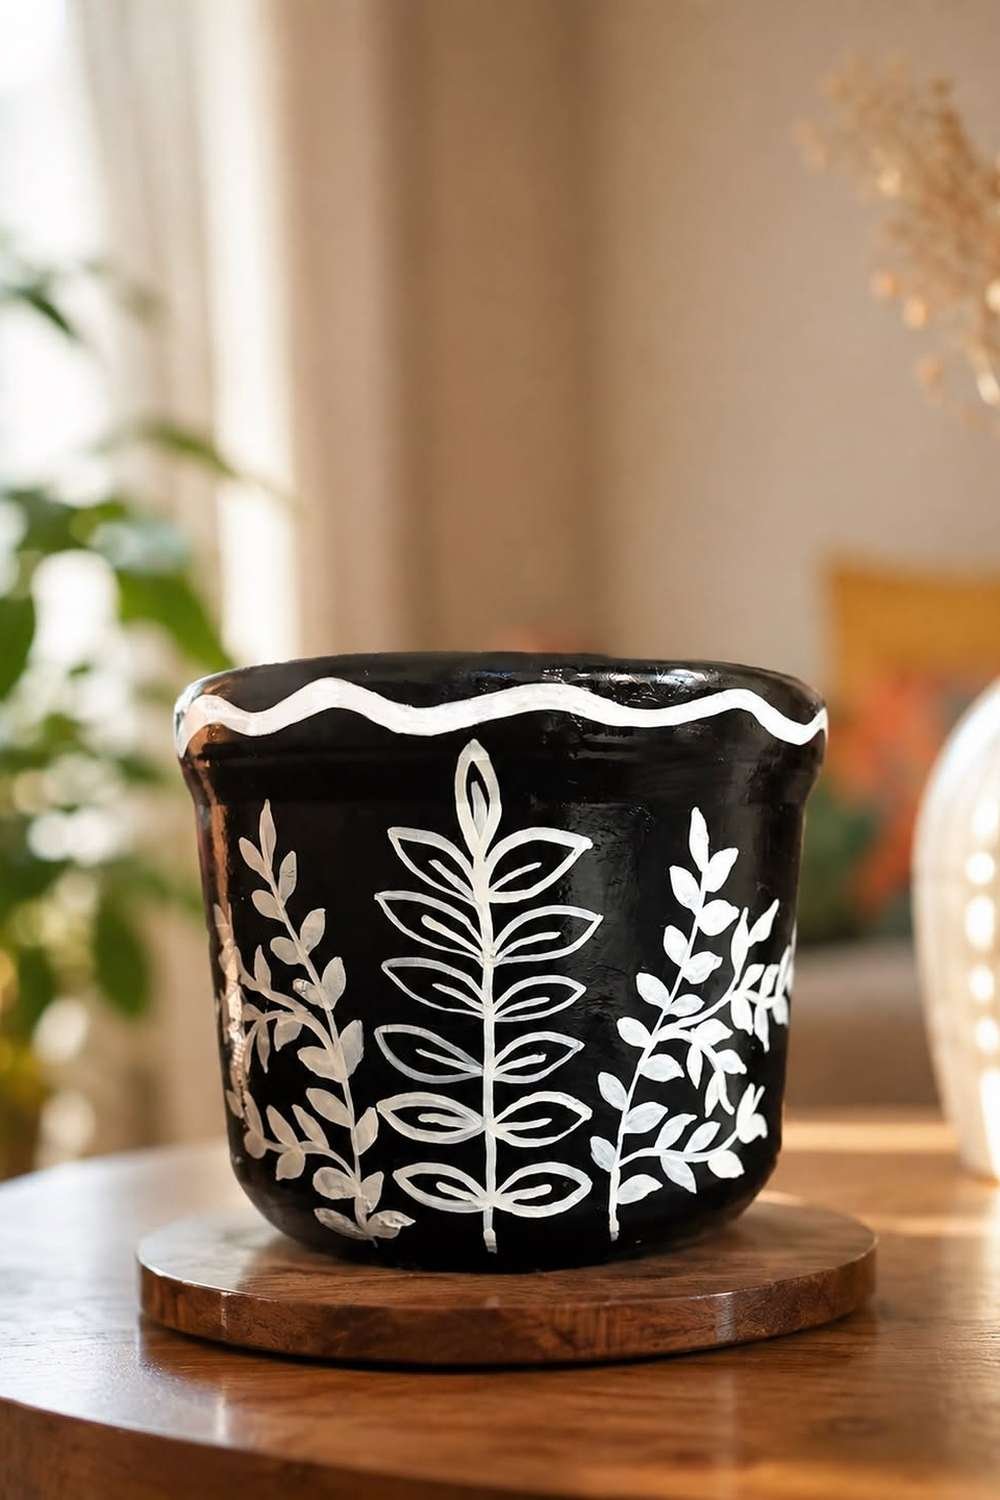
Photo: painted Roots (@paintedroots01) on Instagram — View post
13. Boho Mandala Dots
Mandala dots are made one dot at a time with the end of a paintbrush, a dotting tool, or even a toothpick, so there is no drawing skill involved at all. Start with one center dot, then build rings of dots in different sizes and colors, working outward like a flower. Earthy colors such as terracotta, mustard, cream, and sage give a warm boho feel. Let each ring dry before adding the next. A mandala pot fits your boho patio decor ideas, holding a trailing plant or sun-loving succulent outdoors.

Photo: Happypots (@happypots2018) on Instagram — View post
14. Citrus Slice Pots
Nothing says summer like a pot painted as a slice of orange or lemon, and it is far easier than it sounds. Paint the pot a bright citrus color, add a wide white ring near the top, then paint small white segments radiating from the center, like a fruit slice. A yellow pot reads as lemon, orange reads as orange, and a soft pink makes a pretty grapefruit. Keep the segments simple and slightly uneven for a hand-painted feel. These sunny pots suit a kitchen windowsill with a citrus-scented herb, or a cheerful gift in warmer months.

Photo: Flora and Folklore (@flora.and.folklore) on Instagram — View post
15. Herb Garden Marker Pots
When every herb pot looks the same, a painted label saves you sniffing leaves to tell basil from mint. Paint each pot in a soft, different color, then write the herb name in neat white or dark lettering on the front, either freehand or with a stencil. Add a small painted sprig of the herb above the name for extra charm. A row along a kitchen windowsill looks tidy and intentional, and makes cooking feel a little more joyful. They fit neatly into your rustic kitchen decor ideas for a warm, lived-in kitchen that still feels organized.

Photo: Cornell Farm Nursery & Cafe (@cornellfarm) on Instagram — View post
16. Speckled Stone-Look Pots
A speckled finish makes a plain pot look like natural stone, and the technique is wonderfully messy in the best way. Paint the pot soft gray or warm beige, then flick darker paint off an old toothbrush to speckle the surface. Hold the brush close for fine speckles, further away for bigger ones, and cover your work surface well, because the paint goes everywhere. A second color of speckles adds depth. Seal it with a matte sealer to keep the stone effect. These pots suit leafy green plants and look at home in a calm, natural corner.
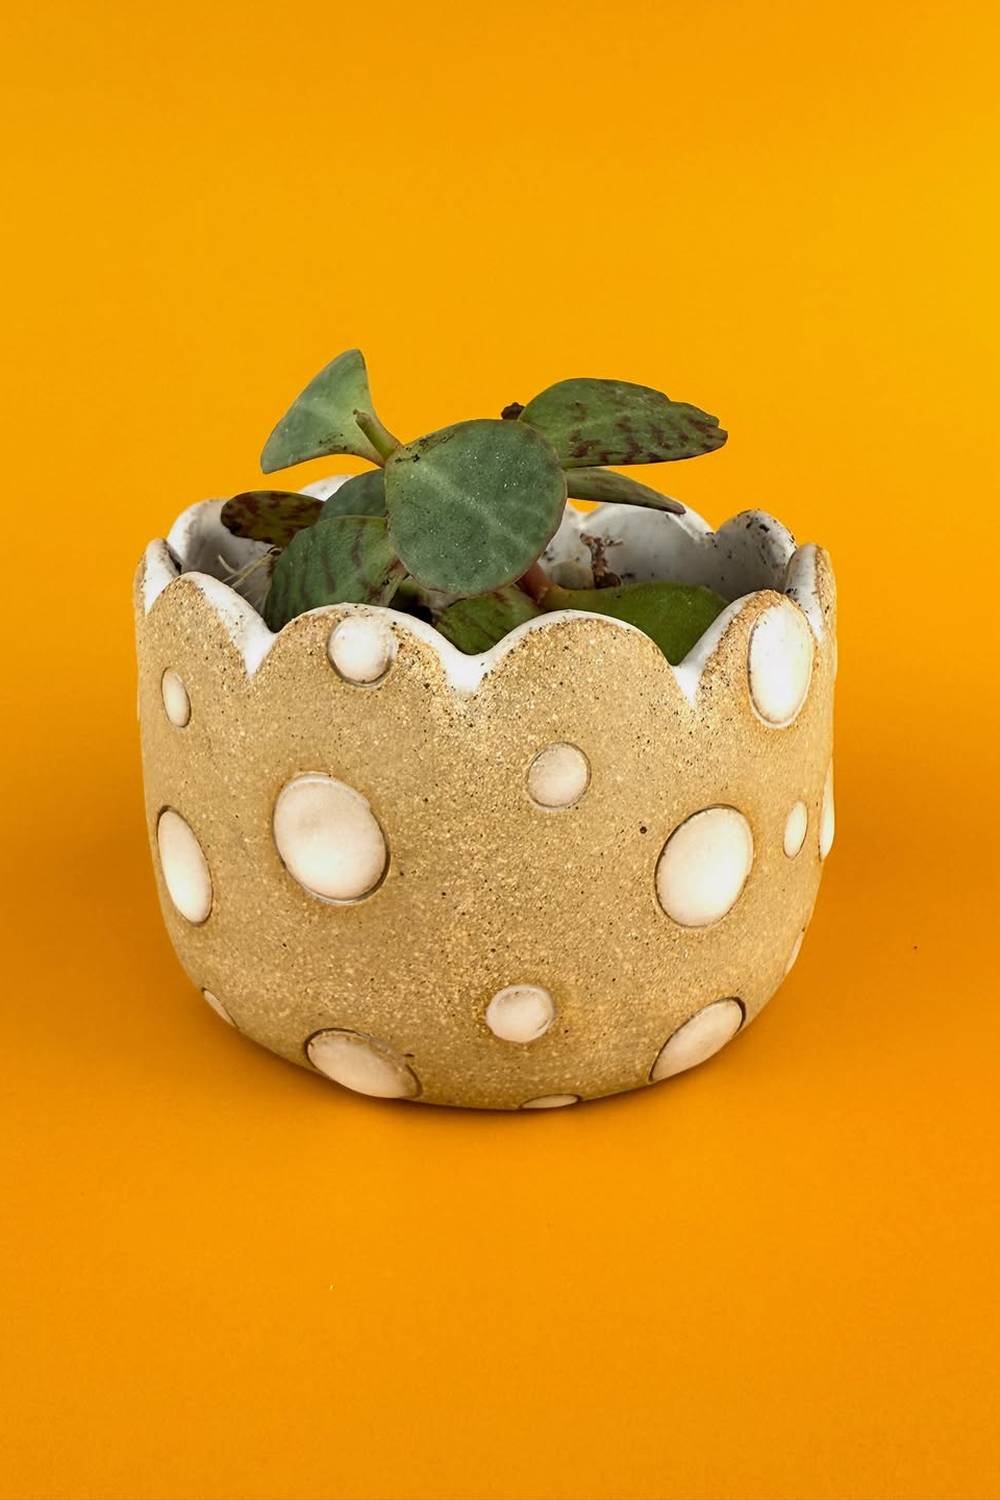
Photo: Caroline Duran Gordon (@carolineduranceramics) on Instagram — View post
17. Rainbow Dipped Pots
Dip-dyeing gives a pot a playful rainbow edge with almost no brushwork. Paint the top half white, then dip the bottom into shallow trays of paint, one color at a time, letting each stripe dry. Or paint rainbow stripes freehand around the base with a flat brush. Keep stripes roughly even; the handmade wobble is part of the charm. A rainbow-dipped pot is a happy home for a bright flowering plant, bringing instant color to a plain shelf, desk, or kids’ room windowsill. They suit a birthday table or a bright kitchen corner.

Photo: Heart Rooted Offerings (@heartrootedofferings) on Instagram — View post
18. Vintage French Script Pots
Old-fashioned French-style lettering gives a pot a romantic, flea-market feel that suits a soft, vintage home. Paint the pot cream or pale gray, then add looping script words like “jardin,” “fleurs,” or “lavande” in a dark gray or soft black, using a fine brush or a transfer stencil if your handwriting is shaky. A light sanding over the dried paint with fine sandpaper ages the lettering just enough to look worn and loved. Pair it with lavender, rosemary, or a small rose, and the whole pot feels like something found at a French market stall.

Photo: Dana Marie (@danamariearts) on Instagram — View post
19. Sage Green Matte Pots
Sage green is one of those colors that makes everything around it look calm, and a matte finish keeps it feeling soft and modern rather than shiny. Use matte or chalk-finish acrylic paint in sage, two thin coats, leaving the rim plain terracotta for warm contrast. No pattern, no fuss, just a beautiful solid color. Grouped with cream and white pots, they blend beautifully into a room that already leans green and natural. For more of the same calm palette, browse our sage green living room ideas and match your pots to your cushions.

Photo: CLAY. BLOOM (@claybloom.pots) on Instagram — View post
20. Polka Dot Party Pots
Big polka dots are pure fun, and the easiest pattern of all, because a round sponge does the work. Paint the pot a solid base color, let it dry, then stamp large dots in a contrasting color all around, spacing them evenly by eye. White dots on terracotta feel warm and classic, while black dots on blush pink feel modern and playful. Keep the dots the same size for a tidy look, or mix two sizes for a livelier feel. These pots are made for cheerful plants like bright geraniums or a happy succulent on a sunny sill.

Photo: Isles_of_discovery (@isles_of_discovery) on Instagram — View post
21. Coastal Blue Wash Pots
A pale blue wash over terracotta gives a pot a breezy, seaside feel, as if it has spent a summer by the water. Thin blue acrylic paint with water, brush it over a clean pot, and wipe some away so the warm clay glows through in places. Layer a paler blue near the rim for soft, watery depth. A clear matte sealer keeps the washed-out look intact. These pots are perfect for a small apartment balcony with trailing plants and a couple of woven baskets nearby, or anywhere you want a light, airy touch.
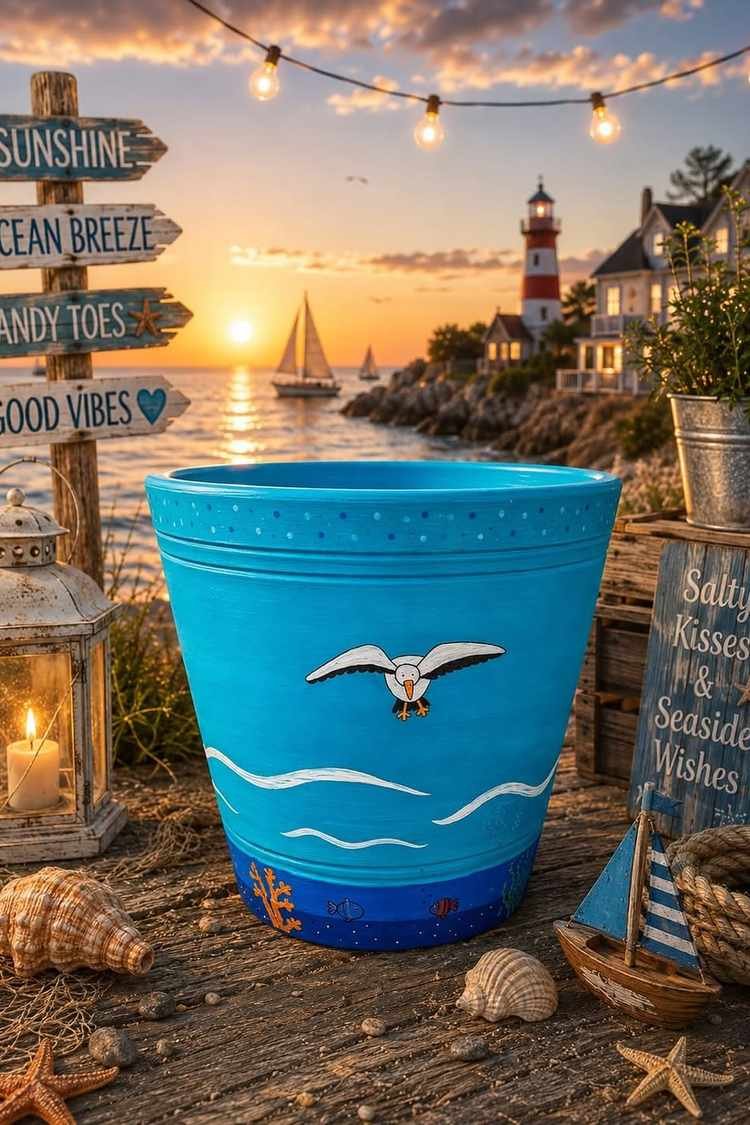
Photo: The Little Lovepot Co. (@thelittlelovepotco) on Instagram — View post
22. Twine Wrap with Painted Band
Twine and paint give a pot a lovely handmade texture that suits a rustic or farmhouse-style home. Paint a wide band around the pot in a soft color, let it dry, then wrap jute twine above and below the band, fixing the ends with hot glue. Keep the wraps tight and even, and tuck the starting end under the first few loops. The contrast between smooth paint and rough twine makes it work. Fill it with a trailing plant like pothos or string of pearls and let the leaves spill over the twine.

Photo: Maegan Leigh Simms (@_themeggymeg_) on Instagram — View post
23. Monogram Initial Pots
A single painted initial turns an ordinary pot into something personal and a thoughtful handmade gift. Paint the pot a color you love, then add a large letter with a stencil, a sticker as a mask, or a steady freehand brush. White letters on a dark pot feel classic, while gold on sage or navy feels a little more special. A small painted leaf or dot beside the letter finishes it off. Monogram pots suit a housewarming gift, a desk plant with your own initial, or family initials lined up on a shelf.

Photo: Geet Sohal (@hands_on_canvas_geet) on Instagram — View post
24. Sunset Gradient Pots
A sunset gradient blends warm pink, orange, and gold across a pot, looking far more dramatic than the technique suggests. Paint horizontal bands of color from deep coral at the bottom through peach to soft yellow at the top, then blend the joins with a damp sponge while the paint is still wet. Work quickly and keep colors warm and close so they melt into each other. A glossy sealer makes the colors glow like evening light. These warm pots are beautiful with sunset-toned flowers like marigolds or a trailing plant with golden leaves.

Photo: Teresa Crannell (@tcrann888) on Instagram — View post
25. Rustic Farmhouse Plaid Pots
Plaid sounds tricky, but it is just stripes painted in two directions, and the result is wonderfully cozy. Paint the pot cream, then add wide vertical stripes in a muted red or sage green. Once dry, paint horizontal stripes in the same color, then add one thin stripe in a darker shade crossing both. The overlapping lines create the classic checked look. Keep the colors soft and muted for a farmhouse feel rather than bright and bold. A plaid pot holding a small pine, a fern, or dried lavender fits a rustic shelf or cozy kitchen perfectly.

Photo: Breezie Castell (@breeziecastell) on Instagram — View post

Conclusion
Pot painting asks for very little and gives back a lot. A plain terracotta pot, a few colors you love, and one quiet afternoon are all it takes to make something truly yours. Start with the simplest idea, like a whitewash or sponge dots, and let your confidence grow with each pot. Before long you will have a shelf, a windowsill, or a balcony full of planters that look handpicked, each carrying a little of your own style.
💬 Join Our Decor Community
Decor Fern | Home Decor Ideas & Inspiration — share your rooms, get ideas, and chat with fellow decor lovers.
Join the Facebook GroupFollow on Facebook
3 Comments